4. Reproducible Computing#
4.1. Compute with Code#
Note
This practice is recommended for projects that involve computations. If your project doesn’t, or if all computations are handled by specialized software, then you might not need a programming language.
Nevertheless, we’ve included writing code as a primary practice to emphasize that it’s uniquely important for reproducibility if your project does involve computations.
Code is an explicit, unambiguous record of every step in a computation. This is a major benefit for reproducible research. You can share your code with someone else, and if they run it with all of the same inputs, they’ll get the same outputs. The same is difficult or impossible to achieve using software that has a graphical user interface.
Another benefit of programming is that code is reusable and often scalable. If you write code to solve a general problem, you can then apply it to any number of specific instances of that problem. The only constraints are time and the computing resources available to you. Most popular programming languages have supportive, active communities that create and distribute thousands of user-contributed packages, so often it’s not even necessary to solve a problem yourself—you can reuse someone else’s code.
Choosing a programming language doesn’t just mean choosing a particular syntax, it also means choosing a community and ecosystem. Different languages have different strengths, weaknesses, community cultures, and packages. We recommend choosing an open-source, high-level language designed for research computing and data analysis, such as:
R: a “software environment for statistical computing and graphics,” R is especially well-suited to cleaning and analyzing tabular data, training statistical models, and creating data visualizations. R has support for missing values built-in, a friendly and active community, and tens of thousands of user-contributed packages, mostly related to statistics and data science.
Python: a general-purpose programming language that “lets you work quickly and integrate systems more effectively.” The Python community supports research computing through its user-contributed NumPy, SciPy, and Pandas packages, as well as others. Python’s syntax encourages well-organized code, and its community is enormous and spans many different disciplines. It’s also one of the primary languages for deep learning. Python’s facilities for data analysis are not as mature as R’s, with equivalent features and stability but some rough edges.
Julia: a relatively new programming language “appropriate for scientific and numerical computing, with performance comparable to [languages like C].” Julia is designed from the ground up for research computing and uses modern optimizations to run substantially faster than R or Python for many tasks. Julia’s community is small but growing. Julia’s facilities for data analysis are not as mature as R’s or Python’s, with many still in early development. Expect to occasionally have to develop things yourself when you wouldn’t in more mature languages.
When choosing a language, always make sure to consider the specific needs of your project. Projects with specific requirements for performance or other features (for example, developing web applications) may benefit from using other languages or a mix of languages.
See also
If you want to learn R, see DataLab’s R Basics workshop reader and consider joining the Davis R Users Group.
If you want to learn Python, see DataLab’s Python Basics workshop reader and consider joining the Davis Python Users Group.
If you want to learn Julia, see the official Julia documentation and consider joining the UC Julia Users Group.
4.2. Organize the Code#
Whenever you’re about to write code, take time to think about what its purpose is and how it will be used in the future. Clarity on these points can make it easier to decide where to put the code, break down the programming problem, and choose appropriate programming abstractions.
Is your code for a one-shot exploration, a prototype, or something highly visual? Then it’s probably a good idea to write and save your code in a notebook format, such as RMarkdown, Jupyter, or Quarto. Notebooks display writing and results inline with code, so that you can try snippets of code out, get immediate feedback, and take notes. Notebooks can also display images, so you can inspect plots and other figures without opening another window or file.
On the other hand, if your code is likely to be reused many times over the
course of the project—and possibly in other projects or by other
people—then it’s usually preferable to write and save your code in a script
format. Script formats are usually plain-text files with an extension like
.R, .py, or .jl to indicate the kind of code.
A mix of notebooks and scripts can be an effective way to solve programming problems and develop code. Don’t feel locked in to one or the other, and remember that generally notebooks can load functions and other code from scripts.
4.2.1. Names in Code#
Most programming languages have a style guide with standards for how to format code, either officially or by community consensus. Following a style guide helps make your code intelligible to other programmers. Style guides usually include naming conventions, which tend to focus on how to capitalize and delimit words in multi-word names. Three common formats for names are:
camelCasedelimits words by capitalizing the first letter of each wordsnake_casedelimits words with underscoreskebab-casedelimits words with dashes
Some style guides use several different formats to distinguish between different kinds of objects.
Among the languages widely used for data science:
R doesn’t have an official style guide, but the Tidyverse style guide is popular. It recommends
snake_casefor all names. In the past,camelCaseand R’s uniquedot.casewere also popular.Python has an official style guide called PEP 8. It recommends
UpperCamelCasefor class names,UPPER_SNAKE_CASEfor constants, andsnake_casefor all other names.Julia has an official style guide. It recommends
UpperCamelCasefor module and type names, andsnake_casefor all other names.
See also
Wikipedia’s naming conventions page describes the styles and naming conventions for a wide variety of programming languages.
Besides how to format names in code, another detail to consider is how long names should be. Longer names allow for richer descriptions, but can also make code harder to read. Here’s one code organization expert’s recommendation:
The length of variable names should be proportional to their scope. Big scopes imply long names.
The length of function and class names should be inversely proportional to their scope. Small scopes imply long names.
– Robert “Uncle Bob” Martin, software engineer and author
In other words, the longer a variable is in use, the longer its name should be.
The rationale is that if a variable is in use for a long time, expressions that
use the variable may be far away from its definition, making it harder to infer
the meaning from context. So don’t hesitate to name a variable x if it will
only be used in a couple of expressions and there’s not an obviously better
name, but avoid naming a variable x if it’s going to be used repeatedly
throughout all of your code; choose a longer, more descriptive name.
Tip
Some other naming conventions include:
Use
i,j, andkfor indexes in loops.Use verbs (action words) in function names, because functions do things. For example:
read_data,add_offset,run_simulation.Use
get_andset_as prefixes for functions that get and set components of a data structure.Use
is_orhas_as prefixes for functions that return a Boolean value.
See also
See How Patterns in Variable Names Can Make Code Easier to Read for Felienne Hermans’ perspective as a computer science education researcher.
4.2.2. Write Functions#
To solve problems efficiently and better organize your code, try to break programming tasks into small, manageable steps. Use writing (for instance, in comments) to clarify and plan the steps. For each step, write the code to solve a few small, simple cases. Once the code for a step seems to work correctly, turn it into a function. Start by identifying the inputs and outputs. These become the parameters and return value, respectively. Test the function still works on the small, simple cases. Then scale up to larger, more complex cases. Edit the function and add parameters as necessary to make it work correctly for the new test cases, making sure that it also continues to work correctly for the old ones. When you have functions for all of the small steps, combine them (usually in sequence) to handle the larger task.
Important
How small is a “small step”? Small steps and functions should generally be longer than a single expression—because in that case you might as well just write the expression—and generally be shorter than one screen in your editor—so that you can reason about what they do easily. Be flexible and judicious with these guidelines; there are exceptions.
When you write small steps, you can try to break them down into smaller sub-steps as well. The sub-steps are usually individual expressions.
Tip
It may be helpful to think of writing code or functions like writing an essay. Start with an outline (describe the steps in comments). Sometimes the outline will have multiple levels (sub-steps). Once you’ve written the outline, start filling in the details (the code). As you write, you may occasionally need to stop and adjust the outline as you uncover gaps in your reasoning.
4.2.3. Make It Modular#
Create separate scripts for separate parts of your project. For example, you might have a script to clean the data, a script to train a model, a script to generate predictions from the trained model, and a script to generate figures summarizing the results. Dividing up responsibilities across multiple scripts is helpful for isolating bugs and staying focused while you’re working. Using multiple scripts will also make it easier for you and your collaborators to find things, provided the scripts have descriptive, unambiguous names.
Structure your scripts so that they’re modules: collections of functions that can be imported and used by other code. Avoid writing code outside of functions, with one exception: to define a constants (named values that do not change, such as pi). Doing this ensures that importing a script won’t cause hard-to-predict side effects.
If you want to be able to run a script from the command line, include a
function that serves as the entry point—the code that runs first. For many
programming languages, it’s required or recommended to call this function
main. Regardless of what name you choose, use it consistently for the entry
point functions across all of your scripts.
4.3. Document the Workflows#
Suppose you’re working on a study of passenger rail systems in the United States. You use 3 scripts to produce plots that summarize how often trains are late and how late they are for various cities. The scripts must be run in a specific order and with specific arguments. A new student is about to join the project, and you need to make sure they’re able to run the scripts and make the plots.
A workflow is a way of using your project. Often this will be a series of commands you can run to produce a specific output. Remembering the order in which to run commands and the settings for each one might seem easy while your project only has a few workflows and you use them frequently. If your project grows or you spend time away from it, you may find it much harder to remember what to do. Moreover, your collaborators may have a hard time remembering how to run a workflow you set up, and vice-versa. Thus it’s important to document your project’s workflows.
There’s one workflow that’s essential to almost every project: downloading the files and installing the necessary software. It’s a good idea to provide step-by-step installation instructions in your project’s top-level README, even if you’re the only one working on the project. Installation instructions are invaluable if you ever have to switch to a different computer or reactivate a project you haven’t worked on for a few months.
Note
As an example, see the installation instructions for fd, a popular command-line tool for finding files.
Besides installation, you should also document workflows for using your project. Explain the different ways to use your project, the settings available, and common patterns of use. If your project contains mostly data rather than code, explain how the data were collected, how they can be used, built-in assumptions, and limitations.
Note
As an example, see the user guide for ripgrep, a popular command-line tool for searching within files.
Documenting workflows is important for reproducibility because it enables you and other people to repeat commands you used to get a particular output. Workflow automation practices (see Use a Task Runner) take this a step further by bundling all of the commands in a workflow into a single command.
4.3.1. Make Workflow Diagrams#
Workflows with multiple interdependent tasks can be confusing, especially for people new to a project. Diagrams that lay out the sequence of and relationships between inputs, tasks, and outputs (as a graph, network, or flow chart) make understanding and using these workflows easier and faster. For instance, if you can’t remember what the inputs are for a particular task, you can simply glance at the diagram.
It’s usually a good idea to make more than one workflow diagram. Use separate diagrams for independent workflows, and make multiple diagrams at different levels of abstraction. Diagrams at different levels are especially helpful for explaining workflows where some of the steps are relatively complex in their own right.
There many different ways to make workflow diagrams, including:
Sketching the diagram freehand. This is a fast, easy way to make a diagram that doesn’t require learning new tools. Depending on your sketching skills, the resulting diagrams might look rough or be difficult to read. You might sketch:
On paper or a whiteboard (and take photos), which is wonderfully easy, but can make editing later difficult.
On a tablet (or with a mouse), which requires drawing software, but makes it possible to collaborate from different locations and makes editing later easier.
Designing the diagram in vector graphics software (such as Lucidchart and Inkscape). This works well for editing and collaborating and can produce presentation-quality diagrams. The drawbacks are that it requires everyone to have a license for and learn the software, and is generally more time-consuming than sketching.
Presentation software (such as Google Slides and LibreOffice Impress) are widely known and usually provide some support for designing diagrams.
Describing the diagram in a graph language (such as Mermaid and Graphviz). This works well for editing and collaborating and can produce presentation-quality diagrams. It’s more time-consuming than sketching but can be less time-consuming than vector graphics software. GitHub and other Git hosts often have built-in support for Mermaid. The drawbacks are that you have to (learn and) use yet another language, and you have less control over how the diagram is drawn and laid out.
DataLab uses a mix of sketching, Lucidchart, Inkscape, and Mermaid, depending on the complexity of the diagram, who will see it, and other needs of the project. In general, you should choose whatever diagramming method works best for you (and your team)—making the diagrams is more important than how you make them.
See also
See DataLab’s [README, Write Me! workshop reader][datalab-readme] for suggestions about how to create workflow diagrams.
4.3.2. Document the Code#
Provide documentation for your project’s code. Think about how people (including you) will typically use the code. Will they:
Run entire scripts?
Call individual functions?
Import your code as a package?
Do something else?
Do some combination of these?
The point of the documentation is to help other people reproduce the typical workflows. Even if you Use a Task Runner, documentation is important to help people understand what each workflow does and how it works.
Use READMEs to summarize the code’s purpose, intended use cases, and organization across files. See Write & Maintain READMEs for more about how to write READMEs.
Most programming languages support comments as a way to intersperse documentation with code. Use comments to explain, in natural language, what your code is meant to do. This is especially important for parts of the code that are terse, complicated, or potentially counter-intuitive. An excellent programming strategy is to first write comments outlining the steps you want to complete, and then fill in the code between the comments; this strategy is a form of literate programming.
Place comments at the beginning of each code file to explain the file’s purpose, inputs, assumptions, outputs, and any pitfalls. If the code is organized into functions, do the same for each function. Some programming languages have syntax or packages specifically for writing this kind of documentation. These tools typically enforce some kind of organization and remind you about important details to include. They can also make it easier for others to find your documentation by making it available through the language’s built-in help system. Python’s docstrings and R’s roxygen2 package are examples of such tools. This kind of documentation is essential if you plan to package your code and/or release it to a wider audience.
4.4. Document the Environment#
A few years ago, you developed an R script to read an obscure file format, MOO, for one of your research projects. The script was a huge help at the time, but you moved on and haven’t used it in a while. You just started an exciting new project, and your collaborator sent you some data in a MOO file. You find your script and try running it, but alas, it crashes with an error message. In the years since you wrote the script, you updated your R packages and even uninstalled a few. You’re confident the script would work if only you could go back to the packages and versions you had when you wrote it.
What your computer can do depends on its hardware and software. For instance, a computer with Windows 11 installed will not necessarily be able to run software developed for the much older Windows 95. Nor will it be able to run most software developed (exclusively) for macOS. The computer’s central processing unit (CPU), memory, and other hardware components also limit the kinds of software it can run. Together, your computer’s hardware and software make up a computing environment with specific capabilities and limitations.
When you use computers in the course of your research, it’s important to document the computing environment(s), so that people who want to reproduce your work will know what hardware and software they need. Without this documentation, an attempt to reproduce your work might yield errors or even incorrect results, and thus raise questions about whether your process and findings are valid. Good documentation on computing environments also makes it easier to:
Bring new collaborators into a project
Switch between or replace computers
Revisit old projects, whether to reexamine results or to repurpose methods
Reach a wide audience (especially if you want others to use your software)
Modern operating systems are designed to ensure that software runs correctly across a wide variety of hardware, so they provide abstraction layers that hide hardware differences. As a result, for making research reproducible, software is usually the primary concern (with the exception of projects that rely on rare or specialized hardware). So at a minimum, for each computer you use in your research, you should document the name and version of:
The computer operating system
All other software you use to arrive at your results, including application software (such as Microsoft Excel), programming languages, and packages for programming languages
If you decide to document the hardware, also include the manufacturer and model of:
Core components:
Central processing unit
Graphical processing unit (if not integrated in the CPU)
Memory
All other hardware critical or relevant to your results
There are many strategies and tools you can use to make documenting and reproducing computing environments more convenient and reliable. In the following sections, we describe three: environment managers, containerization, and cloud computing.
4.4.1. Environment Managers#
An environment manager is a software tool to create, keep track of and switch between collections of software. These collections of software are called virtual environments. When you create a virtual environment, it’s empty, with minimal or no software installed. As you install software into it, the environment manager records the names and versions of the software (and sometimes other details). Most environment managers can also save this metadata to a file that fully describes the virtual environment. You can then use the file and the environment manager to reproduce the virtual environment on other computers. In short, using an environment manager directly addresses the need to document the software in your computing environment by doing the most tedious parts for you.
Besides making your computing environment easier to reproduce, using an environment manager also provides several other benefits:
Most environment managers can download, install, update, and uninstall software, so that you don’t have to track down links and work through multi-step installation instructions.
New collaborators can quickly set up a virtual environment with the exact same software as you. Similarly, you can quickly get set up on other computers.
You can work on multiple projects with incompatible software requirements simultaneously by using a separate virtual environment for each project. Virtual environments are generally independent and self-contained. For example, you might create one virtual environment with R version 4.5 and another with R version 3.2, even though these are incompatible.
When you revisit an old project, you can easily “time travel” back to the virtual environment and software you had when you were working on it.
Many different open-source environment managers exist. For most research computing projects, we recommend and use Pixi. Pixi can:
Install general-purpose software packages (such as Git, R, and Python)
Install Python packages from PyPI or Conda-Forge
Install R packages
Determine dependencies for a given collection of packages you want to use
Automatically download and install packages
Create and manage virtual environments on a per-project basis
Keep track of which packages you installed (and their versions)
Reproduce an environment from a description
Note
Pixi downloads packages from conda-forge, a community-maintained repository of open-source software. The conda-forge repository was originally created to support Conda, the first environment manager designed specifically for research computing projects. Thanks to the hard work of its maintainers, conda-forge contains more than 25,000 packages.
We recommend Pixi rather than Conda because Pixi is faster, provides better cross-platform support, and provides exact reproductions of virtual environments (until recently, Conda did not support exact version matching). Pixi also provides several other features that make it pleasant to use.
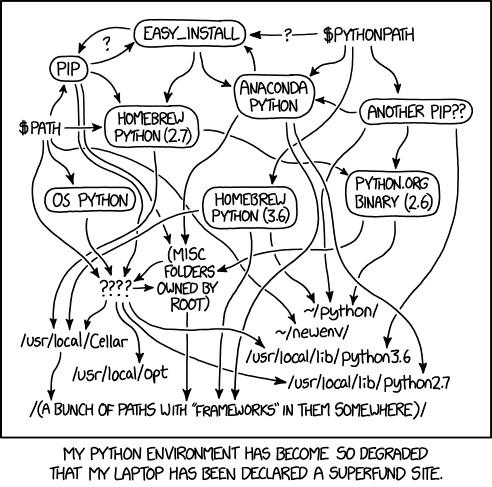
Fig. 4.2 “Python Environment” from “xkcd” by Randall Munroe (license).#
We recommend that you create a new virtual environment for each project and switch between them as needed. Make sure to save the description of the virtual environment with each project (Pixi does this automatically). If you’re also using a version control system, we recommend using it to track changes to the environment description file.
See also
See DataLab’s [Setting Up Software][datalab-pixi] workshop reader for a detailed introduction to Pixi.
If you exclusively use R and prefer to use an environment manager developed specifically for R, check out the renv package.
If you prefer to use the original conda, instead see DataLab’s Making Python Projects & Environments Reproducible workshop reader.
4.4.2. Containerization#
While environment managers provide a way to reproduce most of the software (or at least the open-source software) in your computing environment, they usually don’t account for your computer’s operating system. They also don’t account for differences in hardware. One strategy that addresses both of these points is hardware virtualization: make your computer simulate another computer, complete with its own hardware and operating system, and then do all of your computing in this virtual computer. A drawback of this approach is that simulating a computer requires CPU time and memory, so there’s less available for the things you actually want to compute. Nevertheless, virtualization provides strong guarantees for reproducibility, since everyone who interacts with your project can use the exact same computing environment you used.
Operating system virtualization, or containerization, takes the same approach as hardware virtualization, but only simulates the operating system, not the computer hardware. This takes less computing resources away from the things you want to compute, while still providing most of the reproducibility guarantees. Containerization began to become popular in the 2010s with the releases of Docker and Kubernetes. It is now widely-used in industry and considered a software engineering best practice for ensuring business-critical software works correctly.
For most projects, we recommend using an environment manager rather than containerization. Containerization is most useful if your research project needs to be reproduced by many people and uses software that isn’t well-supported by environment managers, or if containerization is already widely-used and accepted in your discipline.
4.4.3. Cloud Computing#
Cloud computing services such as Google Cloud, Amazon Web Services (AWS), and Microsoft Azure provide hardware and software on demand. UC Davis provides its own cloud computing service in the form of Open OnDemand and (at UC Davis Health) the Advanced Compute Environment (ACE). Cloud computing’s primary benefit is flexibility in choosing and changing hardware. Most commercial cloud computing services rely on containerization to manage software, while Open OnDemand and ACE mostly leave software management to you.
From a reproducibility perspective, cloud computing can be beneficial in the short term, because (especially with commercial services) other researchers can easily set up and use the exact same hardware and software you used originally to reproduce your results. However, in the long term, the hardware you used may stop being available, because cloud computing services periodically update or change the hardware they offer.
If you decide to use cloud computing, we recommend documenting the details of the hardware by hand, and using an environment manager or containerization to manage the software for your project.
4.5. Use Configuration Files#
A configuration file is a file that stores accessory parameters for a computation. Configuration files are distinct from data sets in that the data they contain is usually under your control and not of primary interest. For example, a configuration file for code that trains a statistical model might specify where to find training data, where to find test data, which features to include in the model, and where to save predictions. All of these could be embedded in the code, but using a configuration file makes the code more flexible.
Configuration files also have another benefit: they serve as a record of your parameter settings. When parameter settings are embedded in code, then you have to edit the code each time you want to run it with different settings. Unless you’re meticulous about version control, it may be difficult to determine which settings you used for past computations. Configuration files eliminate this problem: when you want to use a new settings, create a new configuration file (possibly by copying one you already have). Then you can easily find the settings for any computation in its respective configuration file.
Tip
If you also Document Every Experiment, include the name of the configuration file(s) for each experiment in your documentation.
Plain-text formats are a good choice for configuration files because they can be edited by anyone with a text editor. At DataLab, we particularly like to use TOML and YAML formats for configuration files because they’re widely-used, human-readable, and there are well-supported functions for reading them in R, Python, and Julia.
4.6. Automate the Workflows#
Even if you Organize the Code carefully, it’s likely you’ll end up with workflows that consist of running several commands in a specific order and with specific settings. It’s also likely you’ll need to re-run these workflows many times as you incrementally improve, extend, and adapt the code. To make this more convenient and ensure that you don’t accidentally skip commands or use the incorrect settings, it’s a good idea to automate your most frequently used workflows.
Note
A Unix shell is a standardized way of interacting with a computer via text commands—that is, via a command line. Unix shells are widely-used for research computing.
See the DataLab’s Introduction to the Command Line workshop reader to get started with the command line and Unix shells.
If you run your workflows in a Unix shell, one way you can automate them is by writing shell scripts. A shell script is a plain-text file with a sequence of Unix shell commands (akin to scripts for other languages, such as R or Python). You can create separate shell script for each workflow that you run frequently. The technical effort is low, since this just amounts to writing down the commands that you already run in a text file. Besides making it easier to run specific workflows, you can also share shell scripts with your collaborators or other researchers. This helps to ensure that they also run the workflow correctly.
See also
See DataLab’s and DIB Lab’s Automating Your Analyses and Executing Long-running Analyses on Remote Computers workshop reader for the technical details of writing shell scripts.
4.6.1. Use a Task Runner#
You’re working on a project where you receive a new dataset every few weeks. Before you analyzing a dataset, you must process it with the
moo_calibratecommand line software. You don’t usemoo_calibrateoutside of this project, so every time you have to run it, you struggle to remember the parameters. Last time you ranmoo_calibrate, you wrote down the parameters, but it would be nice if you could automate the workflow so that you don’t have to type as much and you can’t accidentally run the command twice.
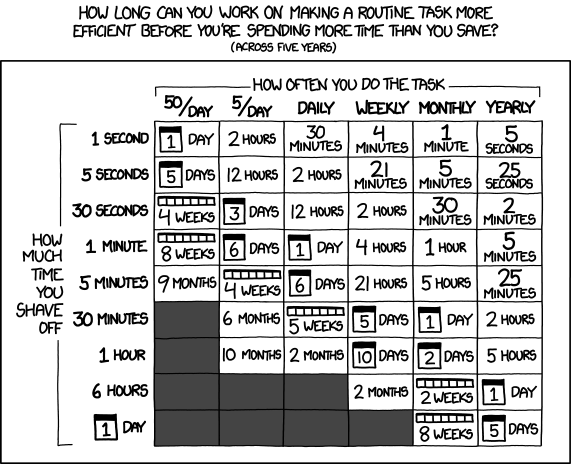
Fig. 4.3 “Is It Worth the Time?” from “xkcd” by Randall Munroe (license).#
A task runner is a piece of software to organize and run tasks that use other (command line) software. With a task runner, you can create named tasks and specify the commands to run to complete each task. Later, you can run a task by simply referring to it by name. Using a task runner makes your results easier to reproduce, because by doing so, you encode the exact commands (in order) to carry out tasks related to your project. Others can run a task with no risk of accidentally skipping a command, passing the wrong arguments to a command, or running a command out of order.
Some task runners, called build systems, can also keep track of dependence
between tasks. To illustrate the idea, suppose you have a task download that
downloads data and another task analyze that runs your analysis on the data.
You can’t analyze data you don’t have, so the analyze task depends on the
download task. If you use a build system to run the analyze task, it will
first make sure that the download task is complete (by running it, if
necessary). Using a build system makes results from projects with
interdependent tasks easier to reproduce.
Task runners usually have other features that are also helpful, such as:
The ability to run tasks only when necessary (saving time)
The ability to run tasks in parallel
Language-specific features (many, but not all, build systems are designed to work best with a specific programming language)
DataLab recommends Pixi as a task runner for most projects, since it’s relatively easy-to-use and also has other features related to reproducibility (see Use a Task Runner). For projects with many interdependent tasks, DataLab recommends Snakemake as a build system. Many other task runners and build systems also exist.
See also
See DataLab’s Installing Software with Pixi workshop reader for an introduction to Pixi.
See DataLab’s and DIB Lab’s Automating Your Analyses with the Snakemake Workflow System workshop reader for an introduction to Snakemake.
4.7. Log Output#
See also
If you’re using R, see DataLab’s Intermediate R: Outputs, Errors, and Bugs workshop reader for a brief overview of a how to manage log files in R.
If you’re using Python, see DataLab’s Intermediate Python: Squashing Bugs with Python’s Debugging Tools workshop reader for a brief overview of how to manage log files in Python.