2. Pushing Commits#
This chapter explains how to create a repository on GitHub and sync it with a local repository on your computer.
2.1. Making a Test Repository#
First, use the command line to make and change to a new directory in your home
folder (~):
mkdir ~/my_first_remote_directory
cd ~/my_first_remote_directory
Then initialize a Git repository in the directory:
git init
Initialized empty Git repository in <path>/<to>/my_first_remote_directory/.git/
Now let’s create a new file, called README.md:
echo 'Hello world!' > README.md
Time to add and commit our file with Git. Don’t forget to write a short note in the commit message.
git add README.md
git commit -m 'Added a README file'
main (root-commit) cad7867] Added a README file
 1 file changed, 1 insertion(+)
 create mode 100644 README.md
2.2. Preparing to Sync Your Repository#
So far so good! All we’ve done is repeat the usual workflow for putting files under version control. But now we need to step away from the command line for a moment and prepare a space for receiving this repository on GitHub.
To do so, go to GitHub and click the “+” button in the top right corner. Select the “New repository” option. You’ll be taken to a page like this:
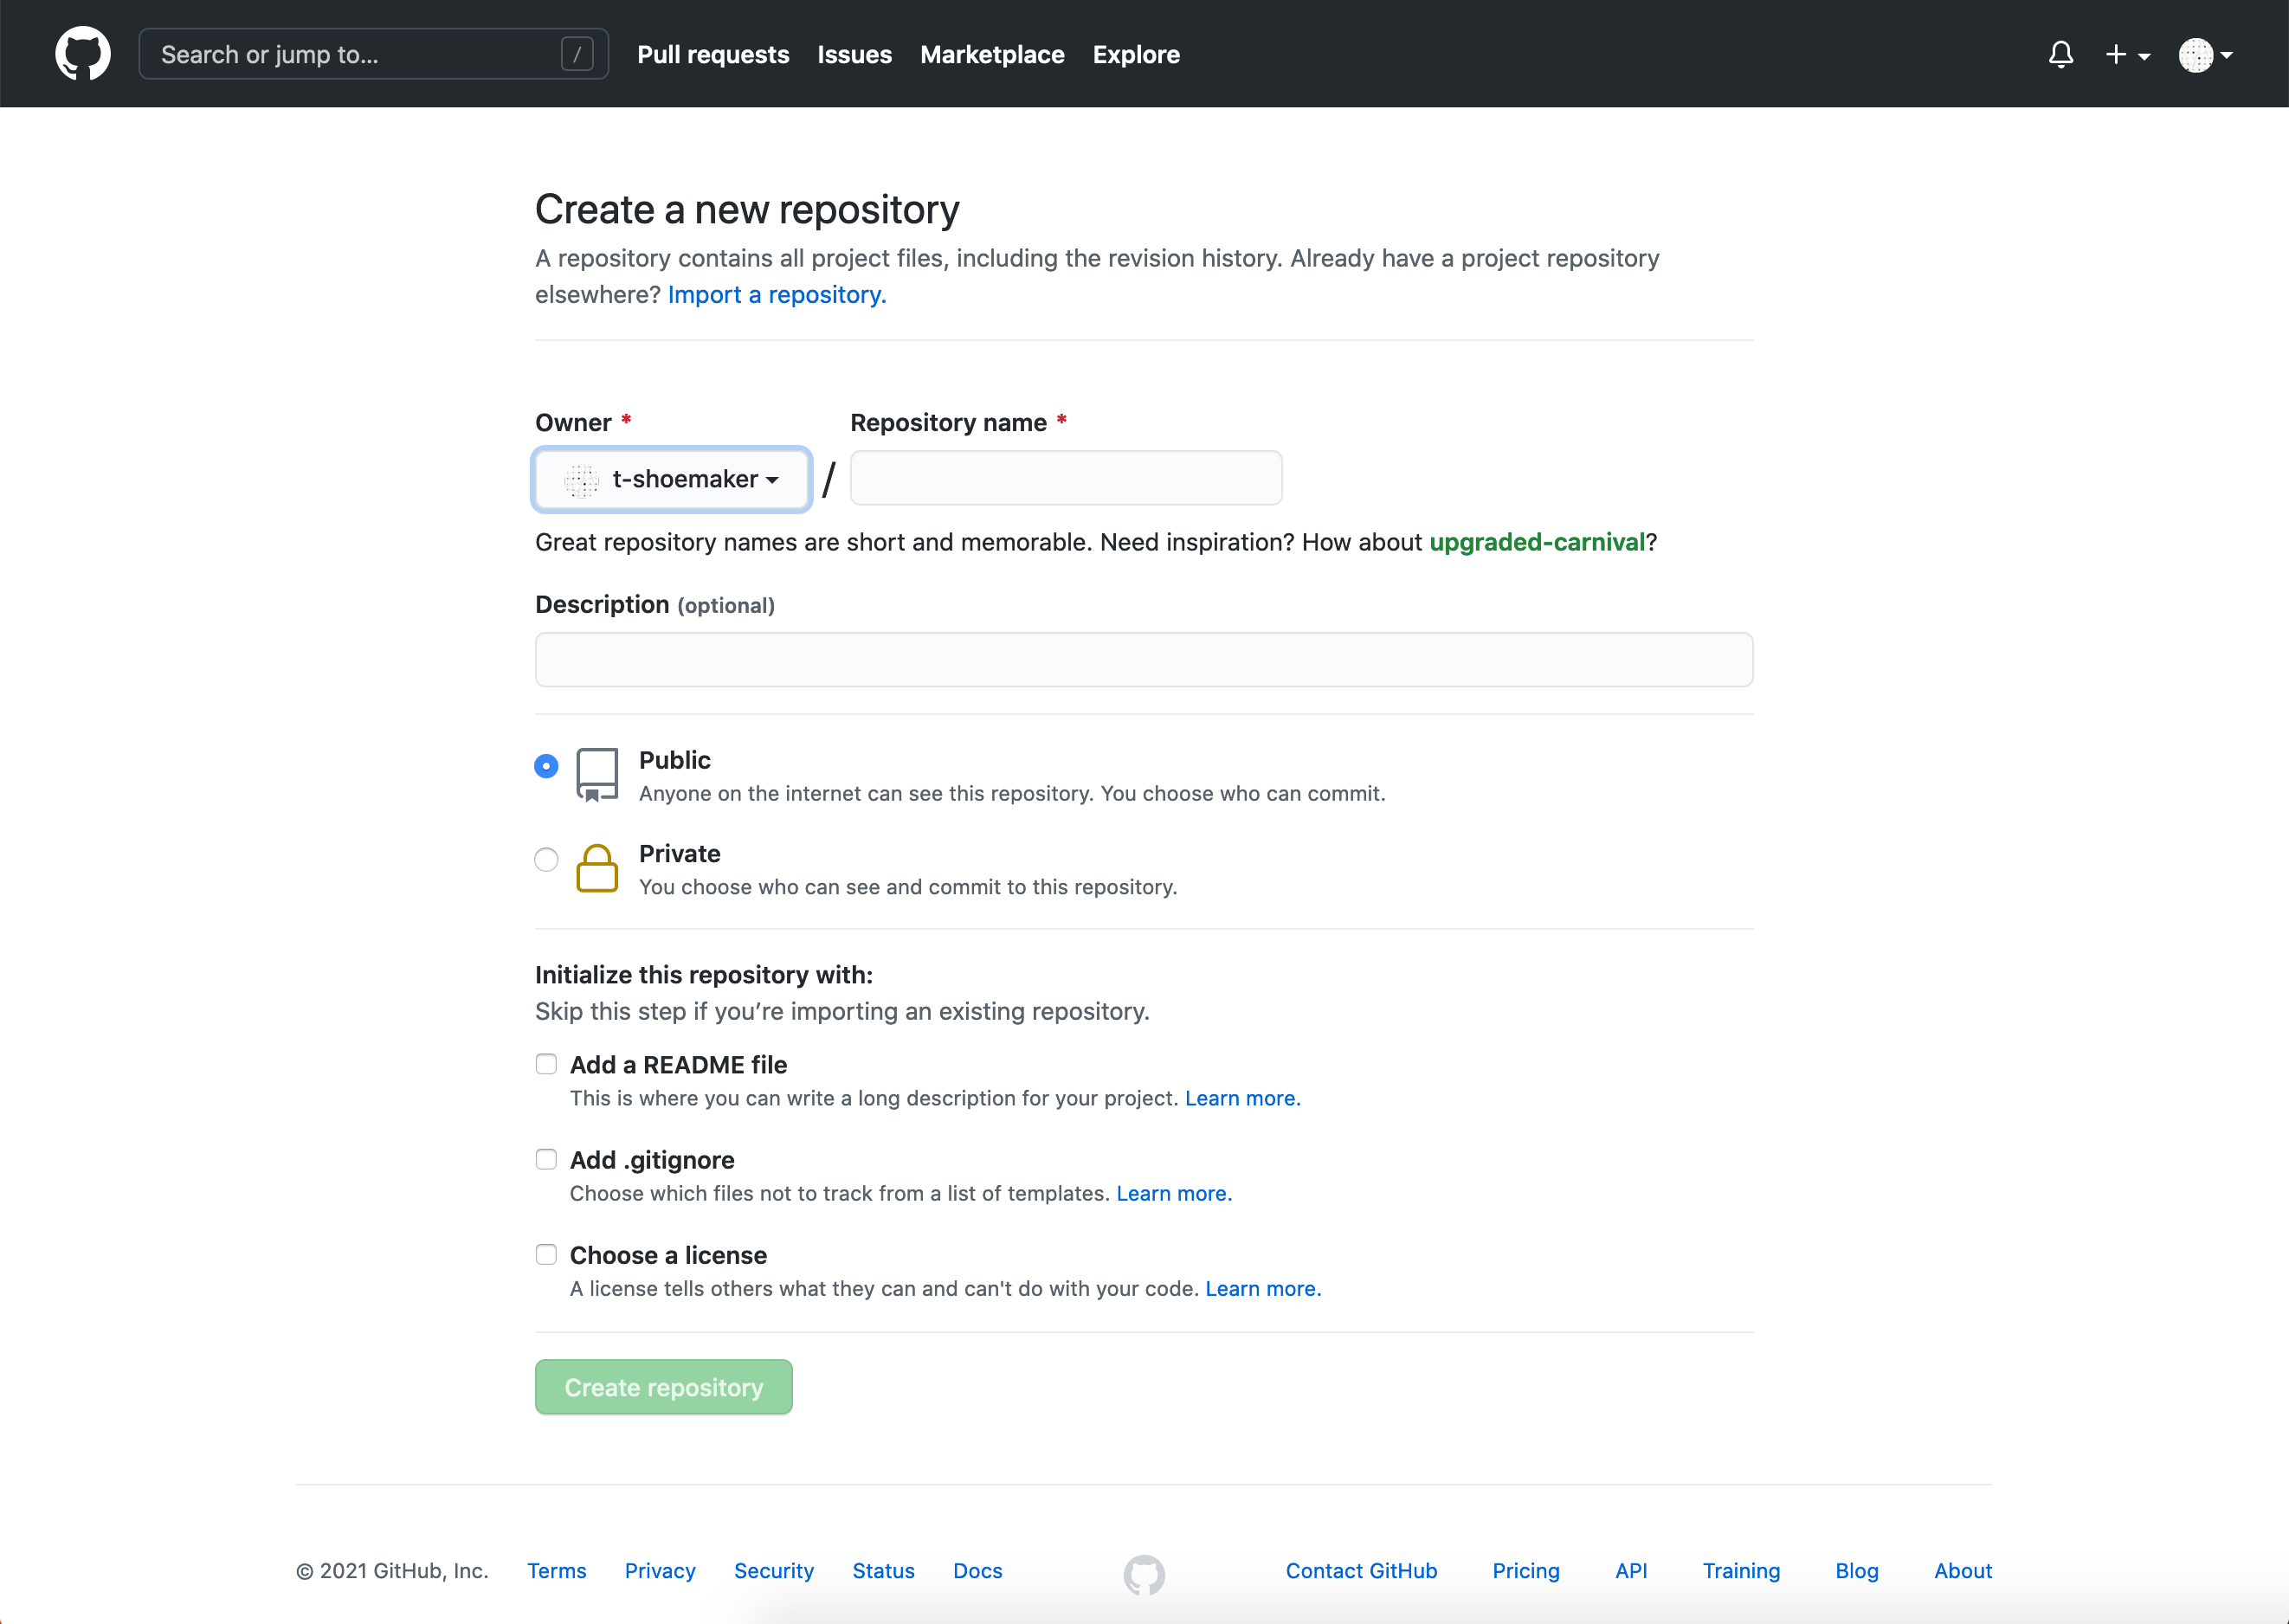
There are a few things of note here:
Repository name: your repository’s name, which should be the same as what’s on your computer
Description: a short (1-2 sentence) explanation of what’s in this repository
Public/private setting: repositories may be either “public” (viewable by anyone) or “private” (only viewable by you and those to whom you grant access)
“Initialize this repository with”:
A README file: a form of documentation; provides information about the files in the repository
A .gitignore file: instructs Git to ignore specific files or filetypes
A license: governs the use or redistribution of your files
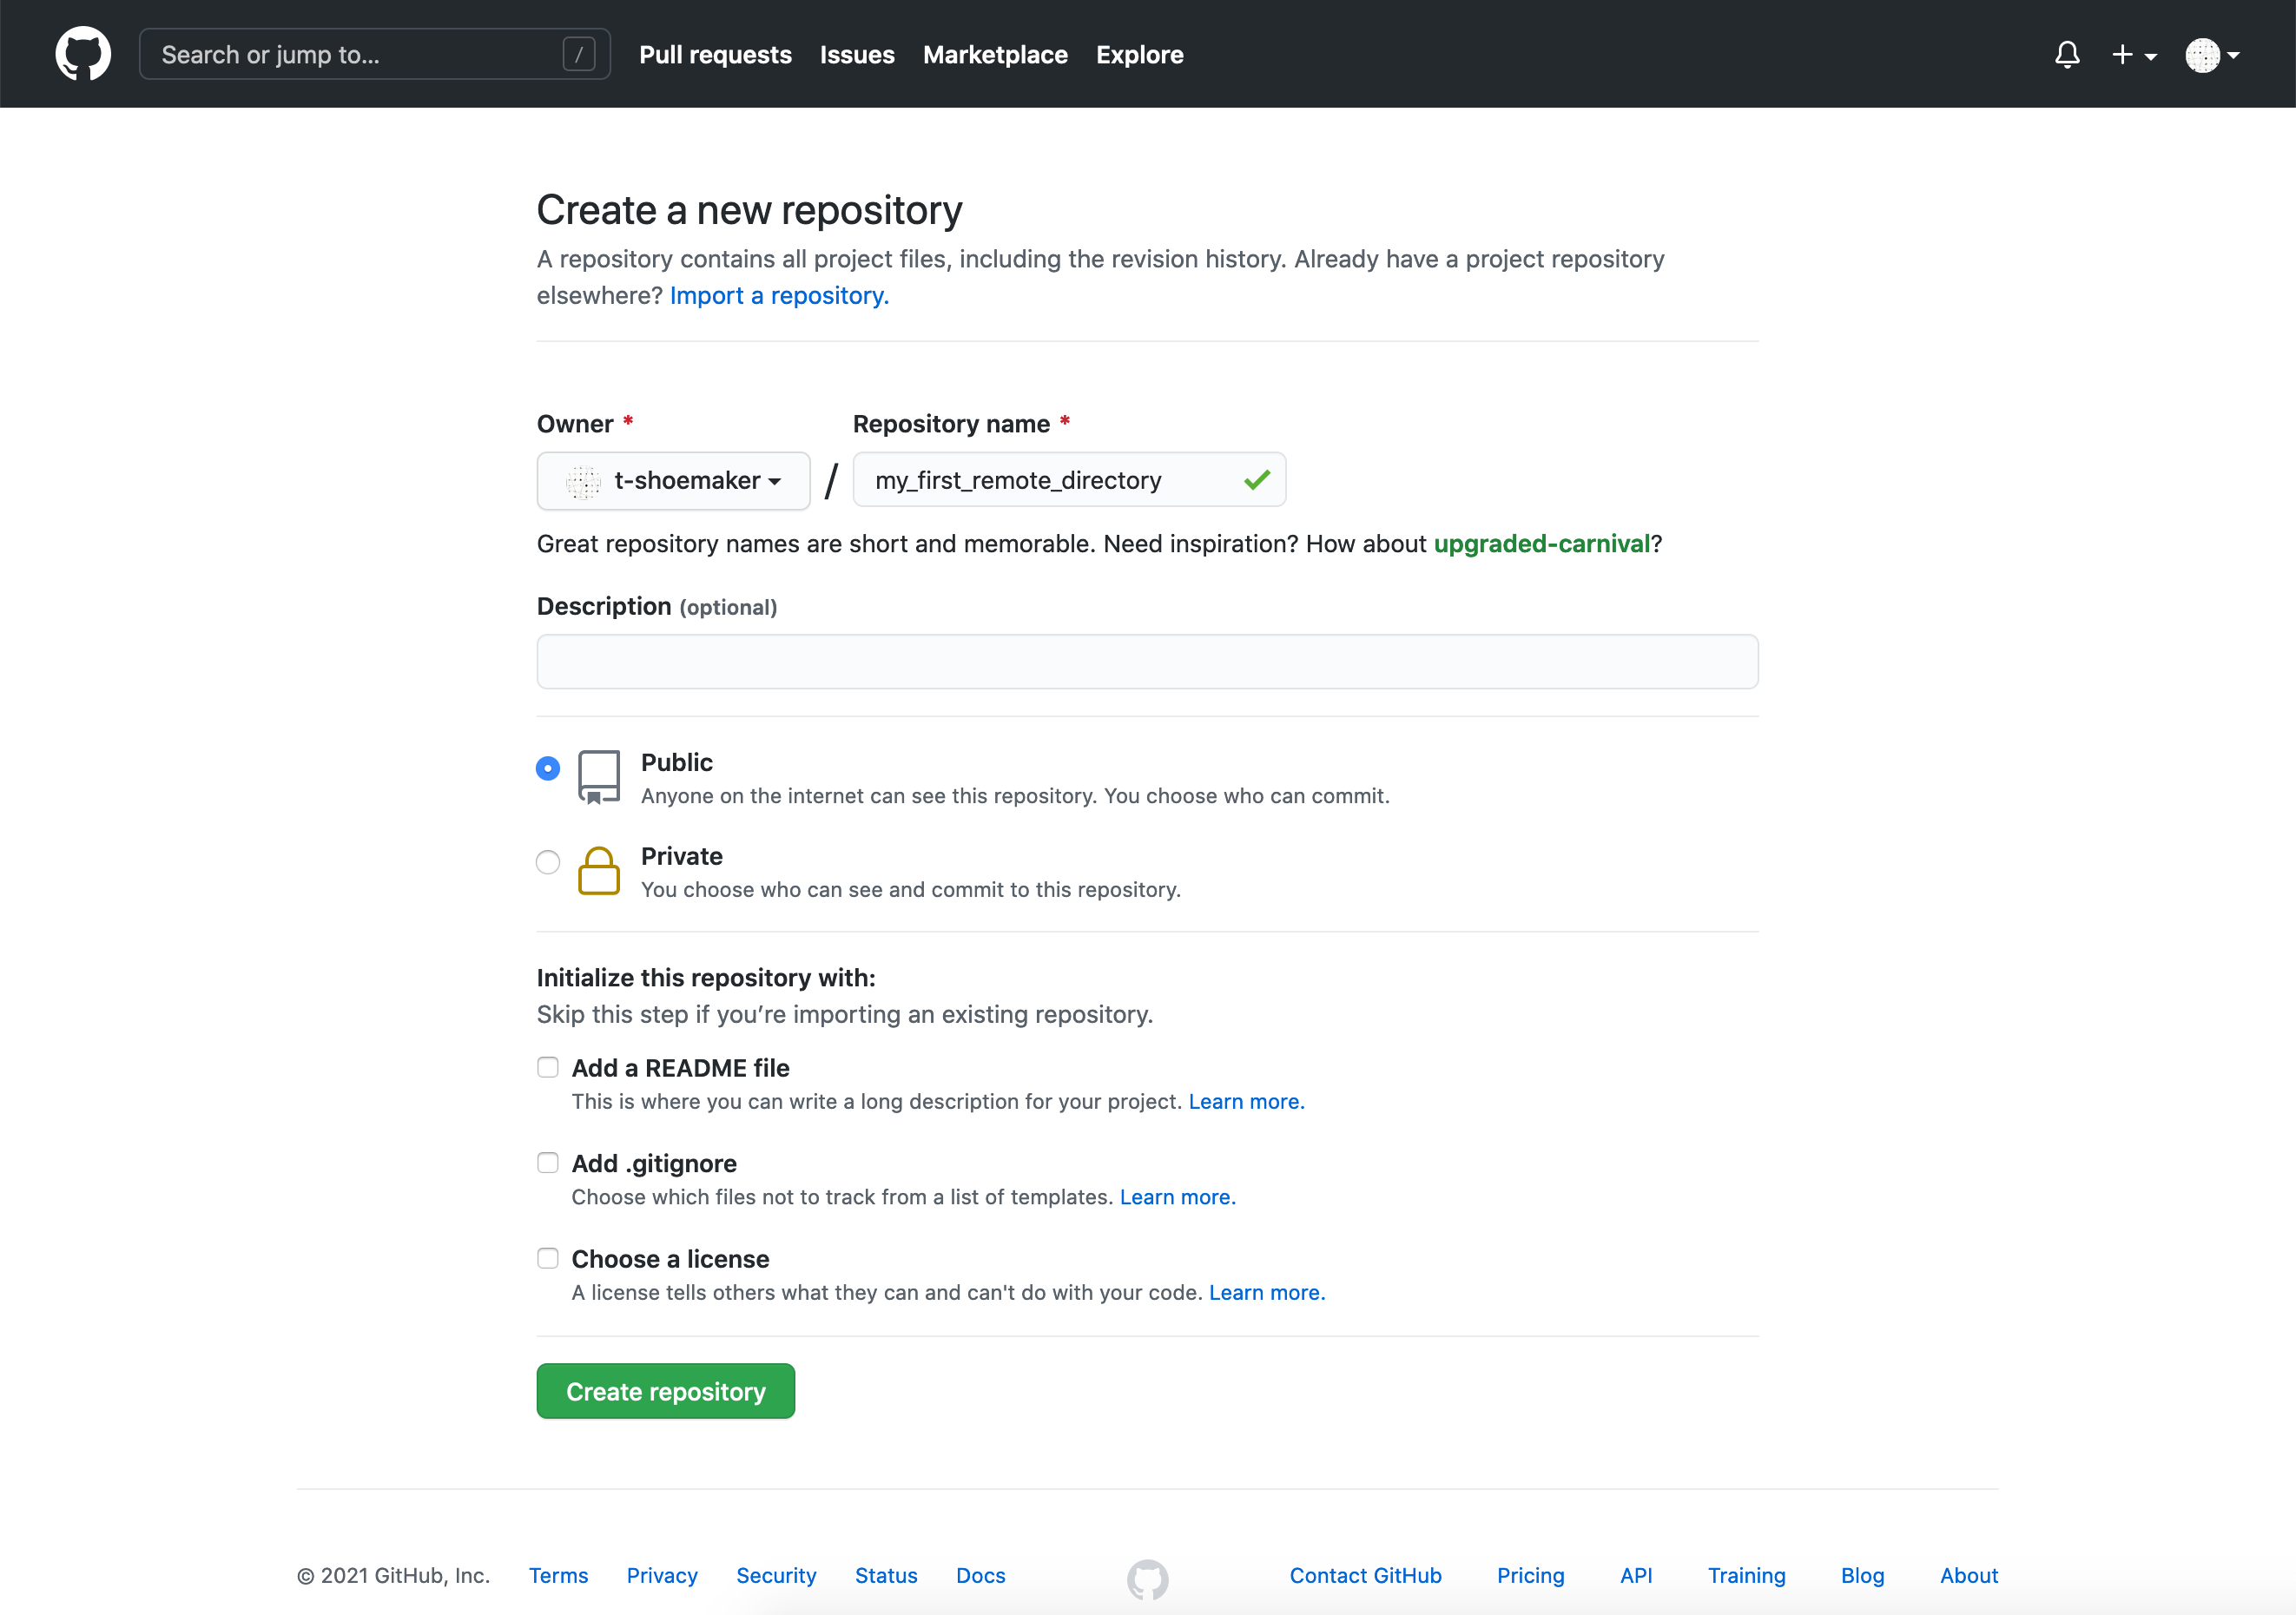
Because we’re initializing this repository from an existing directory, we won’t
bother with most of the extra details. But we do need a title, which should be
the same as what’s on your local computer (my_first_remote_directory). A
description is helpful but not necessary for our purposes; the same goes for a
license. Finally, we will choose to make this a public repository (meaning
anyone can see it).
2.3. Pushing a Local Repository#
Once you’ve entered the above information, click “Create repository.” GitHub will take you to a new screen, which gives you a number of options for making or uploading new files to the repository.
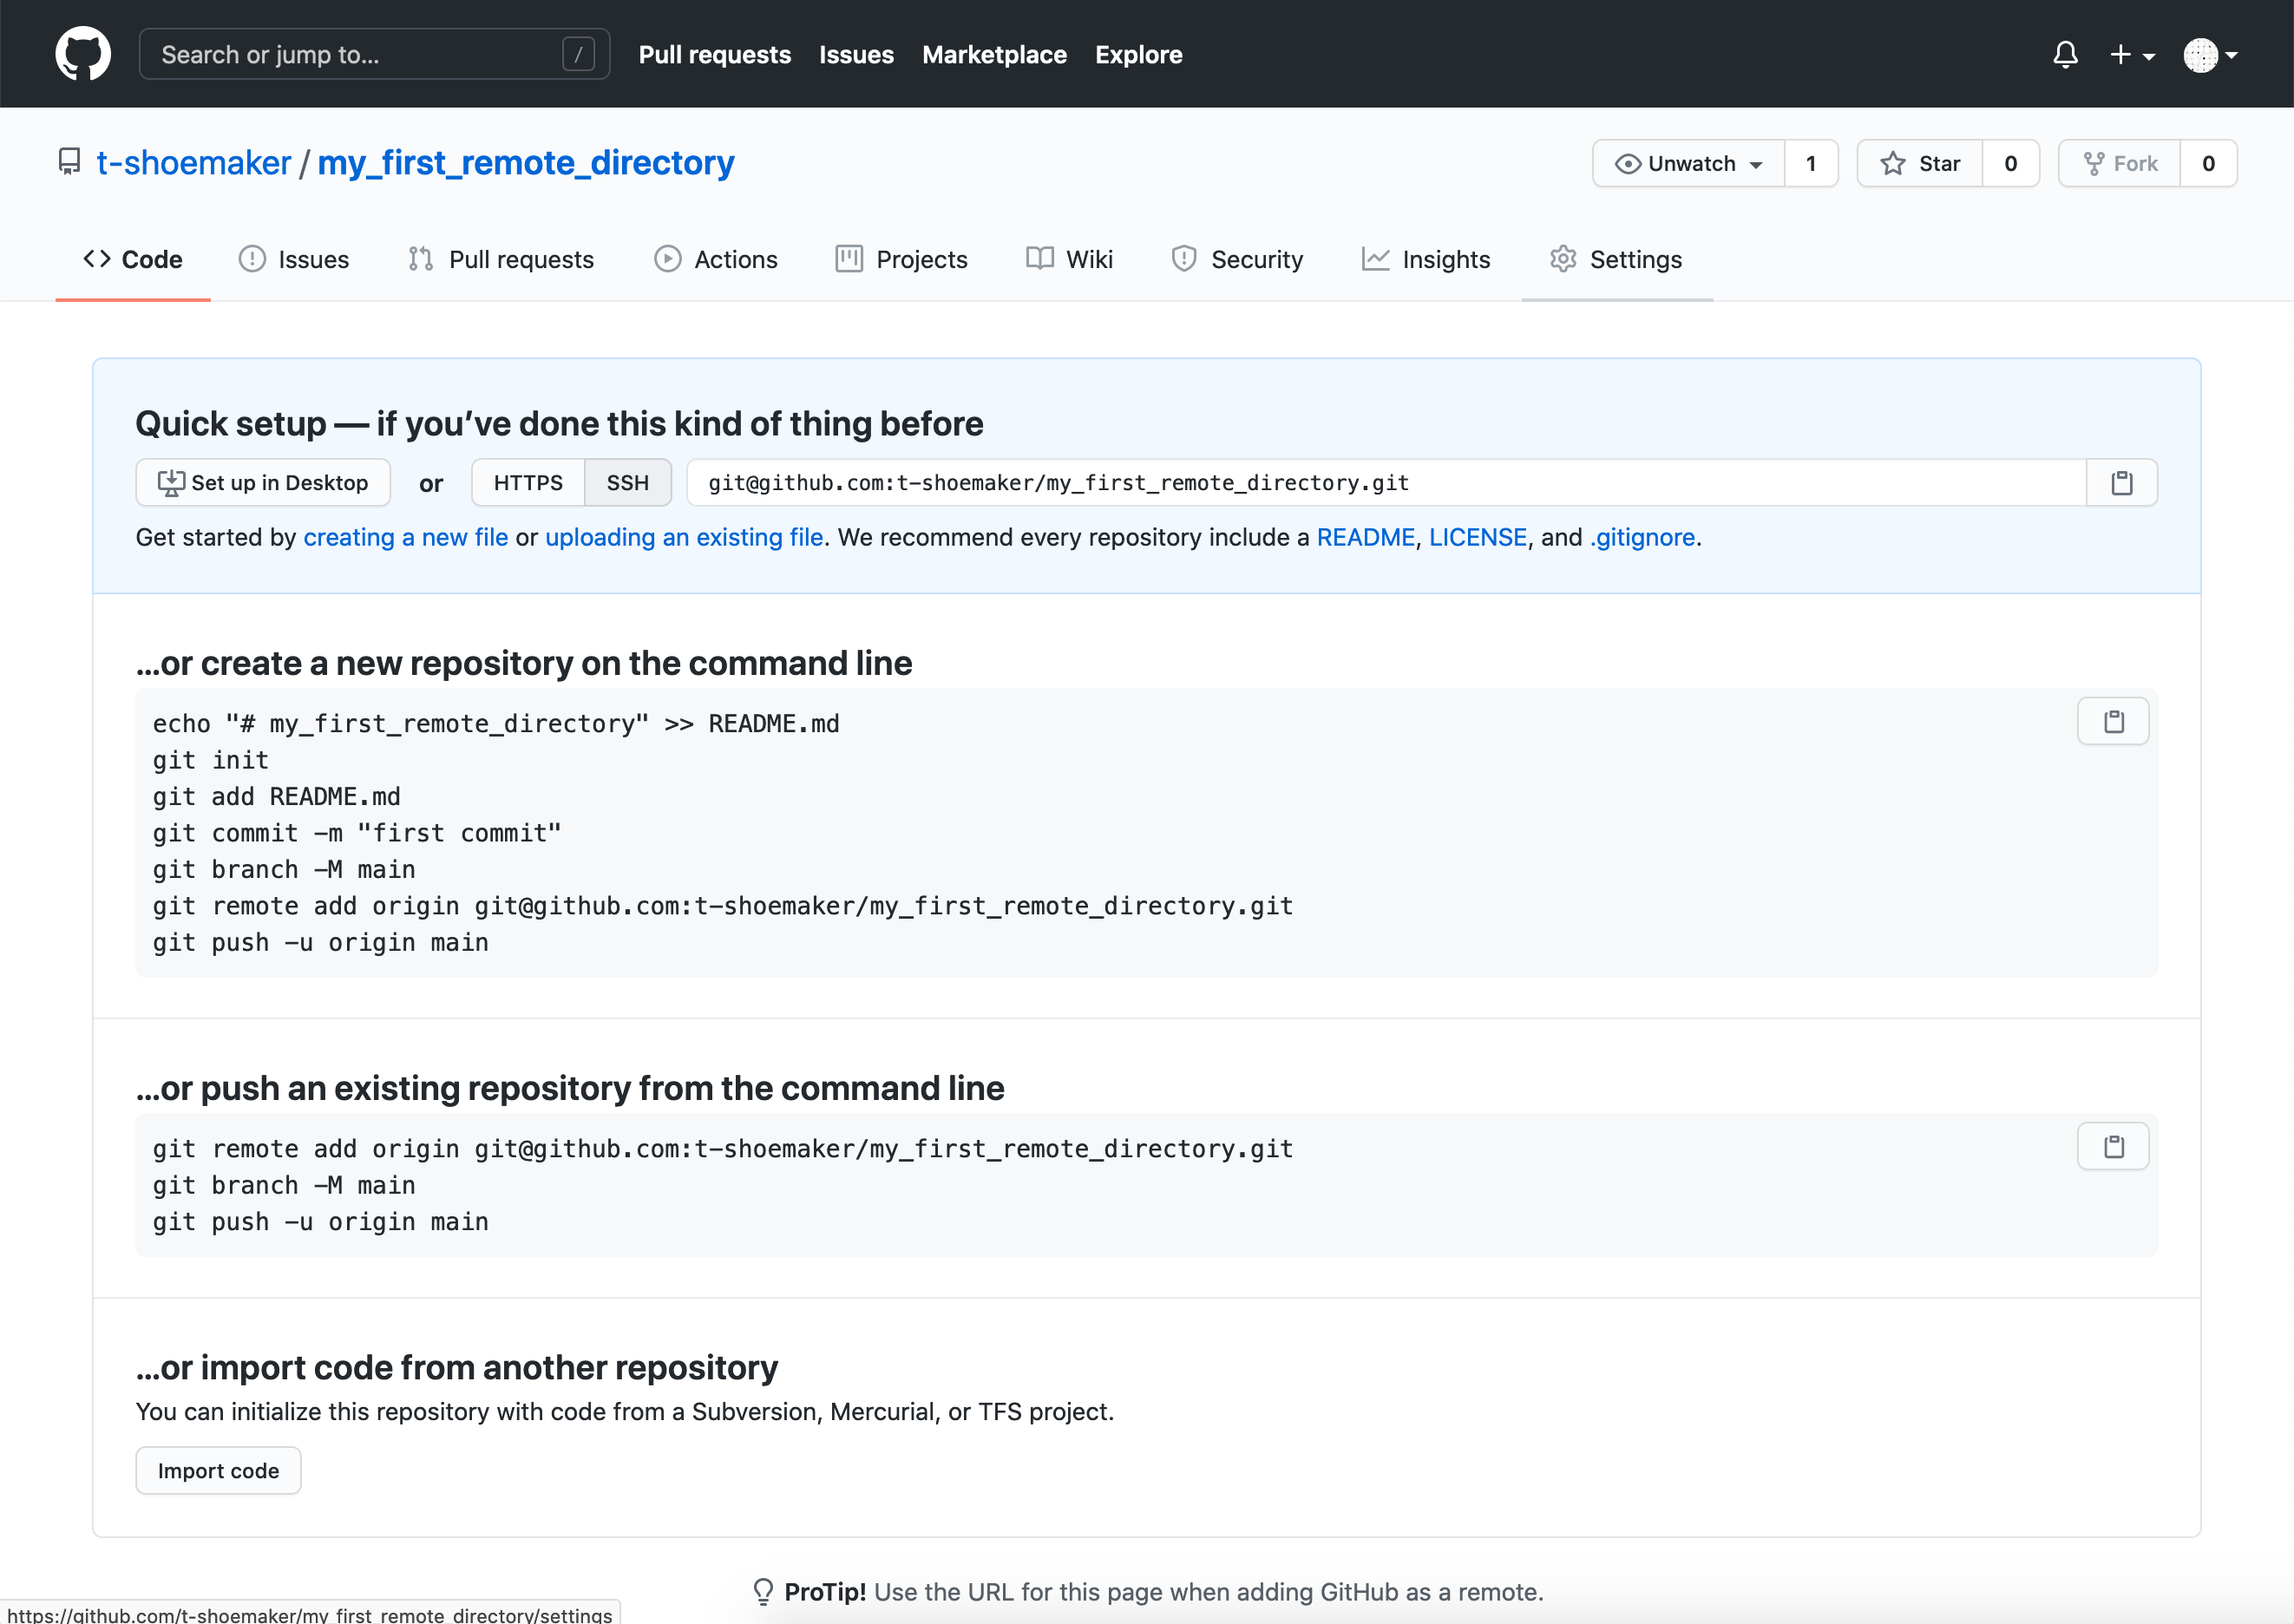
Since we already have a local copy of the repository, we need to use the “Push an existing repository from the command line.” In your terminal, enter the three commands GitHub recommends. First:
git remote add origin REPOSITORY_URL
Here REPOSITORY_URL is unique to your repository (copy it from GitHub).
git branch -M main
git push -u origin
Enumerating objects: 3, done.
Counting objects: 100% (3/3), done.
Writing objects: 100% (3/3), 239 bytes | 239.00 KiB/s, done.
Total 3 (delta 0), reused 0 (delta 0), pack-reused 0
To github.com:<your username>/my_first_remote_directory.git
 * [new branch]      main -> main
Branch 'main' set up to track remote branch 'main' from 'origin'.
To summarize the above, we’ve done the following:
Associated GitHub’s remote repository with our local repository (
git remoteetc.)Made a new branch in our local repository called “main” (
git branch -M main)Pushed the contents of main (from
origin) to a new, corresponding remote branch on GitHub
From here on out, when you want to update the remote repository with further
changes, you can simply use the shorthand git push after the usual save, add,
commit steps. Importantly, Git will only update the branch you’re on when you
enter git push, so before making any pushes, it’s a good idea to run a quick
git status command to make sure you’re on the branch you want to be on.
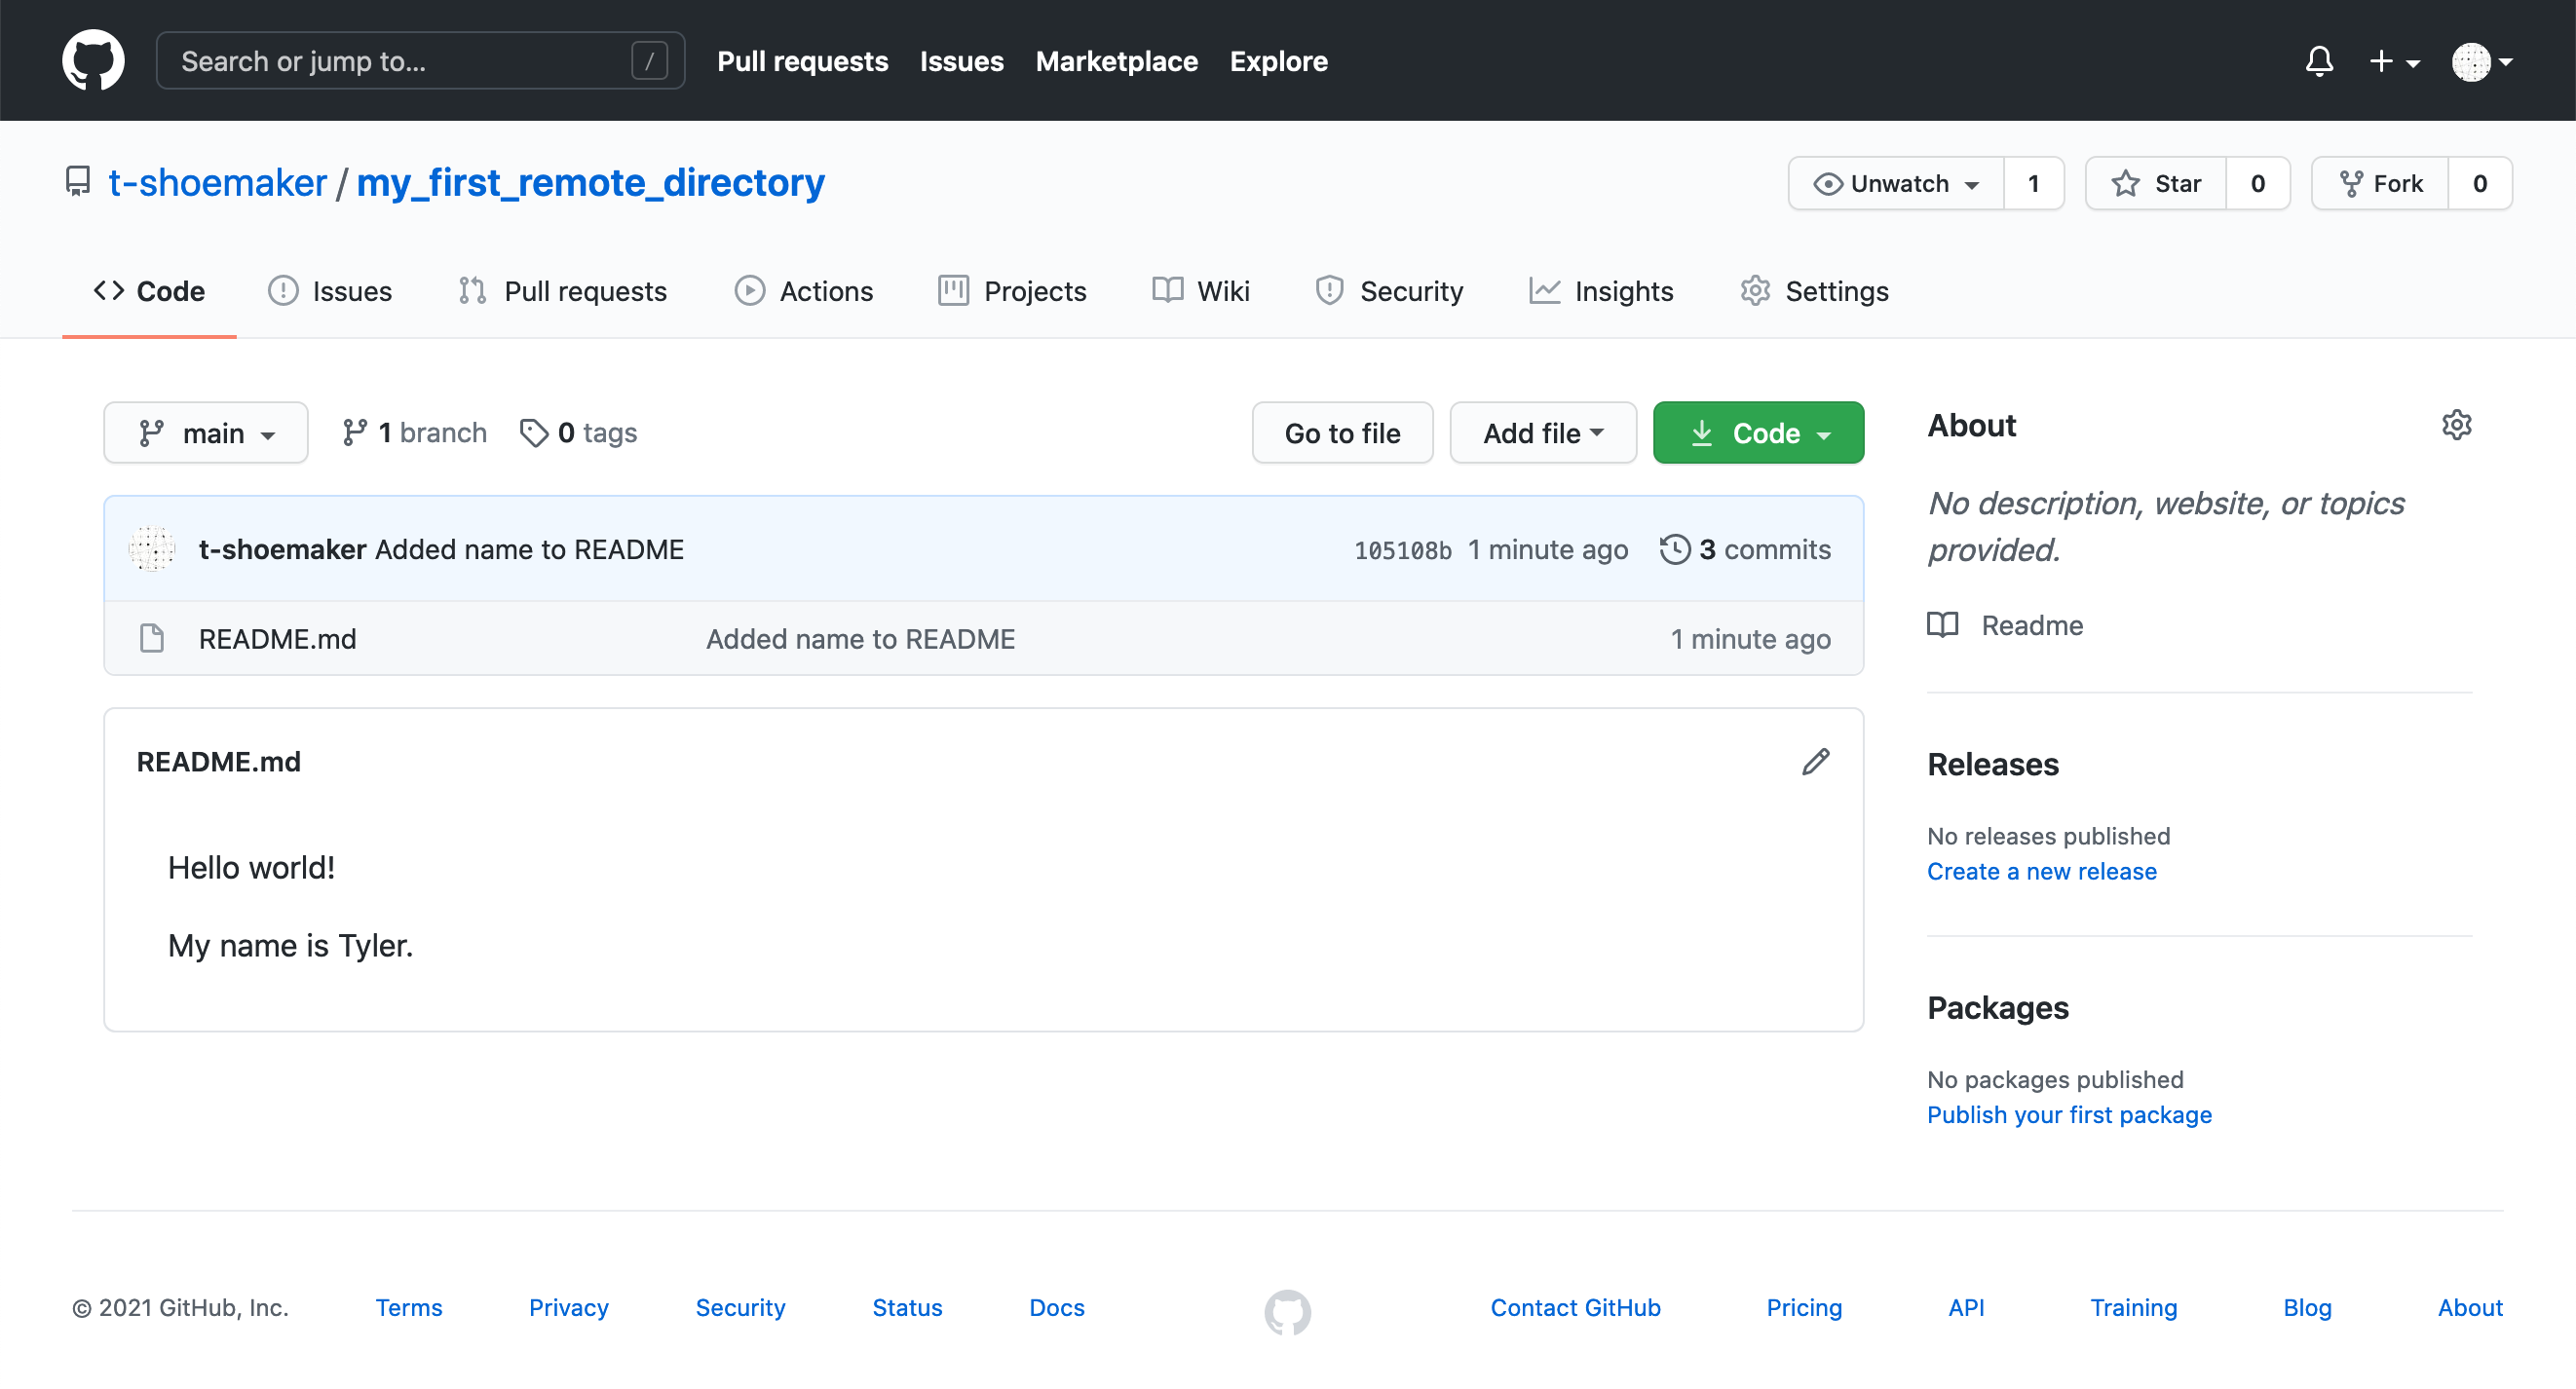
When you make your changes, the GitHub site won’t immediately refresh itself,
but if you click on the “Code” tab or on the name of the directory, you’ll see
that the repository has been synced and your README.md file is now online.
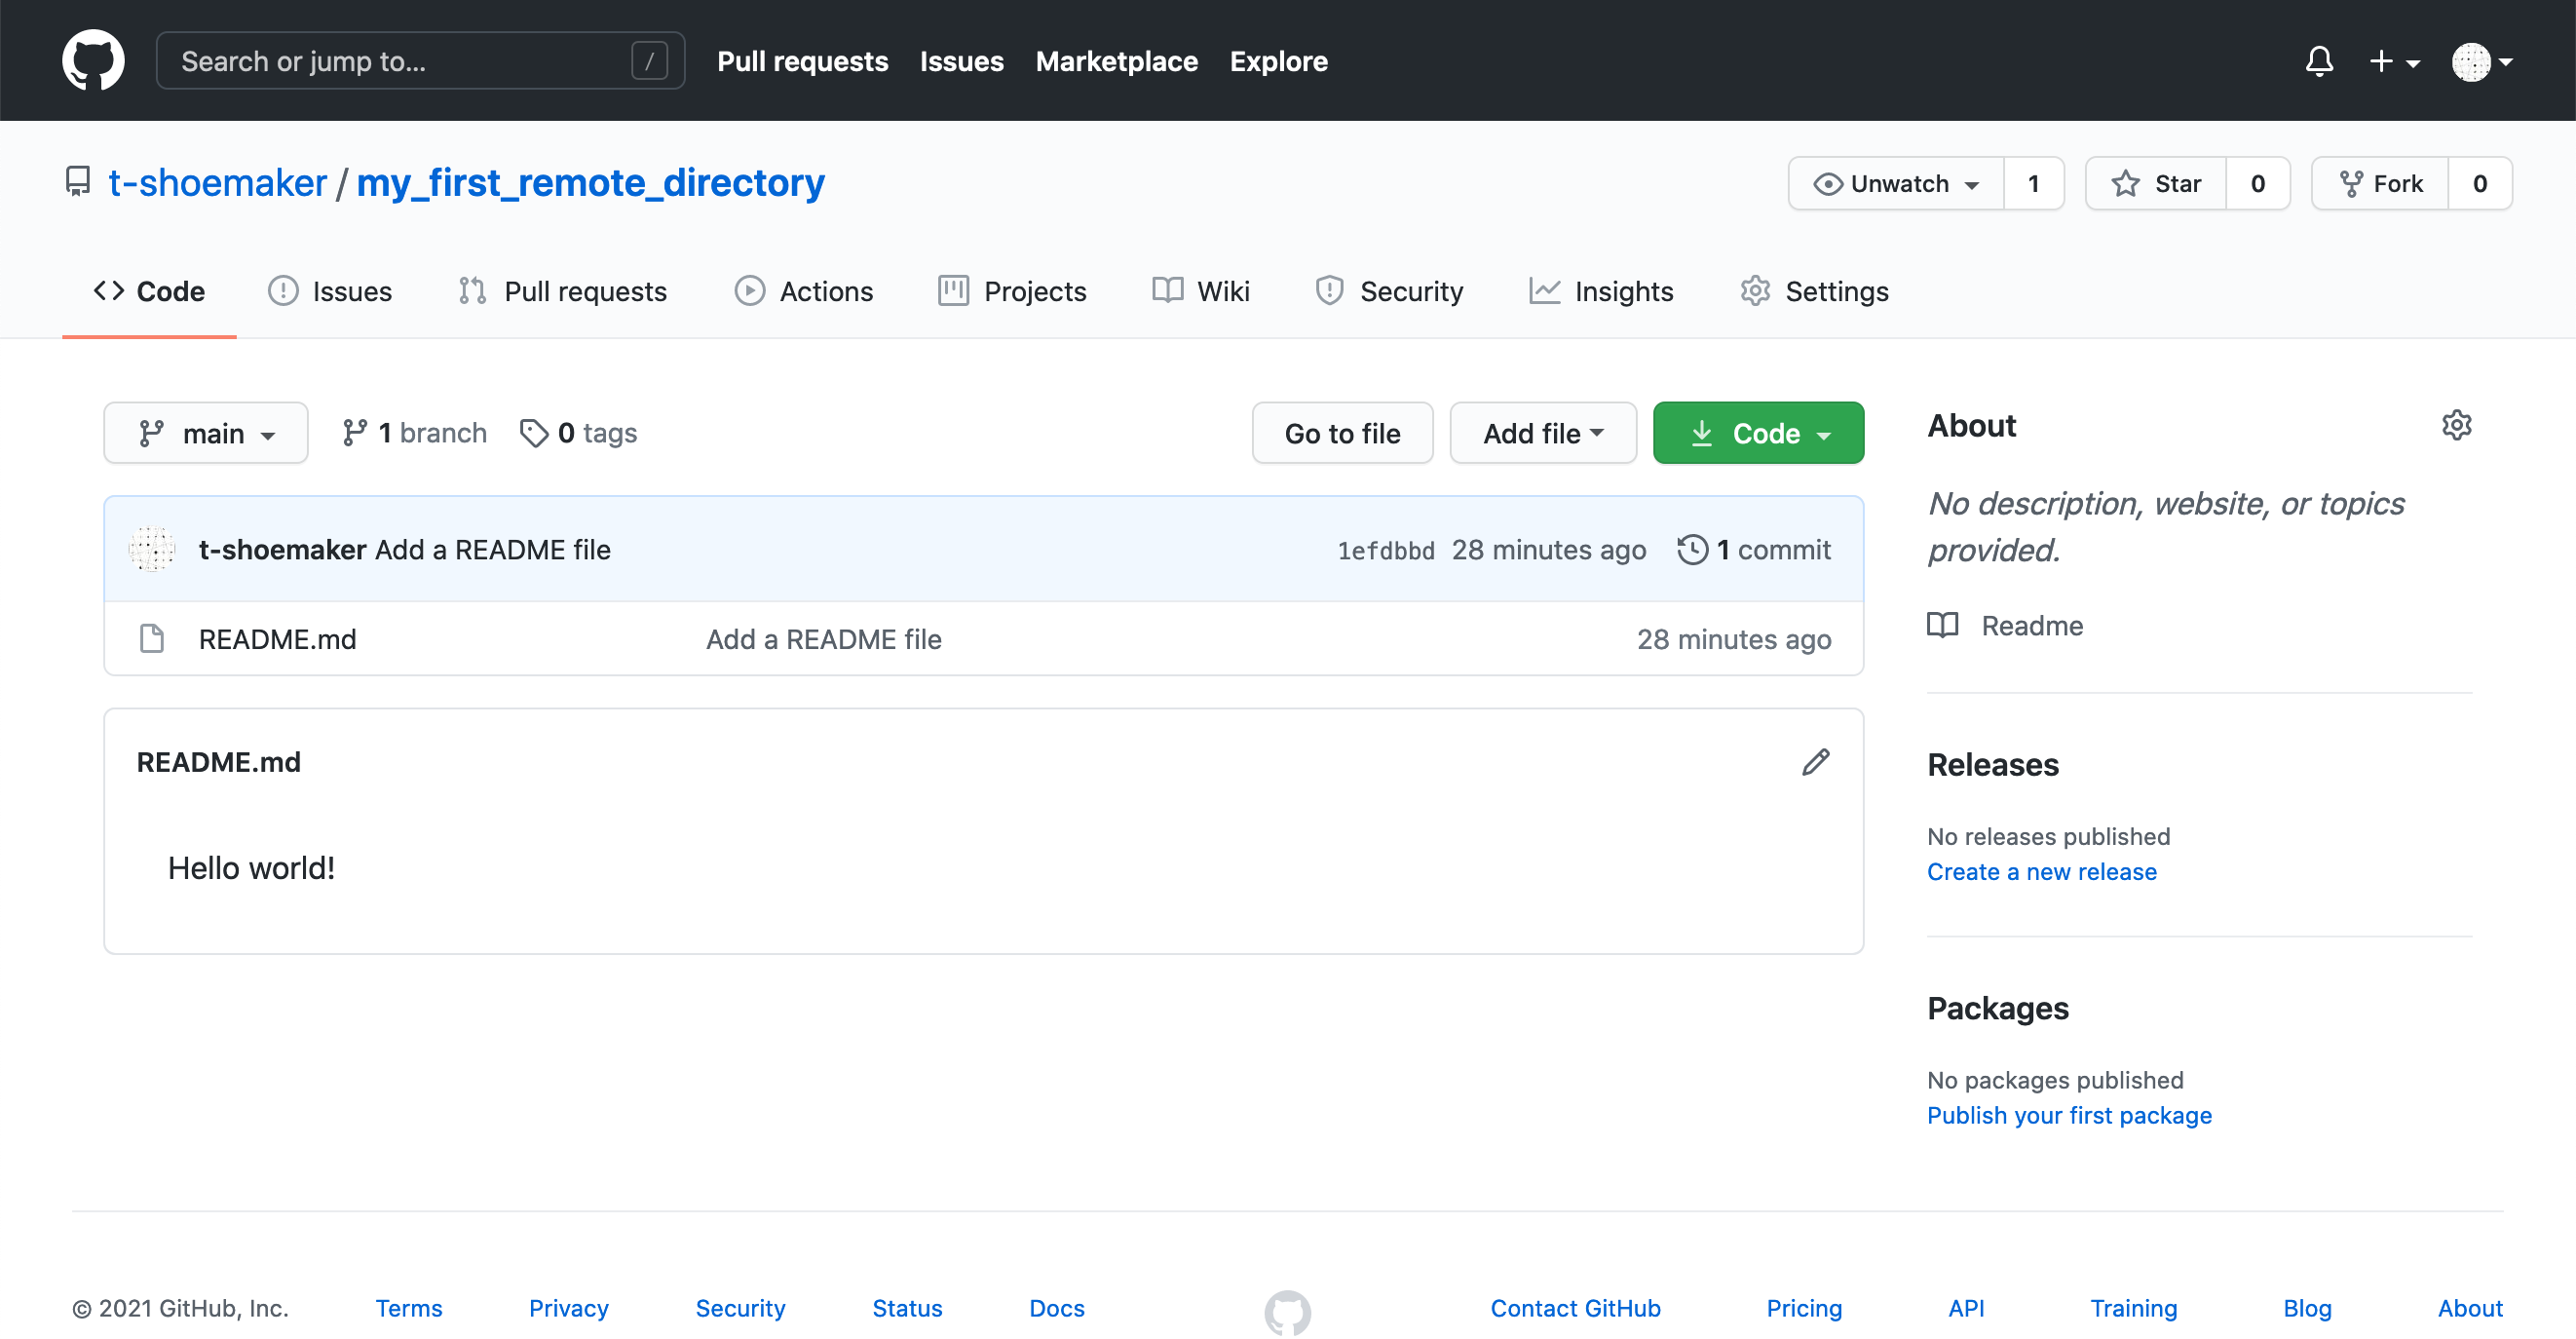
Note that GitHub automatically looks for a README file in your repository. If it finds one that contains renderable markdown code, it will render the file on your repository’s main page. (More information about writing effective README files is available through the DataLab’s data documentation workshop.)
2.4. Tracking Files Remotely#
With this repository made, GitHub can start tracking changes you make to your files, much as Git does locally. The process works exactly like the one you do for Git, though it requires one more step.
First, we’ll alter our README.md. Reopen the file with Vim, skip a line down
from the line you’ve already written, and add My name is NAME., where NAME
is your name. Save and quit.
Your file should look like the following:
cat README.md
Hello world!

My name is NAME.
Then, add the file and commit your changes.
git add README.md
git commit -m 'Added my name to README'
[main 78bf509] Added my name to README
 1 file changed, 2 insertions(+)
If you want to push these changes to your remote repository, simply enter git push. Just as when you first linked your local repository to GitHub, you’ll
see a message appear about enumerating, counting, and writing objects.
git push
Enumerating objects: 5, done.
Counting objects: 100% (5/5), done.
Writing objects: 100% (3/3), 292 bytes | 292.00 KiB/s, done.
Total 3 (delta 0), reused 0 (delta 0), pack-reused 0
To github.com:<your username>/my_first_remote_directory.git
   cad7867..78bf509  main -> main
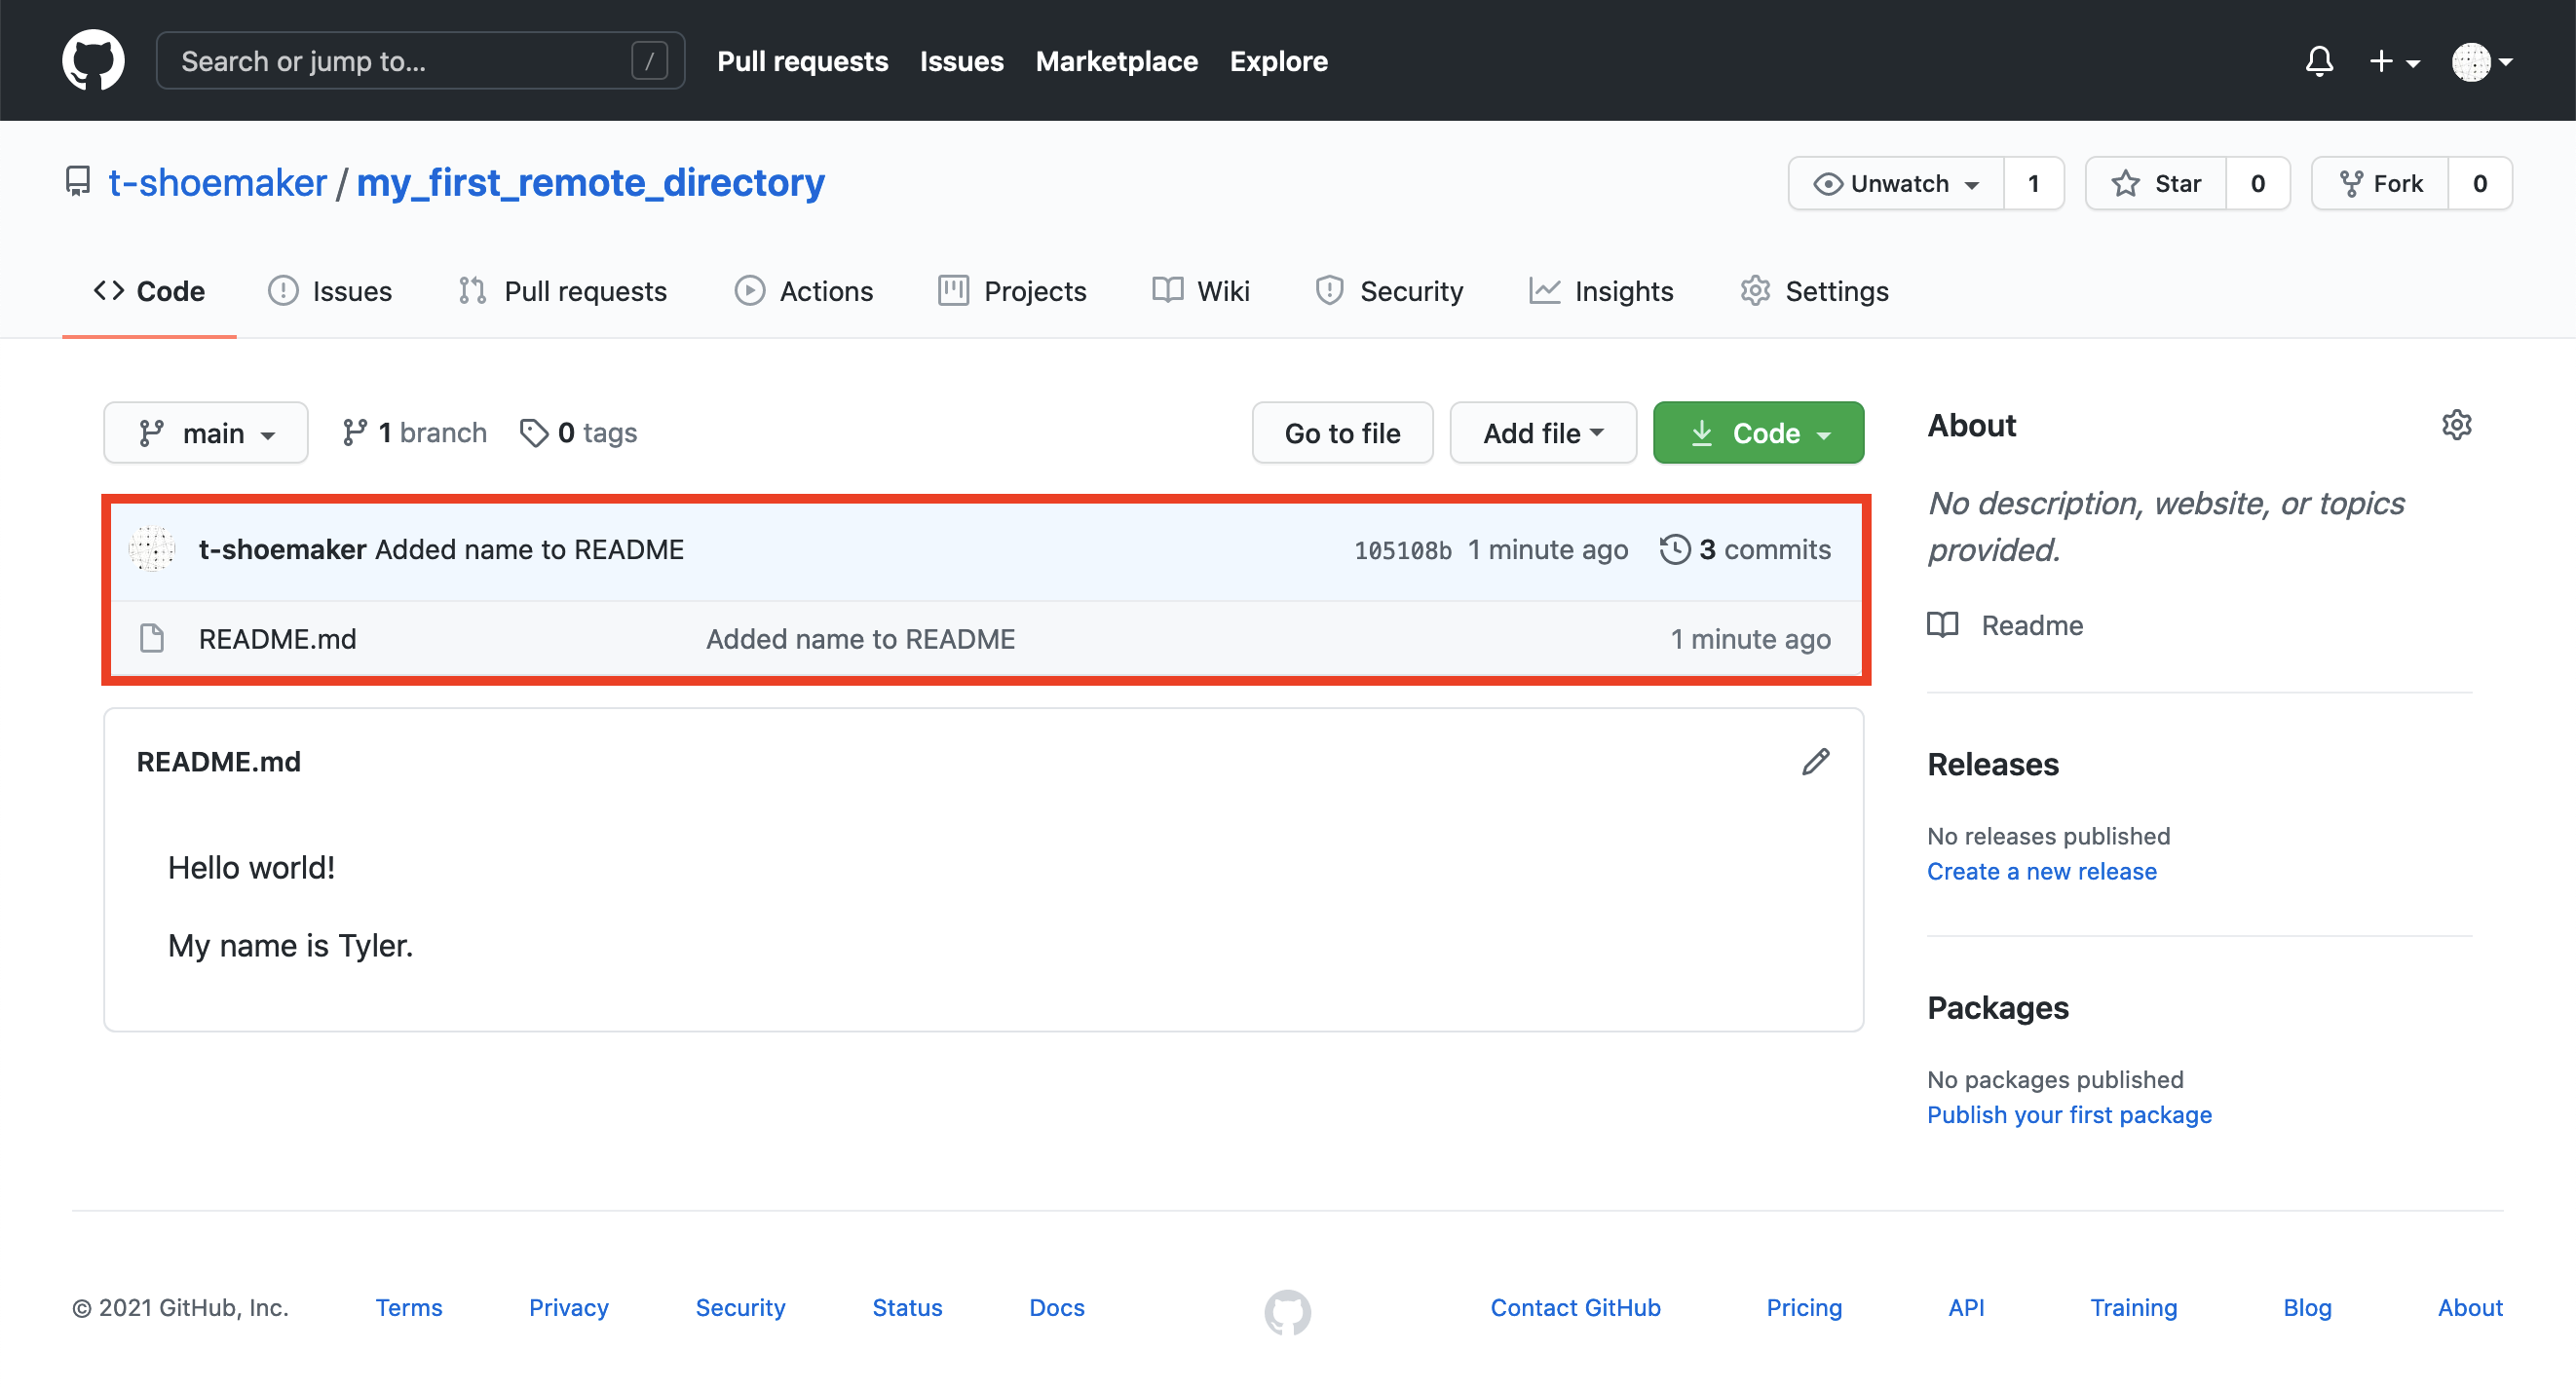
Afterwards, if you refresh your file’s page on GitHub, you should see your changes:
Note that your commit message appears here as well:
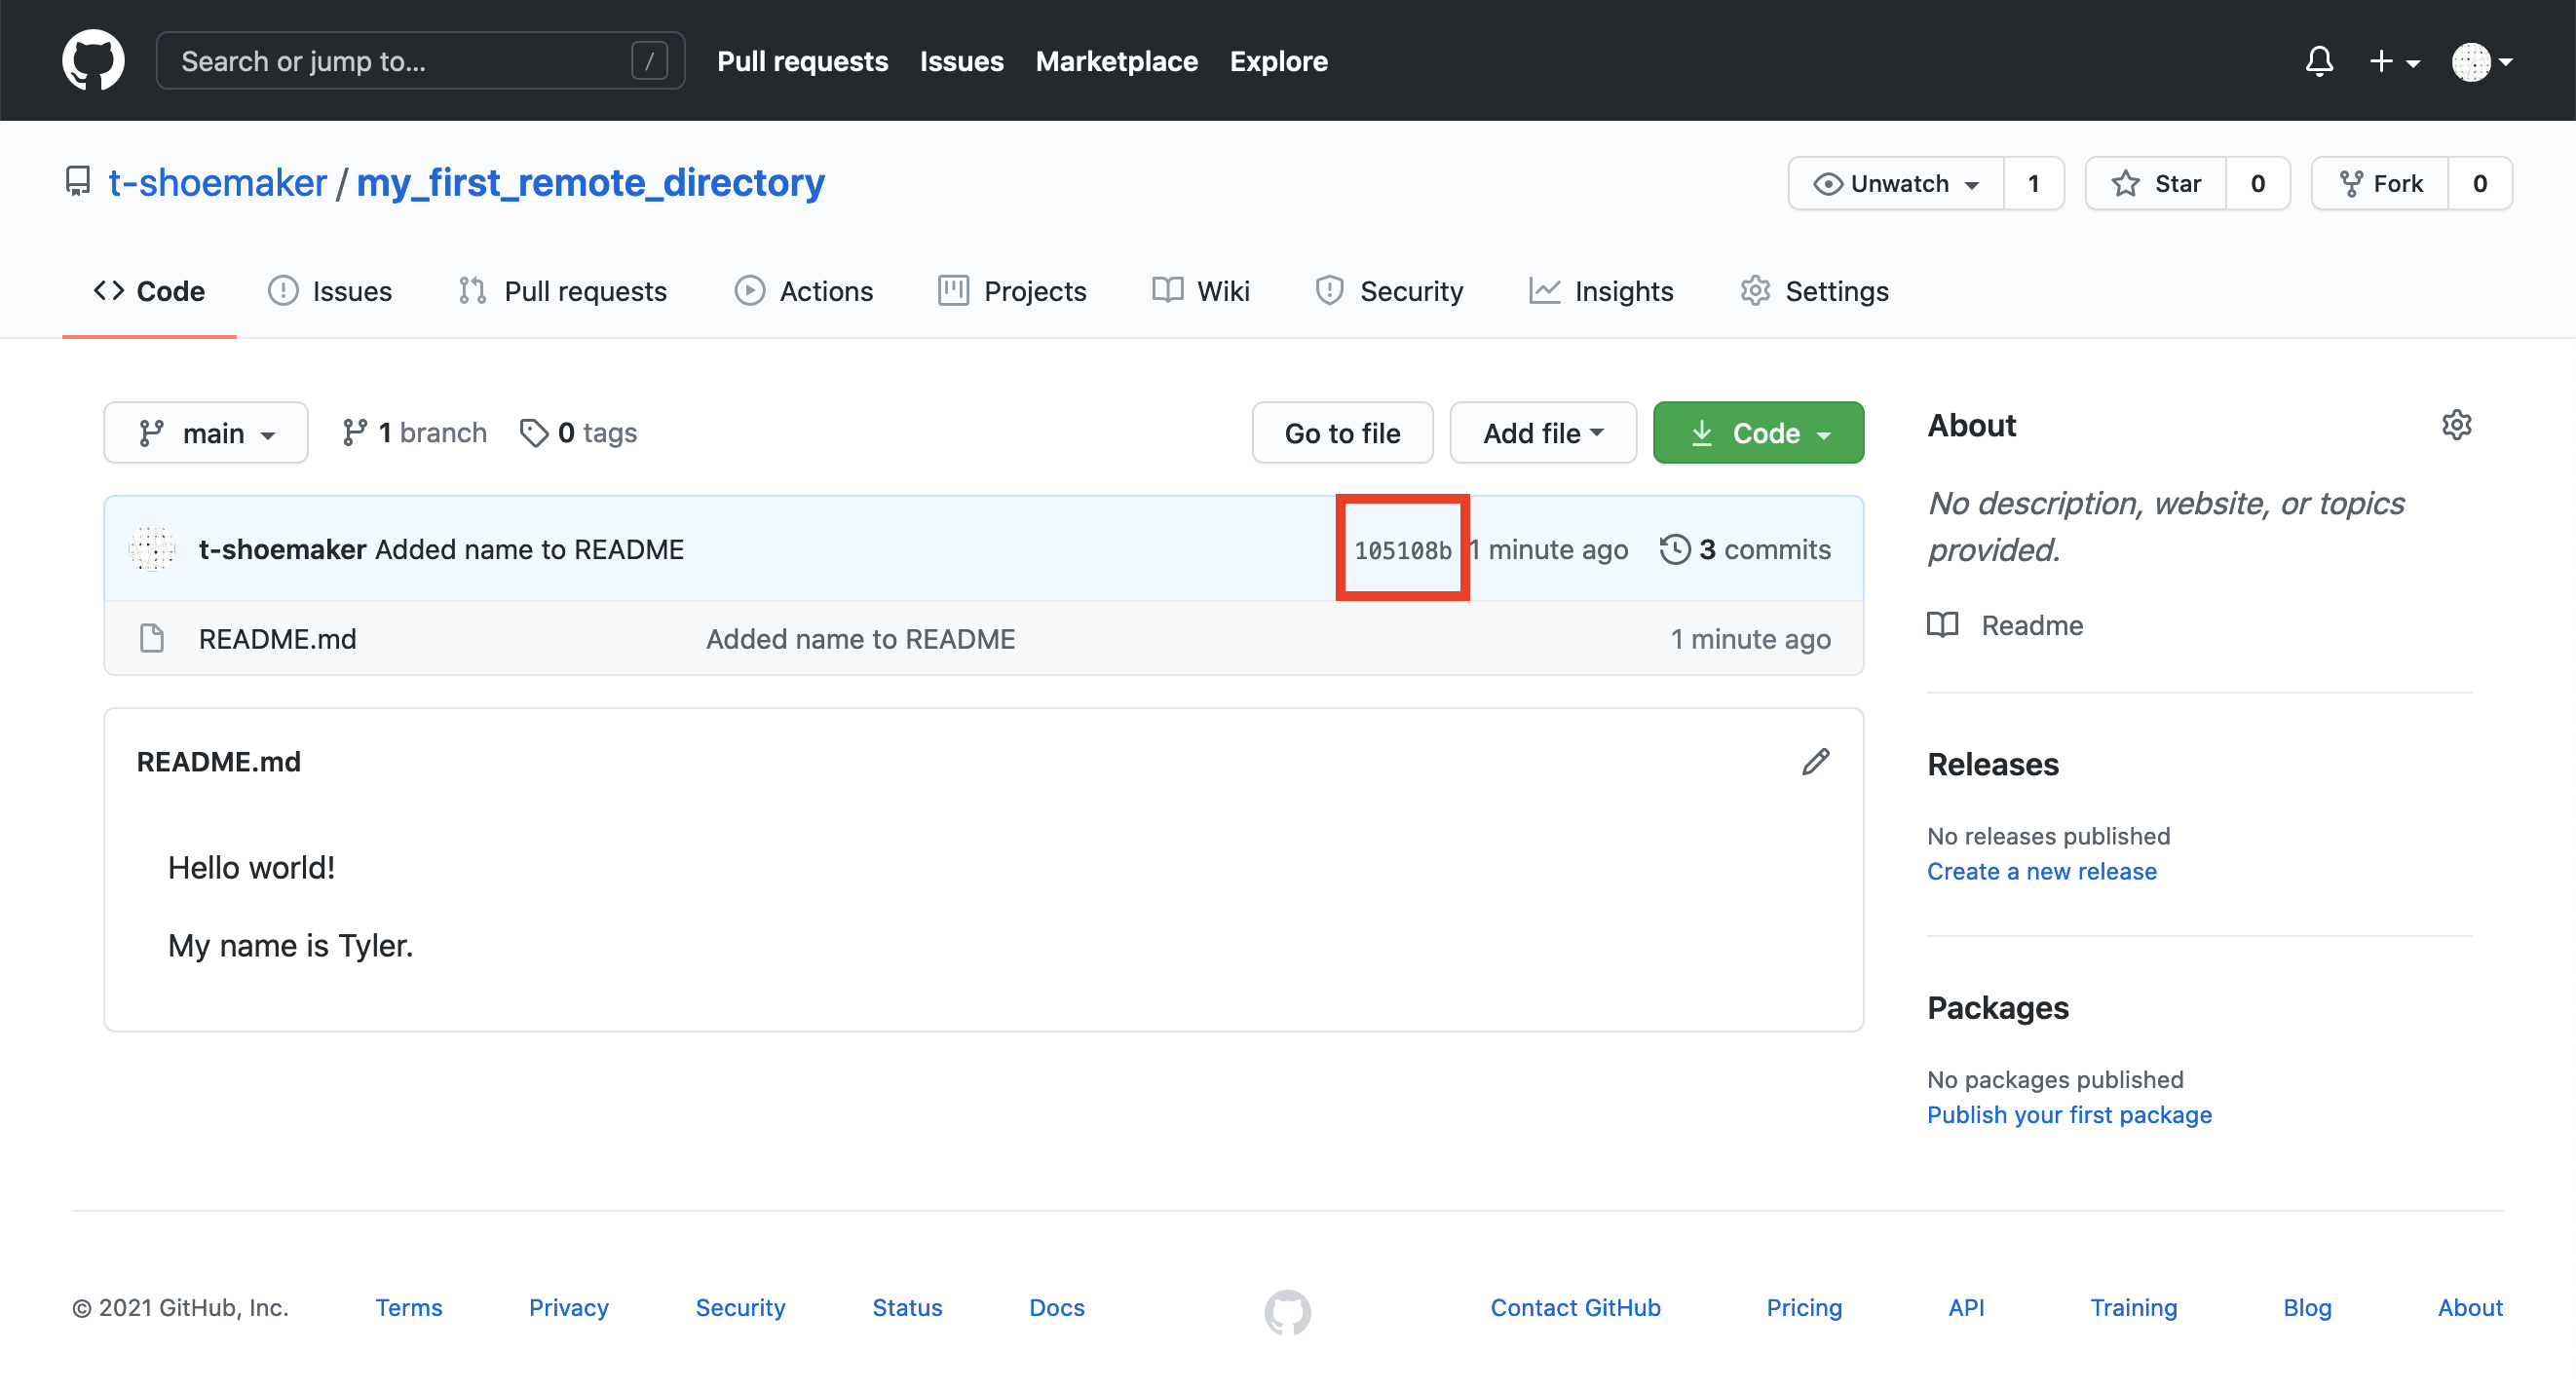
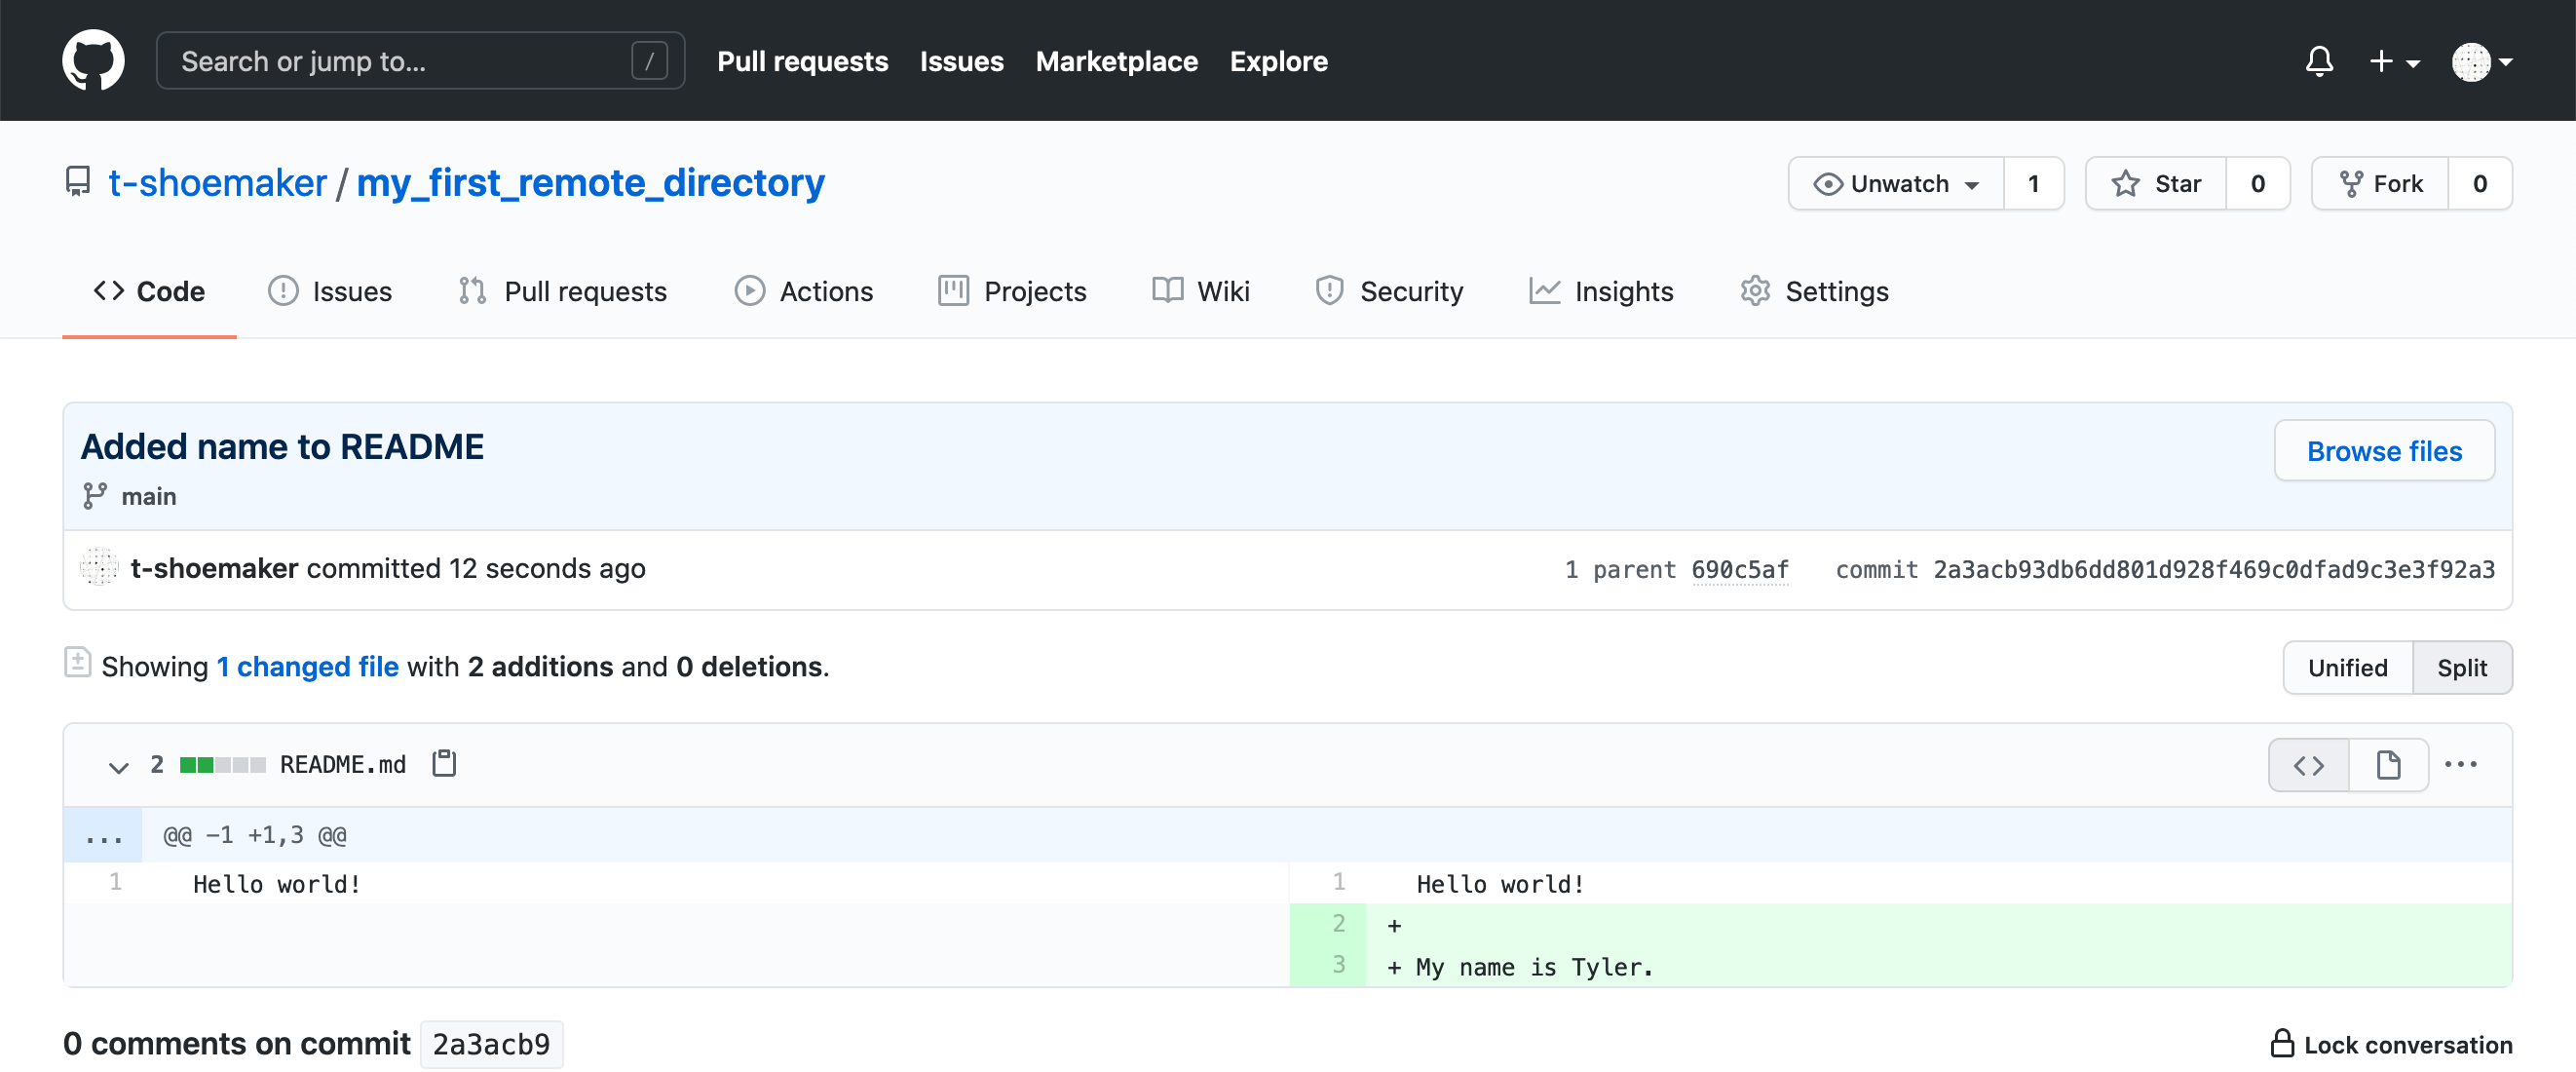
If you click the commit tag:
You’ll be taken to another page, which shows you the differences between your
old version and the new one. This is like running git diff <commit a> <commit b> on your local computer.
2.5. Pulling Changes from a Remote Directory#
Before moving on, it’s also worth noting that we can pull changes directly from GitHub. If a file has been altered on the remote version of a project, GitHub offers functionality for syncing that file with your local copy (or creating a new file altogether, if need be).
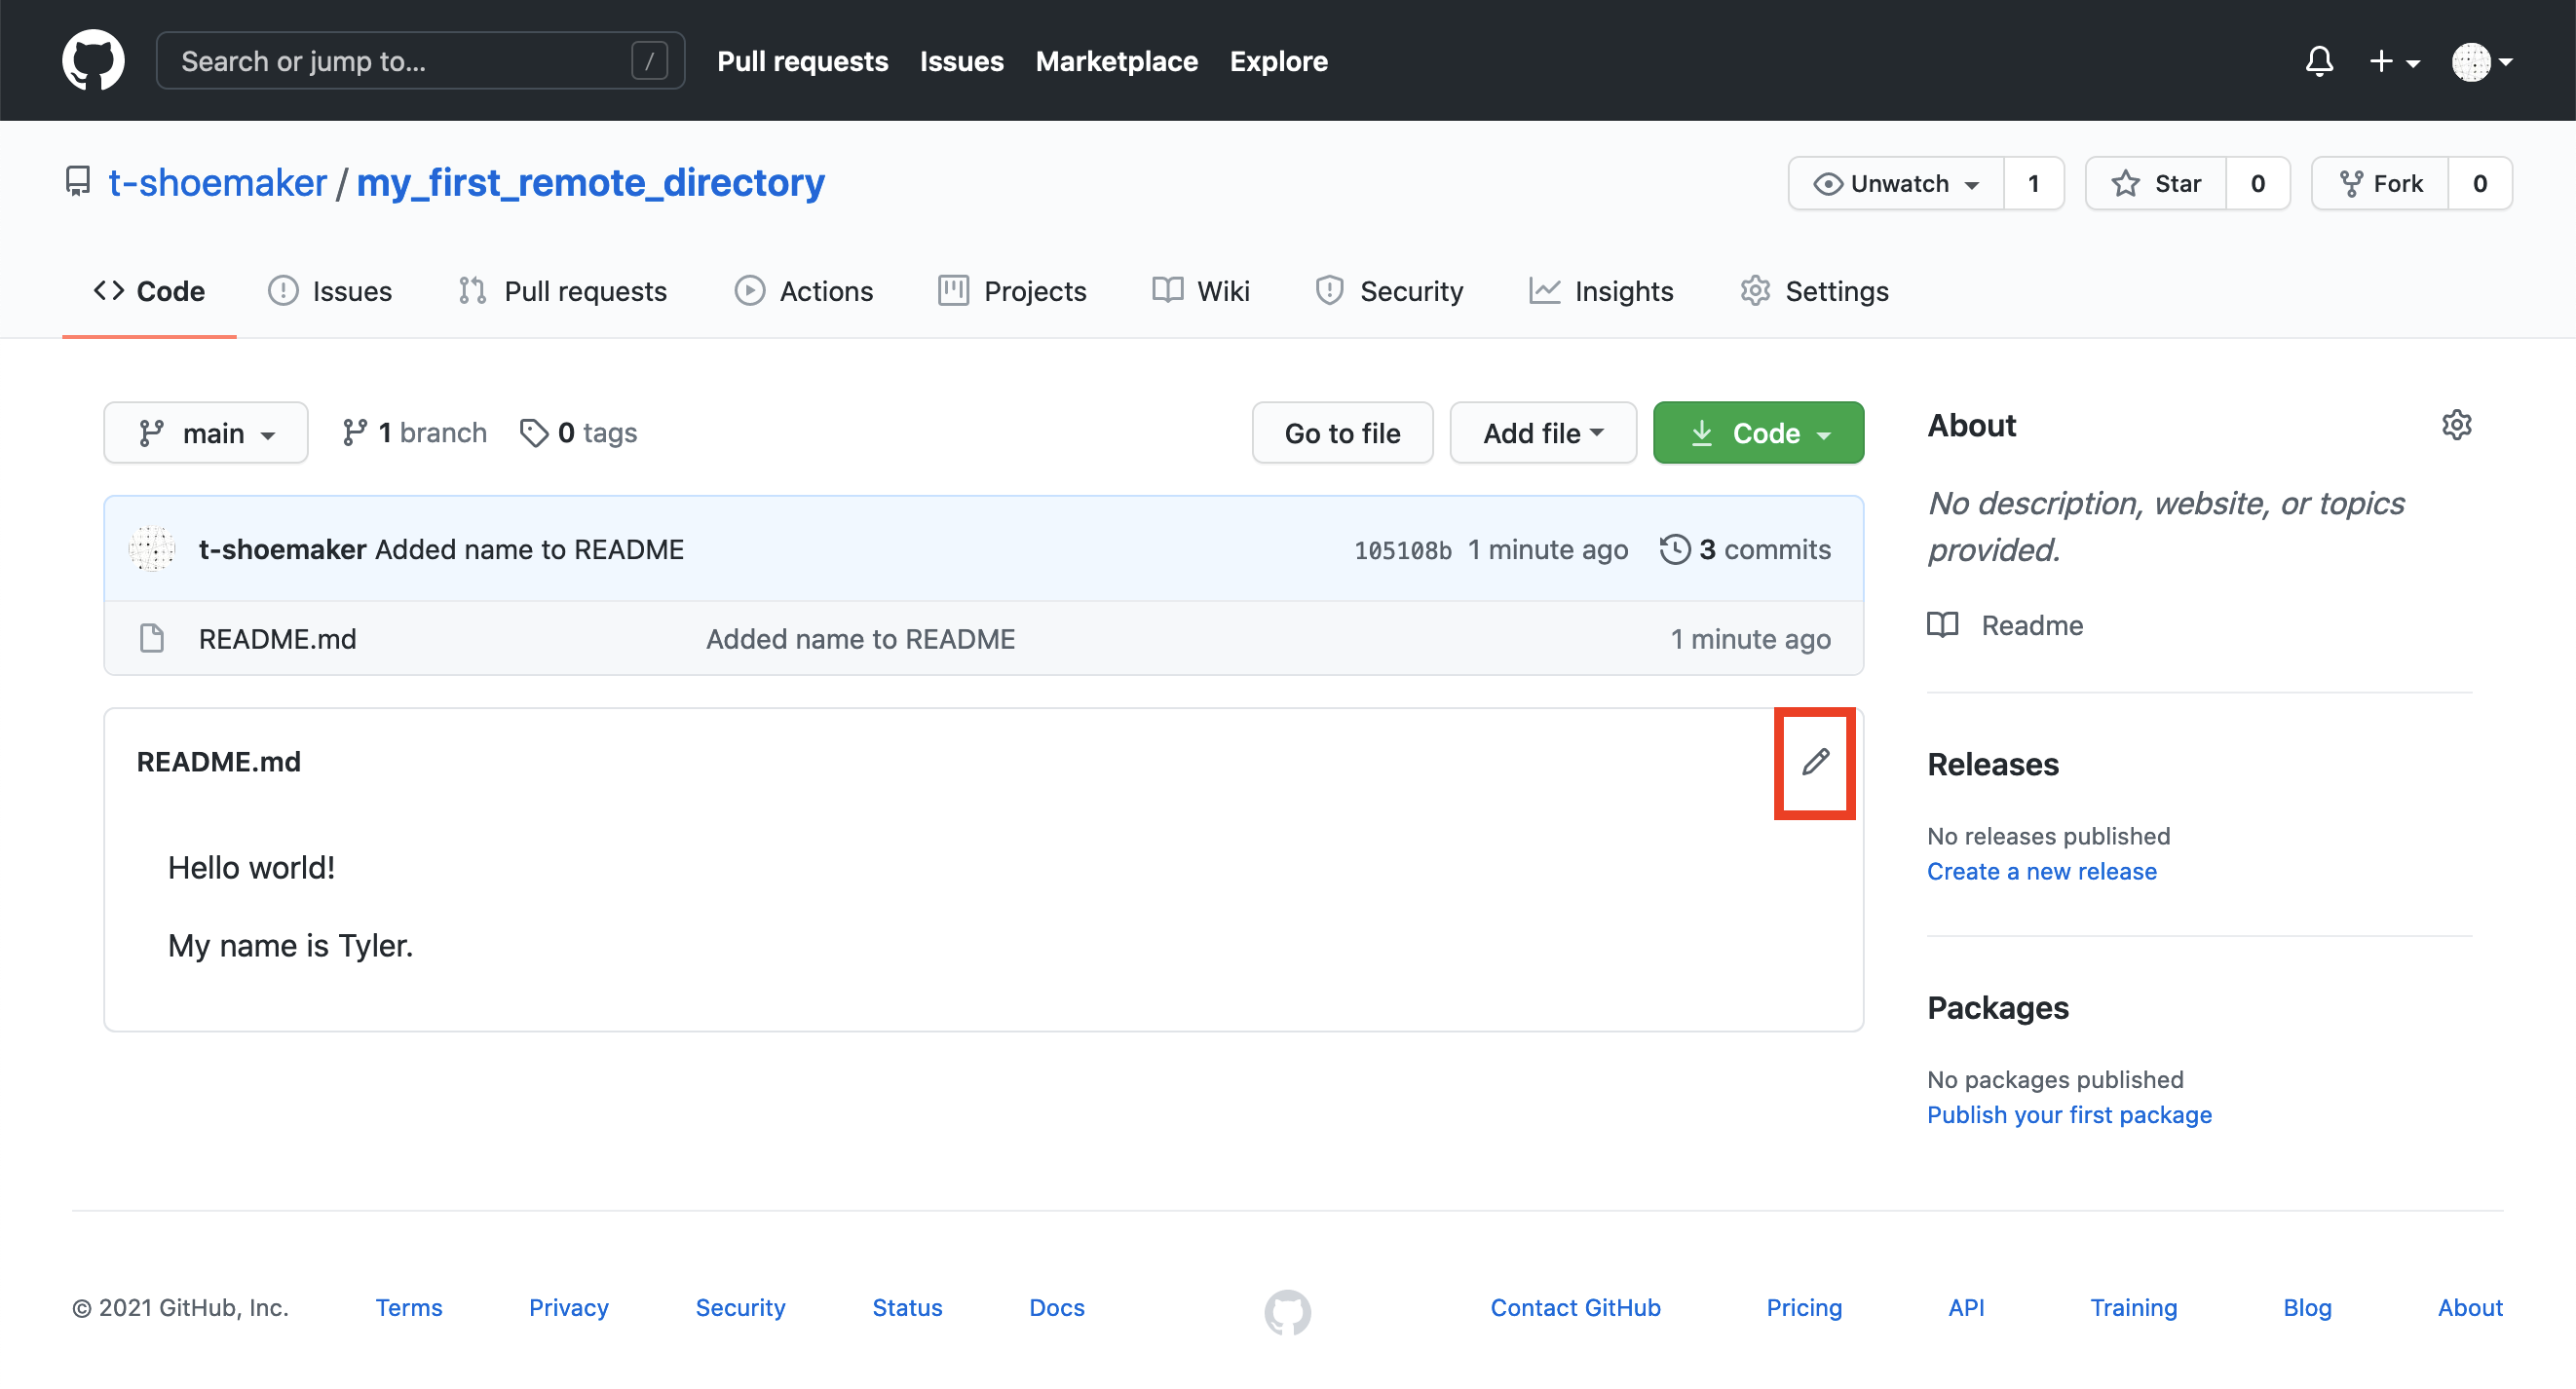
For example, if you return to the main page of “my_first_remote_directory”, you can alter the README directly on GitHub. Click the pencil in the right-hand corner of the rendered file.
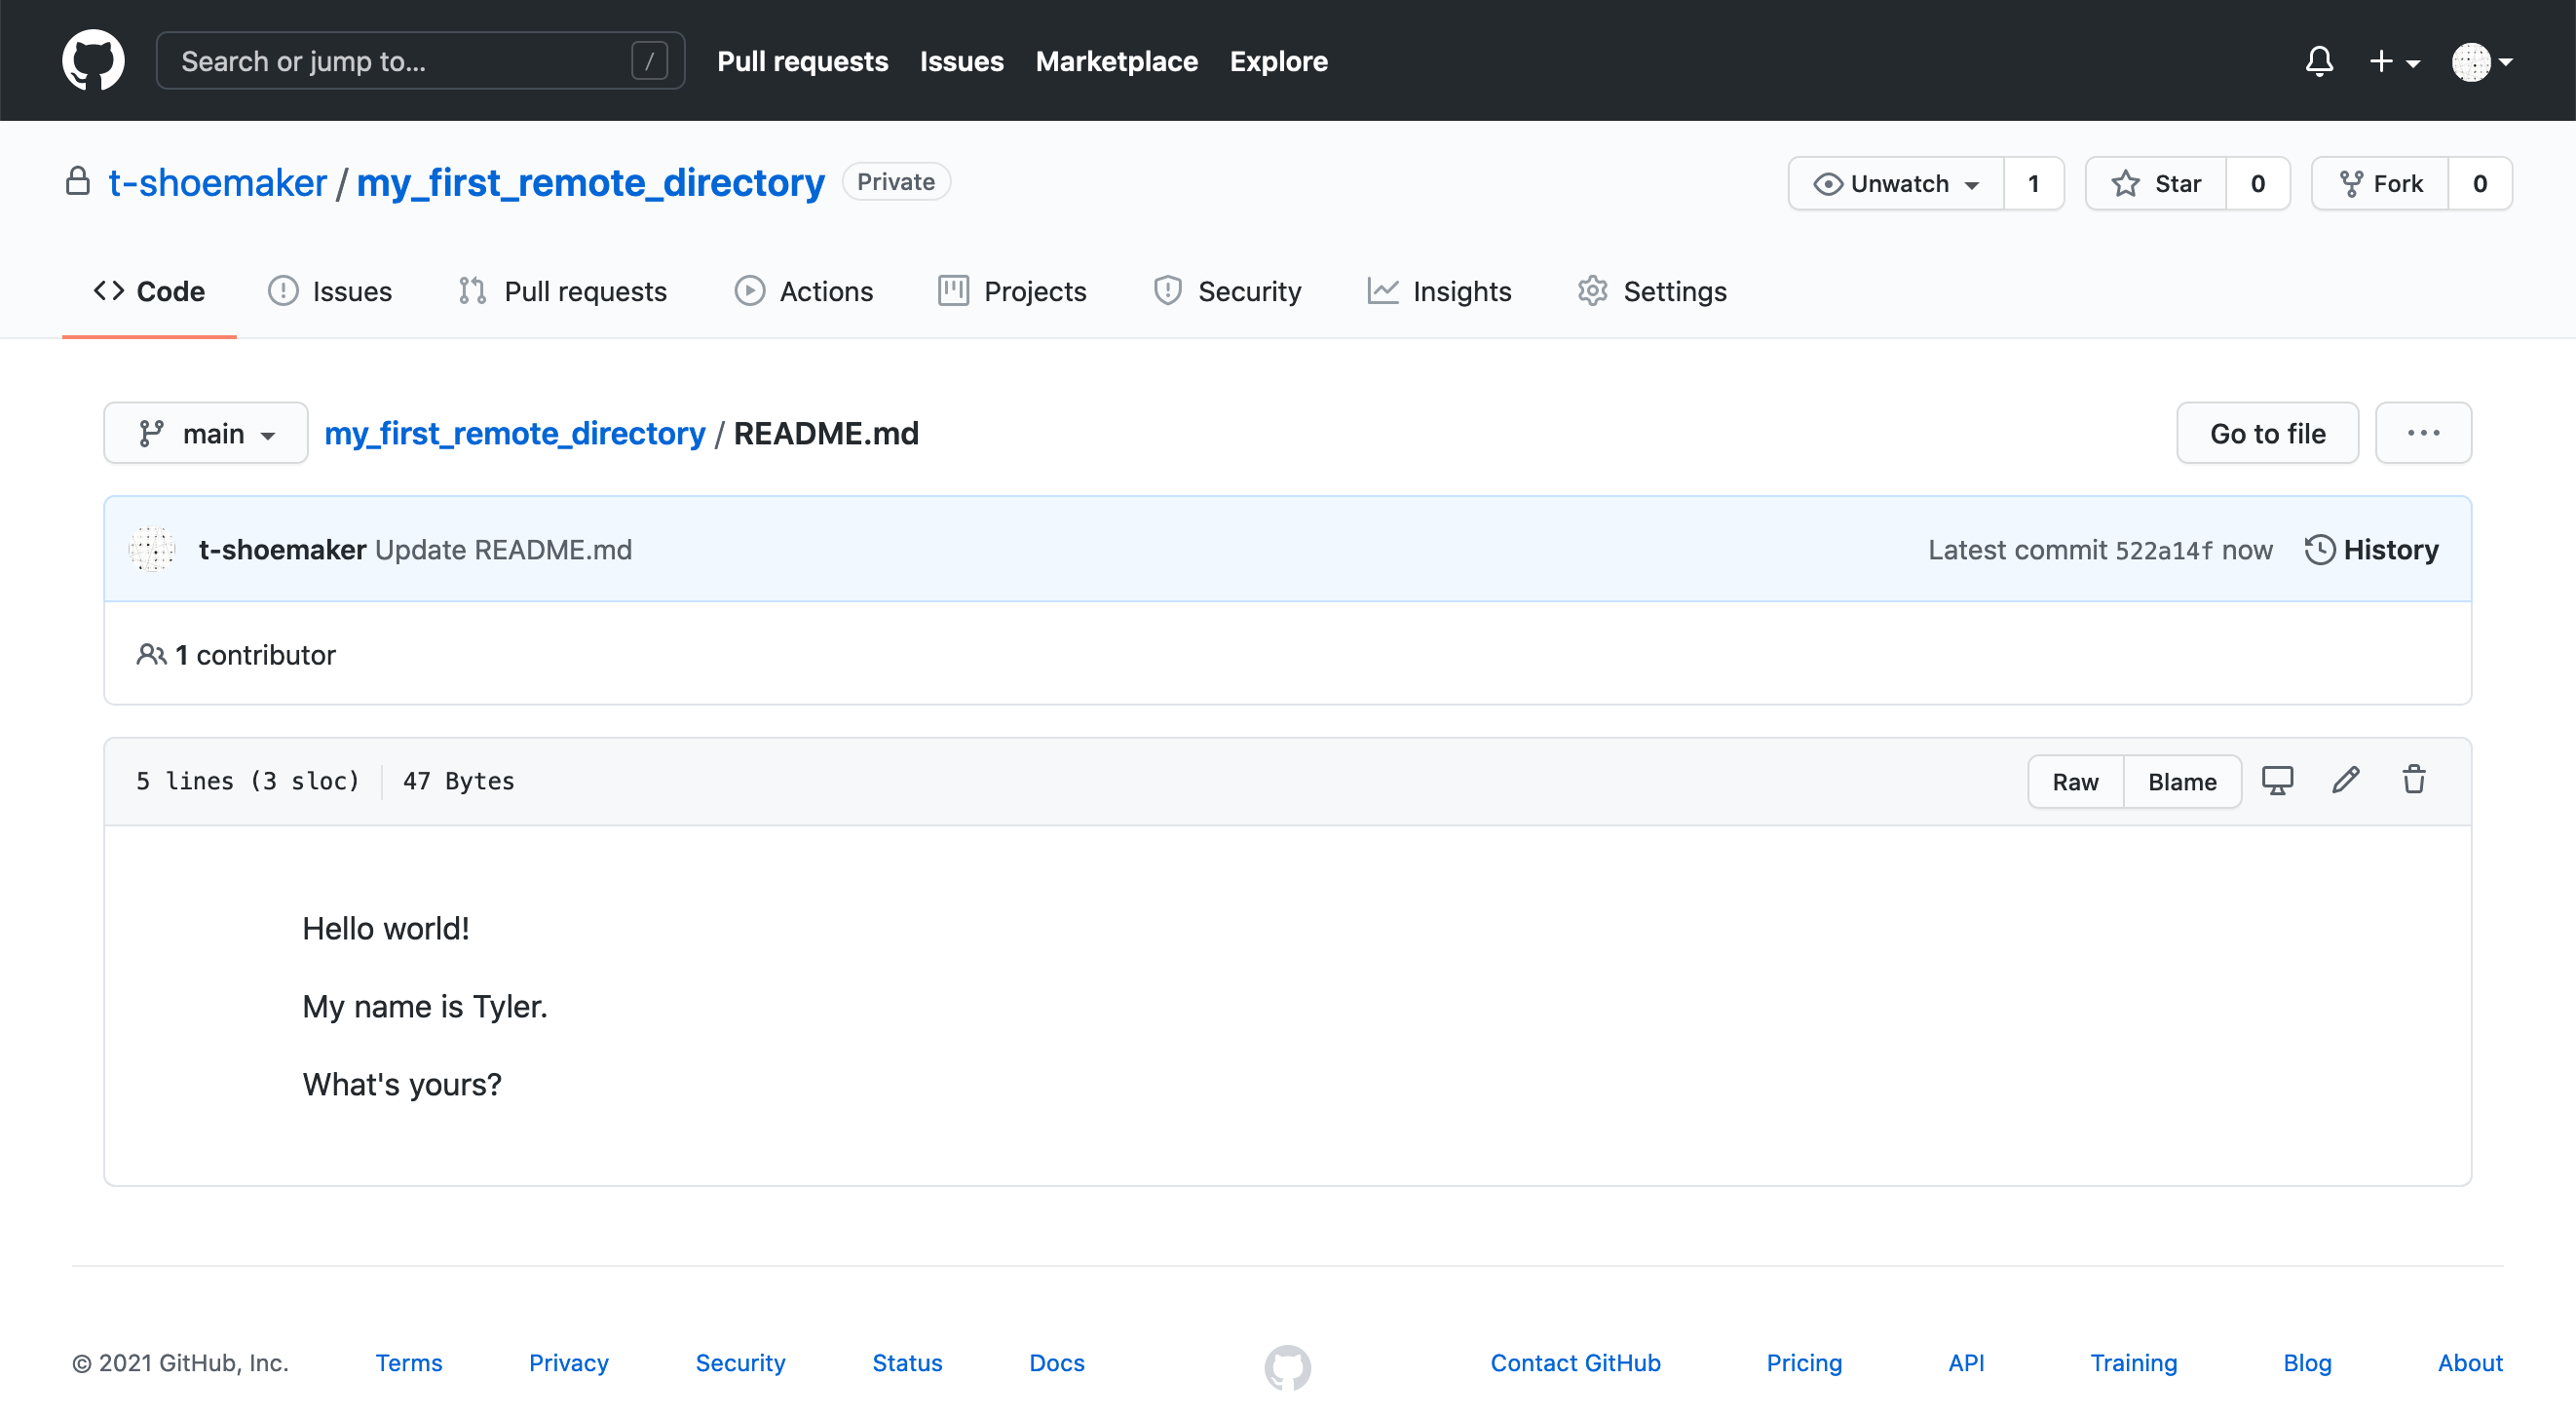
This will open up a text editor interface. Using it, add “What’s yours?” on the fifth line of the document. The complete document should look like this:
Hello world!

My name is <your name>

What's yours?
Scroll to the bottom and click the green “Commit changes” button. This is the
equivalent of doing git add <file> and git commit -m <message> on the
command line.
You’ll see something like the following:
Back on the command line, you can run git fetch to see whether any changes
have been made to the remote repository.
git fetch
remote: Enumerating objects: 5, done.
remote: Counting objects: 100% (5/5), done.
remote: Total 3 (delta 0), reused 0 (delta 0), pack-reused 0
Unpacking objects: 100% (3/3), 666 bytes | 333.00 KiB/s, done.
From github.com:t-shoemaker/my_first_remote_directory
   78bf509..2335530  main       -> origin/main
With this information about your remote repository pulled down to your computer, you can run a status check. If you do so, you’ll see that your local repository is now out of sync with the remote one.
git status
On branch main
Your branch is behind 'origin/main' by 1 commit, and can be fast-forwarded.
  (use "git pull" to update your local branch)

nothing to commit, working tree clean
If you haven’t made any changes to your directory, syncing it with the remote
version can be achieved with a straightforward pull command:
git pull
Updating 78bf509..2335530
Fast-forward
 README.md | 2 ++
 1 file changed, 2 insertions(+)
Your files are now synced. A later portion of this reader will discuss how to handle this process when you have made changes to your directory between the time the remote was altered and the time you go to make a pull.
2.6. Keeping Certain Files Untracked#
Before moving on, let’s briefly consider files that you don’t want Git/GitHub to track. When you’re using remote repositories, you’ll often find yourself in situations where you don’t want to share certain things with everyone who might come across your repository. Information about your system configuration, passwords, or other sensitive data are all examples of things you shouldn’t push to GitHub. Most modern operating systems (such as Mac or Windows) also automatically create and store a lot of hidden configuration files within the computer’s directory structure. For example, below is a file listing for a directory containing resources for a workshop the DataLab offers about text mining and R:
ls
D3VIS data gephi_tutorial kumu_tutorial r_networks readme.txt scraping text_mining
And here is the same directory listing showing hidden files:
ls -a
.   .DS_Store   D3VIS   gephi_tutorial   r_networks   scraping
..  .git        data    kumu_tutorial    readme.txt   text_mining
Note the appearance of the previously hidden .DS_Store and .git directories
when we run ls -a. These are those system- and directory-specific
configuration files. Git is pretty smart, and it knows to ignore its own hidden
configuration files, but we need to tell it explicitly to ignore the other one
using a special file called .gitignore. You can create a .gitignore file
from scratch using Vim by typing vim .gitignore on the command line. When you
do this, Vim will open a new file. Then, you simply add the names of files and
directories that you want Git to ignore, putting one per line of the new file.
.httr-oauth
.DS_Store
.config
data/*
Note in this example that we’ve also added the data folder and any of its
contents to .gitignore. This is for two reasons, which we discussed earlier:
it’s generally bad practice to track data files with version control systems; 2) the free version of GitHub (which you’re probably using) puts a cap on the total size of a repository. It would be a waste of space to have data eating away at that size limit.
Generally speaking, you should place your .gitignore file in the root of your
repository, where it will control Git behavior for the repository. You can
create a global .gitignore file, but this requires you to run various system
configurations on Git itself. Information on this process can be found
here. GitHub also provides a nice
repository of template .gitignore files for various types of development
here.