1 Command Line Tools
1.1 Git
1.1.1 Introduction
Git is a ubiquitous software for version control. Version control describes a process of storing and organizing multiple versions (or copies) of documents that you create. Approaches to version control range from simple to complex and can involve the use of various human workflows and/or software applications to accomplish the overall goal of storing and managing multiple versions of the same document(s).
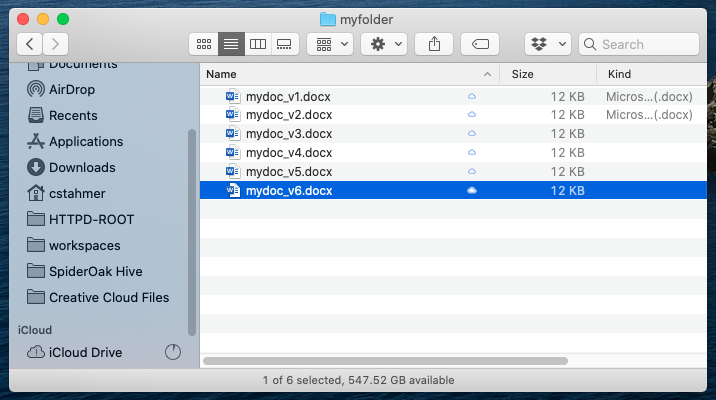
Most people have a folder/directory somewhere on their computer that looks something like this:
Or perhaps, this:
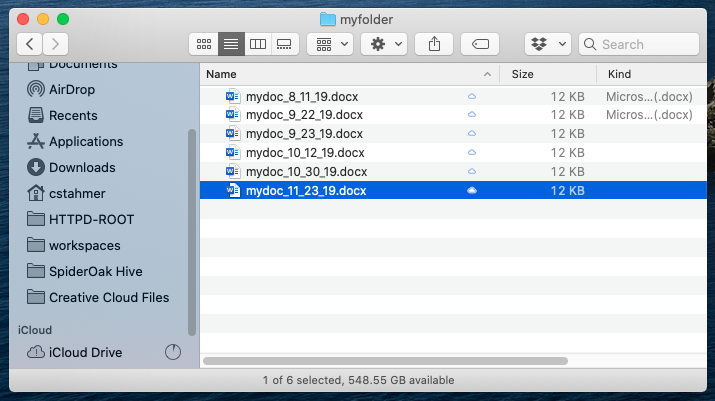
This is a rudimentary form of version control that relies completely on the human workflow of saving multiple versions of a file. This system works minimally well, in that it does provide you with a history of file versions theoretically organized by their time sequence. But this filesystem method provides no information about how the file has changed from version to version, why you might have saved a particular version, or specifically how the various versions are related. This human-managed filesystem approach is more subject to error than software-assisted version control systems. It is not uncommon for users to make mistakes when naming file versions, or to go back and edit files out of sequence. Software-assisted version control systems such as Git were designed to solve this problem.
If you would like more information on how Git works, read more in the Git Book for free.
1.1.2 Git on Windows
Follow these step-by-step instructions if you’re installing Git on a Windows machine:
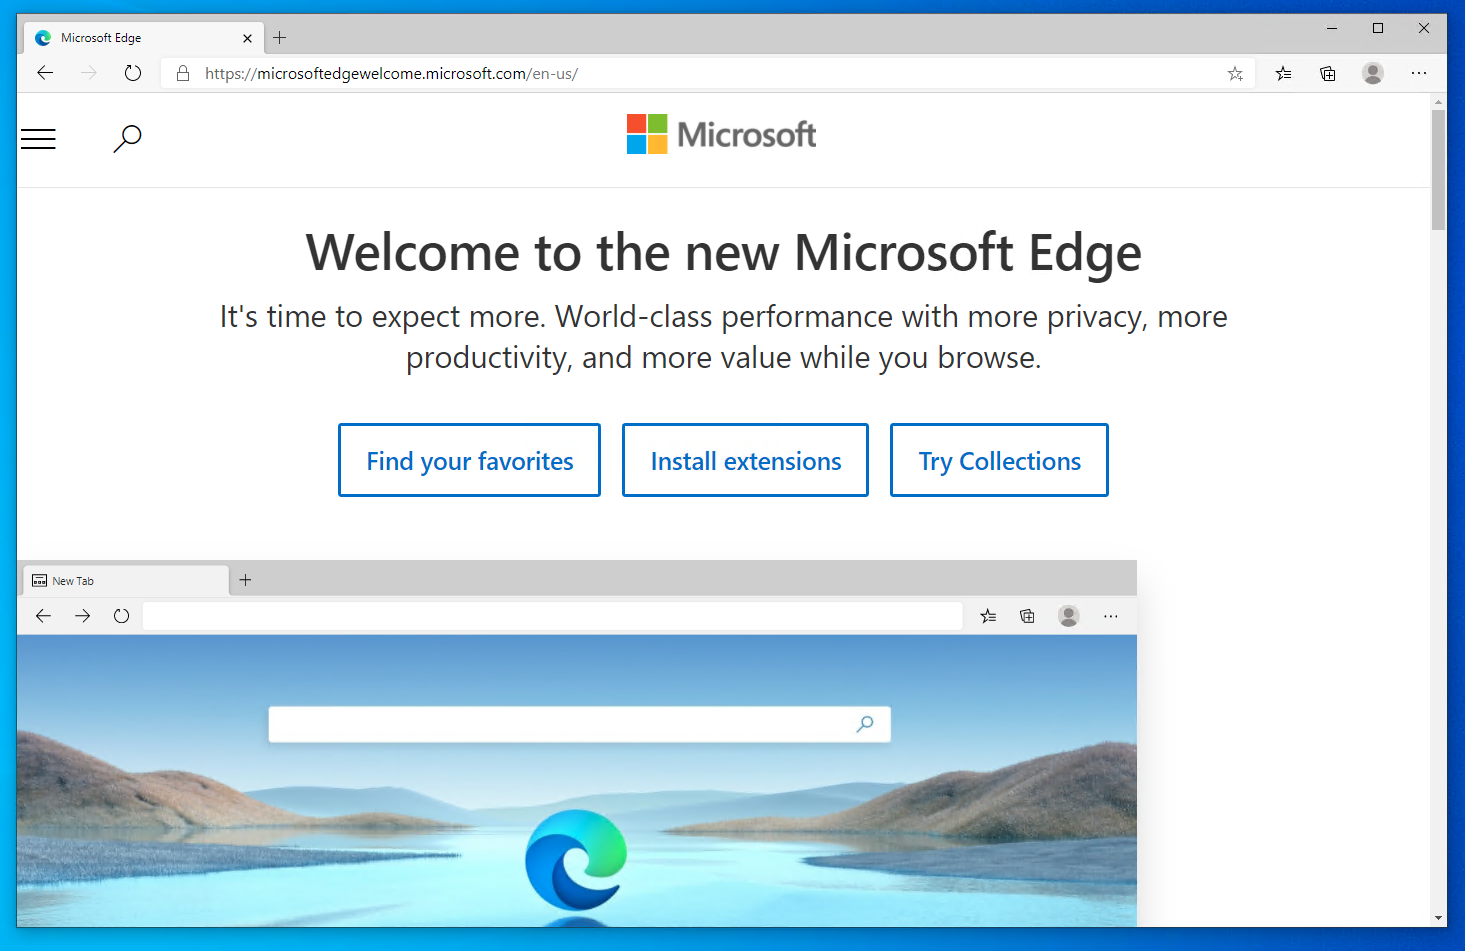
First, launch a web browser, the image below shows the Microsoft Edge browser:
Next, navigate to the following Git download URL in your browser https://git-scm/com/downloads:
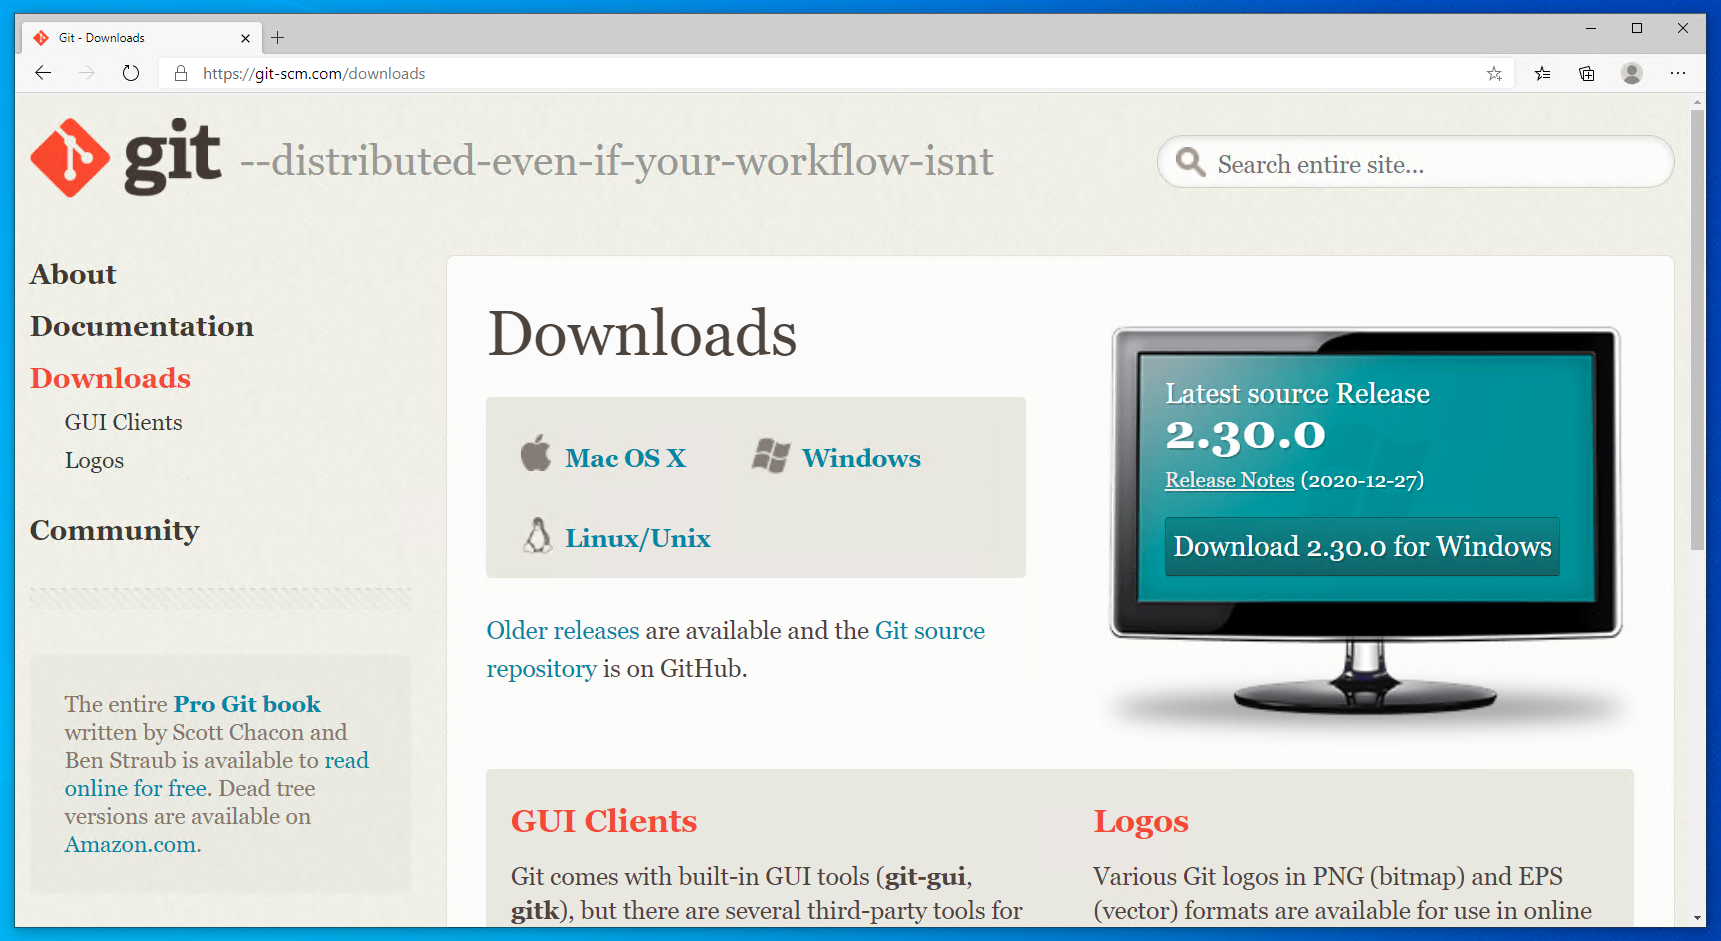
Select “Windows” from the Downloads portion of the Git webpage. Git will display the following page and automatically being downloading the correct version of the Git software. If the download doesn’t start automatically, click on the “Click here to download manually link”:
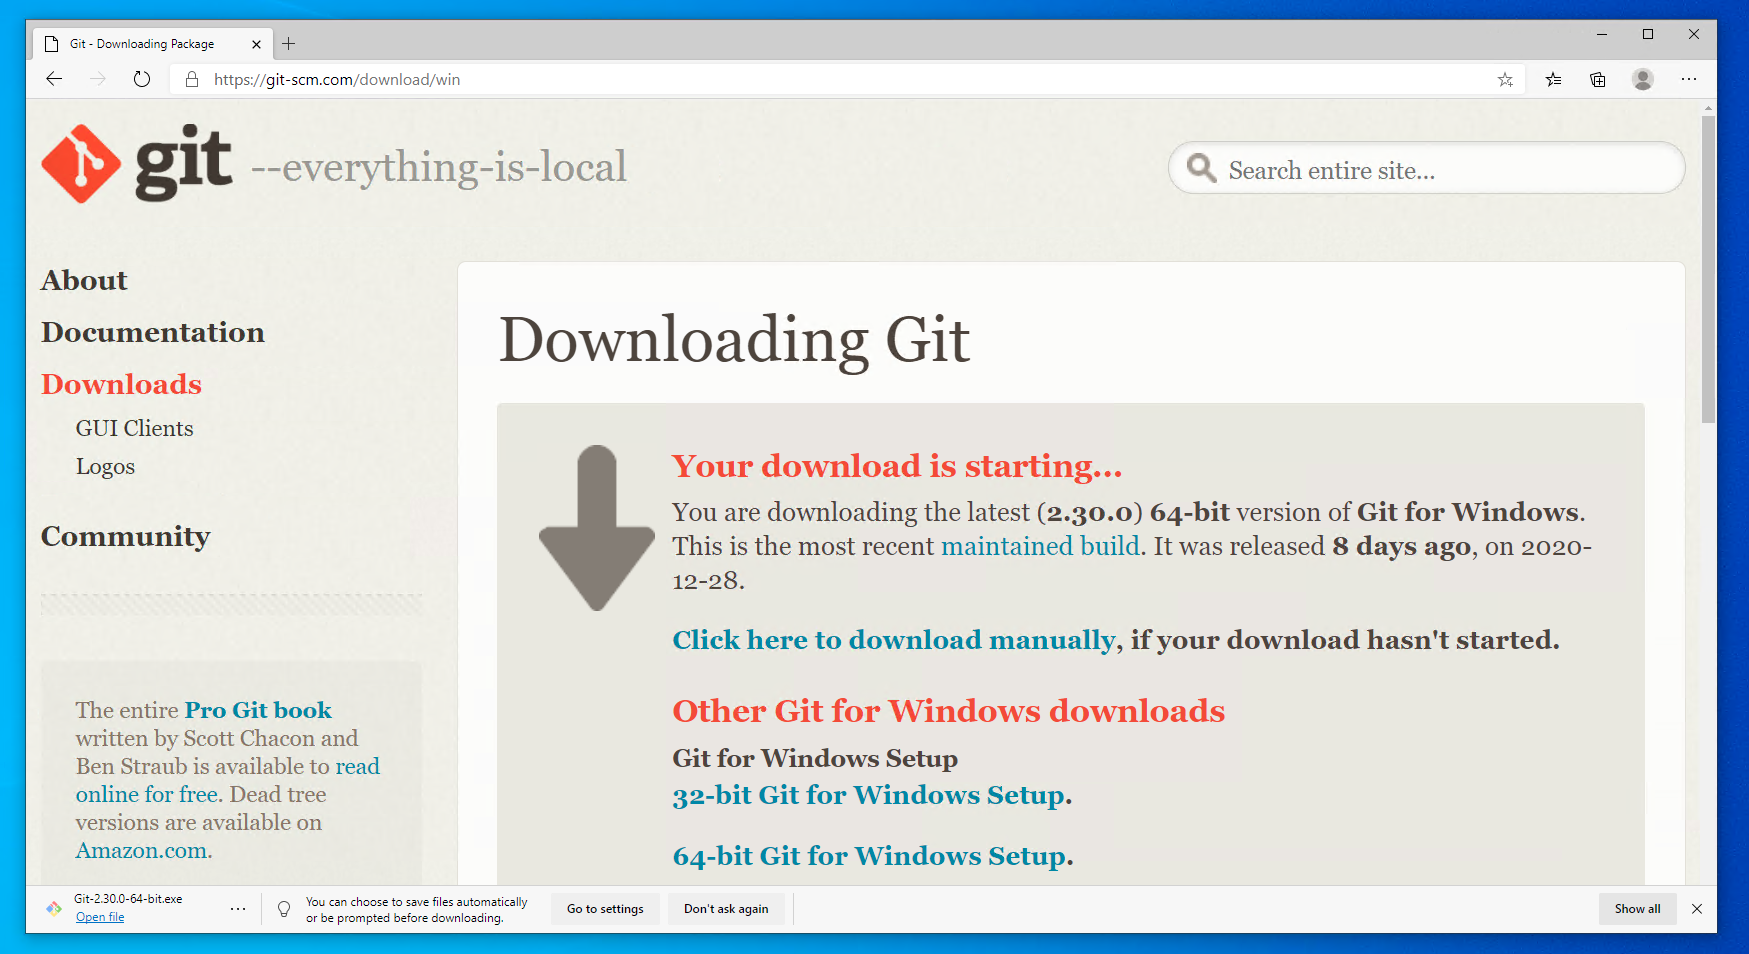
When the download is complete, open/Run the downloaded file (will look different in different browsers, but everyone should know how to do this):

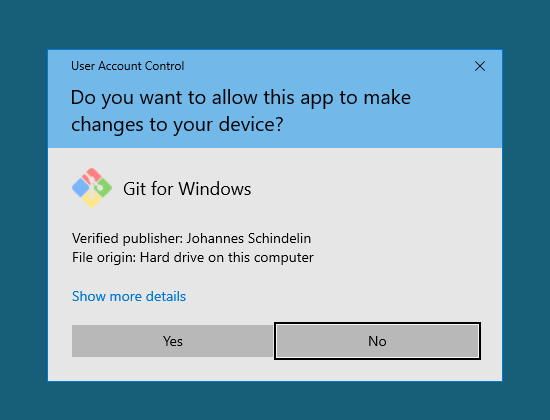
A screen will appear asking for permissions for the Git application to make changes to your device. Click on the Yes button:
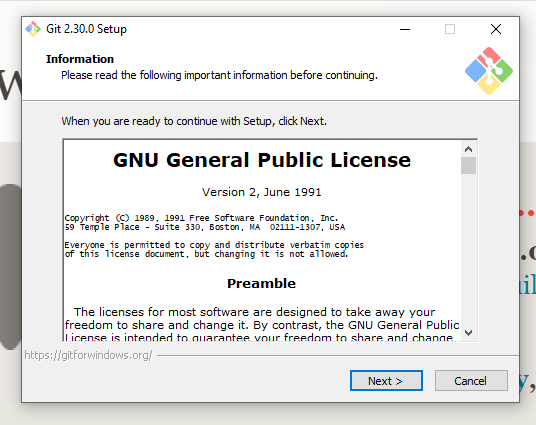
Click Next to accept the user license:
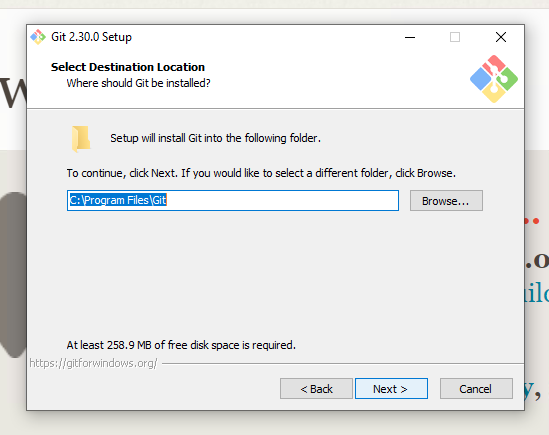
Leave the default “Destination Location” unchanged (usually C:\Program Files\Git) and hit Next
You will see a screen like the one below asking you to “Select Components”:
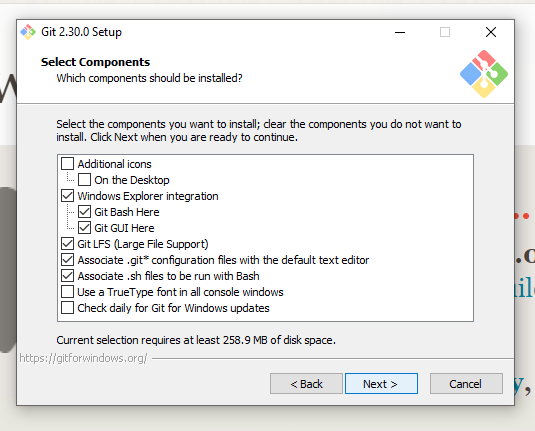
Leave all of the default components selected and also check the boxes next to “Additional Icons” and it’s sub-item, “On the Desktop”. Your completed configurations window should have the following components selected:
Additional Icons
    -> On the Desktop
Windows Explorer integration
    -> Git Bash Here
    -> Git GUI Here
Git LFS (Large File Support)
Associate .git* configuration files with default text editor
Associate .sh files to be run with Bash
And should look like this:
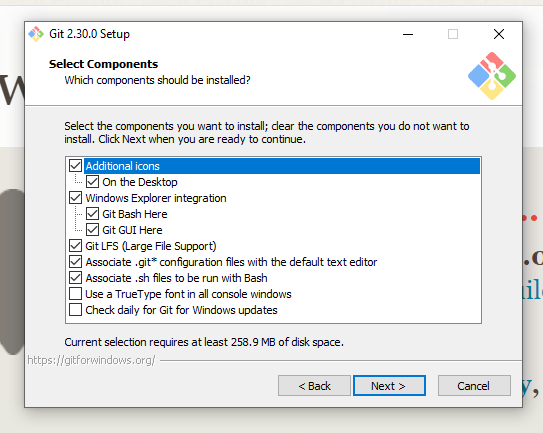
After verifying that you have the necessary components selected as per above, hit Next.
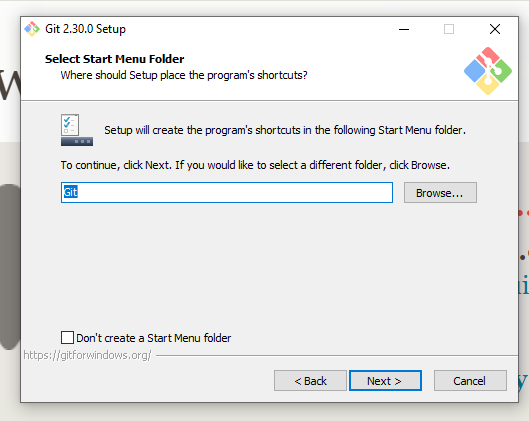
The next screen will ask you to “Select a Start Menu Folder.” Keep the default value of Git and hit Next:
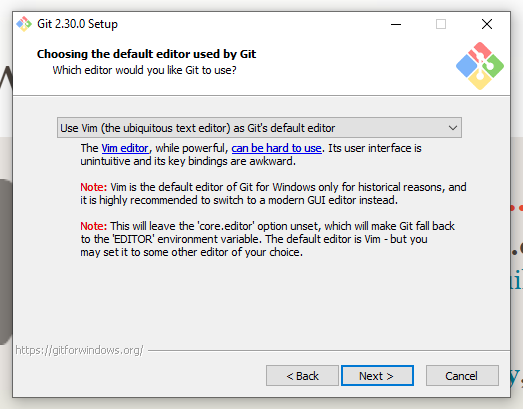
Leave the default “Use Vim (the ubiquitous text editor) as Git’s default editor” selected on the “Choosing the default editor used by Git” screen and hit Next:
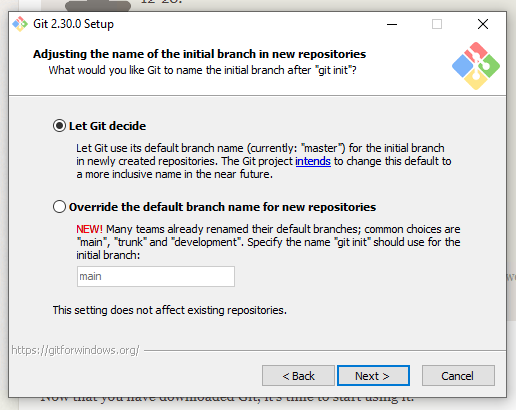
On the next screen, leave the default “let Git decide” option selected and hit Next:
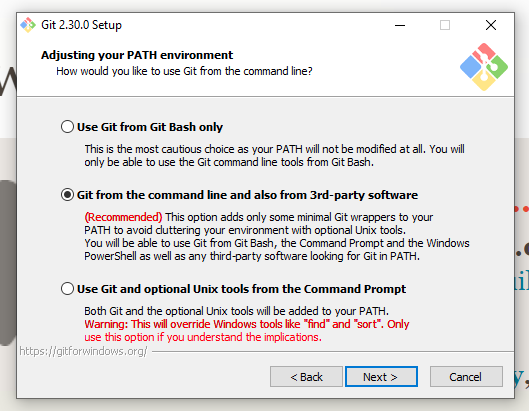
Leave the default “Git from the command line and also from 3rd-party software” selected and hit Next:
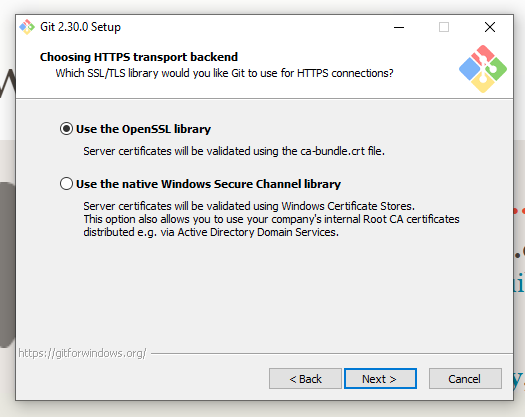
On the next “Choosing HTTPS transport backend” page leave the default “Use the OpenSSL library” option selected and hit Next:
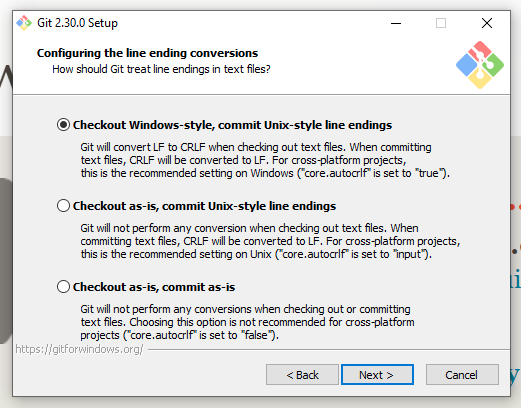
Leave the default “Checkout Windows-style, commit Unix-style line endings” selected on the next page and hit Next:
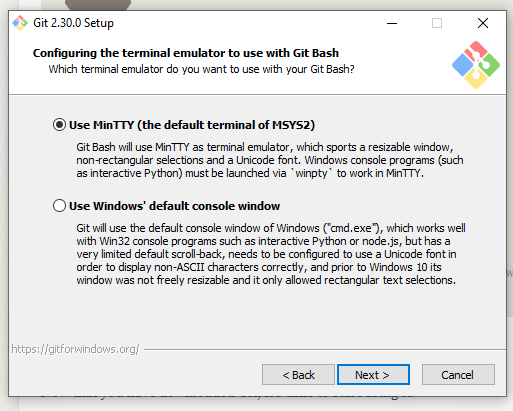
Keep the default “Use MinTTY (the default terminal of MSYS2)” selected on the “Configuring the terminal emulator to use with Git Bash” window and hit Next:
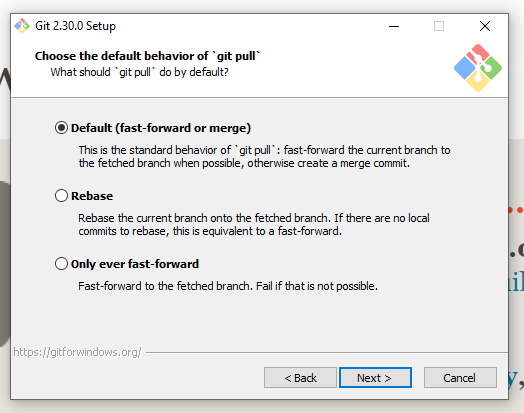
Keep the default value of “Default (fast-forward or merge)” on the “Choose the default behavior of ‘git pull’” page and hit Next:
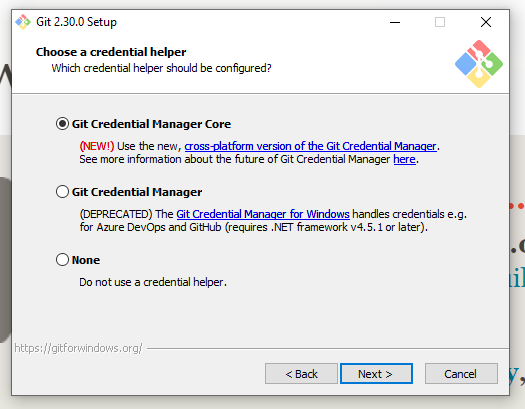
Keep the default value of “Git Credential Manager Core” on the “Choose a credential helper” page and hit Next:
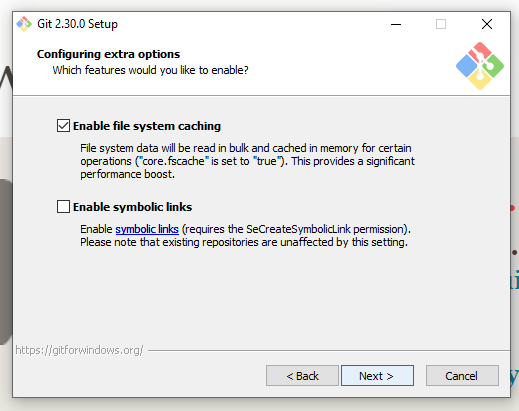
Keep the default values on the “Configuration extra options” page by keeping “Enable file system caching” checked and “Enable symbolic links” unchecked and then hit Next:
Make sure that no options are checked in the “Configuring experimental options” page and hit Install:
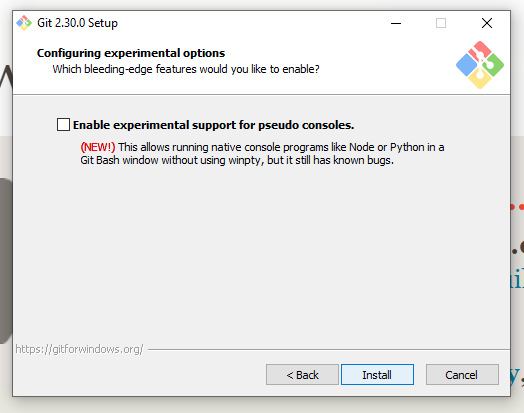
After you hit this Install button as per above, you will see an install progress screen like the one below:
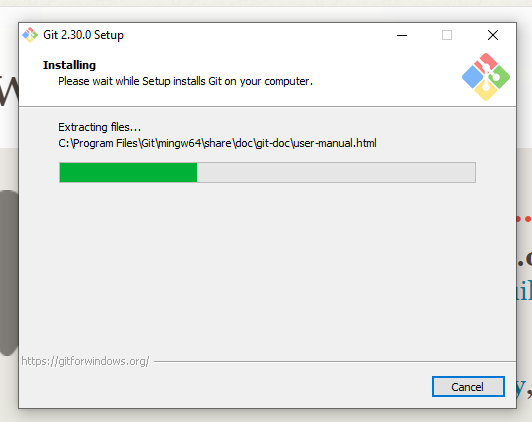
When the install is complete, a new, “Completing the Git Setup Wizard” window like the one below will appear:
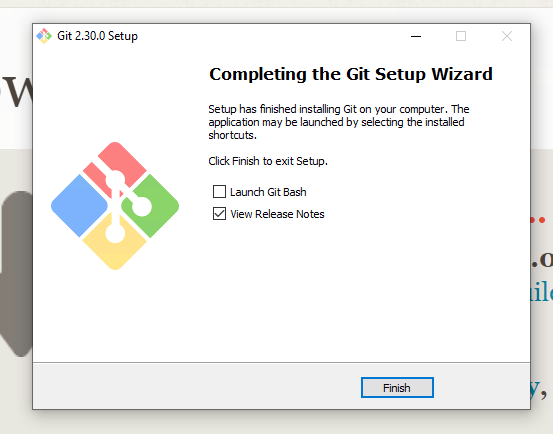
Make sure that all of the options on this window are unchecked as in the image below and then hit the Finish button:
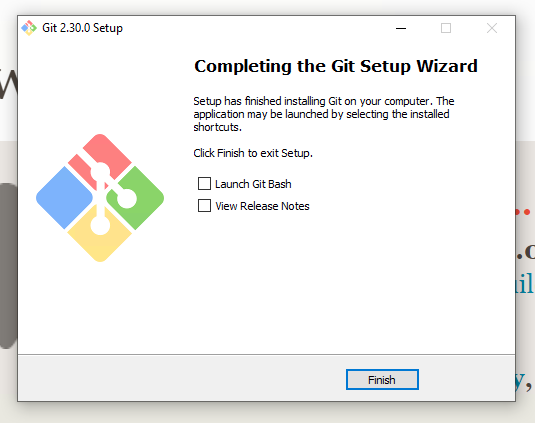
This will complete your installation process.
Windows users should verify that when downloading Git for Windows they have also installed Git Bash, which is necessary for working with Git in command line.
1.1.3 Git on Mac
If you are installing Git on a Mac, there is no extra configuration. Simply go the git download page at https://git-scm.com/downloads and choose the latest version for mac, and run the installer package when it is finished downloading. If you get an “unknown developer” warning during the install process, follow the instructions at the beginning of the video at https://www.youtube.com/watch?v=__kr-Ew5kbE to help you work through this problem.
1.1.4 Verifying your install
Whether you’re installing on Windows or Mac, note that unlike most applications that you’ve installed before, you will not find a “Git” application in your programs or applications directory once the installation is complete. As long as you don’t get an explicit error message during the installation process, you can assume that the software was successfully installed. Git is a command-line application with which you interact using the command-line, which we’ll cover during the interactive session. If you’re already familiar with using command line, you can verify your install by opening the terminal (for Windows that will be Git Bash in your programs menu) and type git –version. You should then see a response of your installed version (e.g., git version 2.12.2.windows.2, or git version 2.12.2.mac.2), and not the error “command not found.”
1.1.5 Installation troubleshooting
If you are not able to successfully install Git on your own, please attend DataLab’s Virtual Office Hours. Click here for more information and to receive a Zoom link.
1.2 Windows Subsystem for Linux (Ubuntu)
1.2.1 Introduction
Windows now has the ability to install a linux operating system on your machine without the use of an emulator. This gives you a full-featured linux environment that can interact with your normal files.
1.2.2 Check your windows version
First, please check the build version of Windows that you are using. This can be done by selecting the Windows logo key + r on your keyboard. Once you do that, you should see the windows Run prompt:
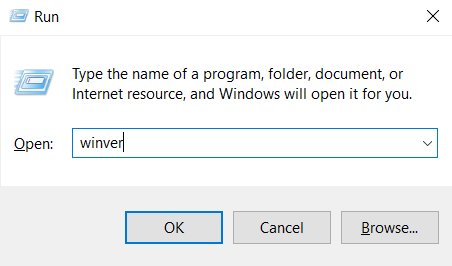
Type the command “winver” (no quotes) into the prompt, as depicted in the image above, and hit enter. You should see a screen similar to this:
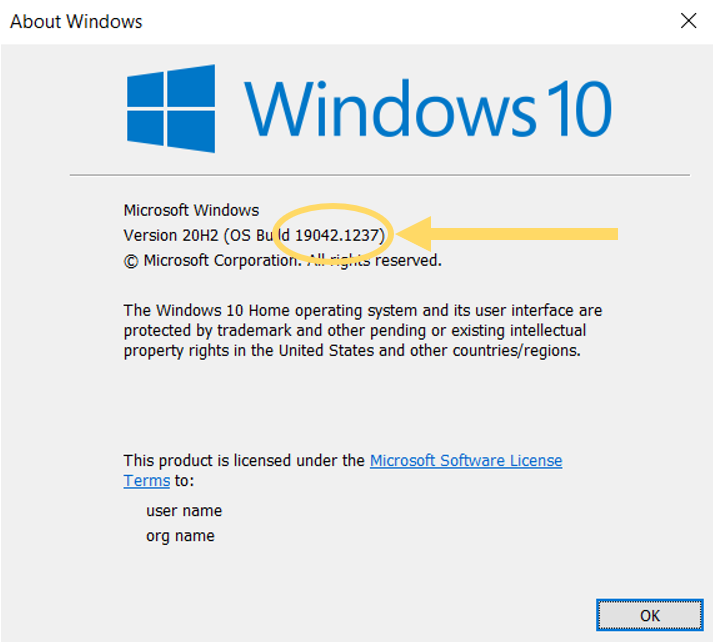
Your build version number is the one that follows the “Windows Build” text (as highlighted in the above image). Depending on whether your build number is larger or smaller than 19041, please follow the appropriate directions below:
1.2.2.1 Windows version larger than (or equal to) 19041
In the start menu, search for “Powershell”, right click and select “run as administrator”.
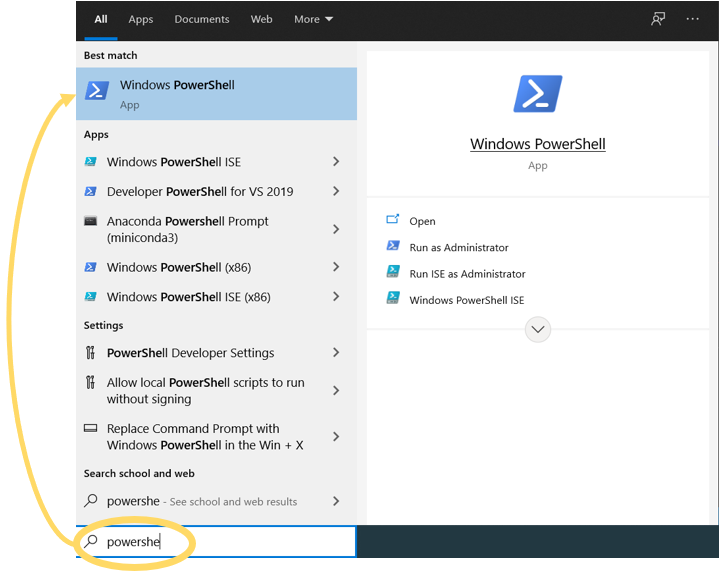
A small blue window should open with a flashing cursor. Please type wsl --install and hit enter:
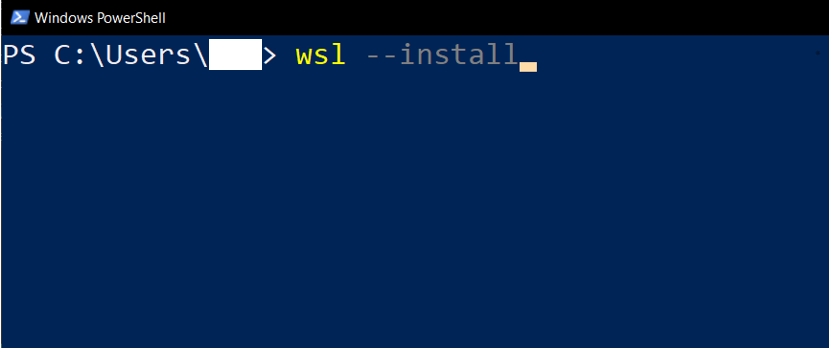
This will take a few minutes to install everything. Once it is finished, please skip to verifying your install.
If the above installation did not work- please try to install using these instructions (even if your version is not smaller than 19041).
1.2.2.2 Windows version larger smaller than 19041
In the start menu, search for “Turn Windows features on or off” and open that settings window.
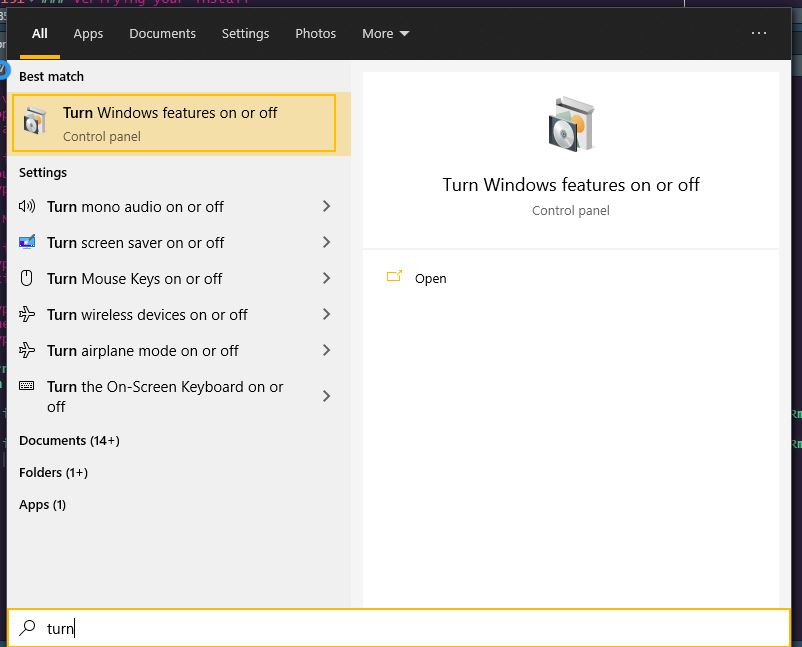
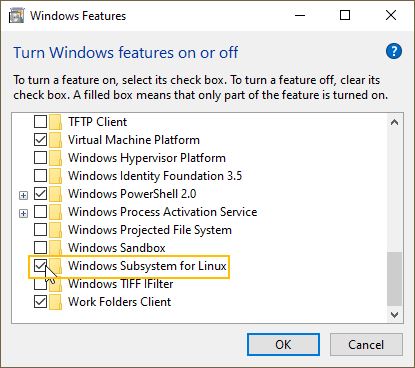
In the settings window, scroll down to “Windows Subsystem for Linux”, check the box next to it, and select OK at the bottom of the window.
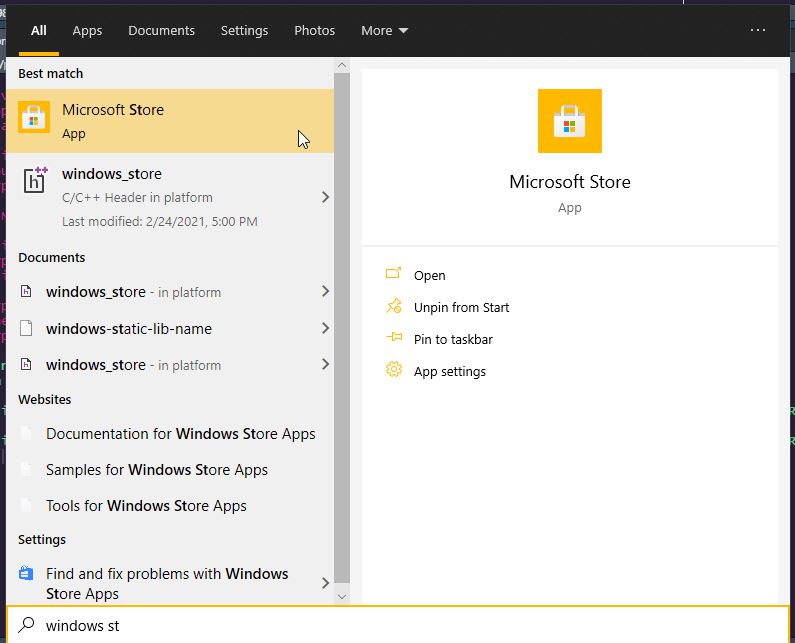
You will not need to restart your computer. Once you have rebooted, open the Windows Store from the start menu.
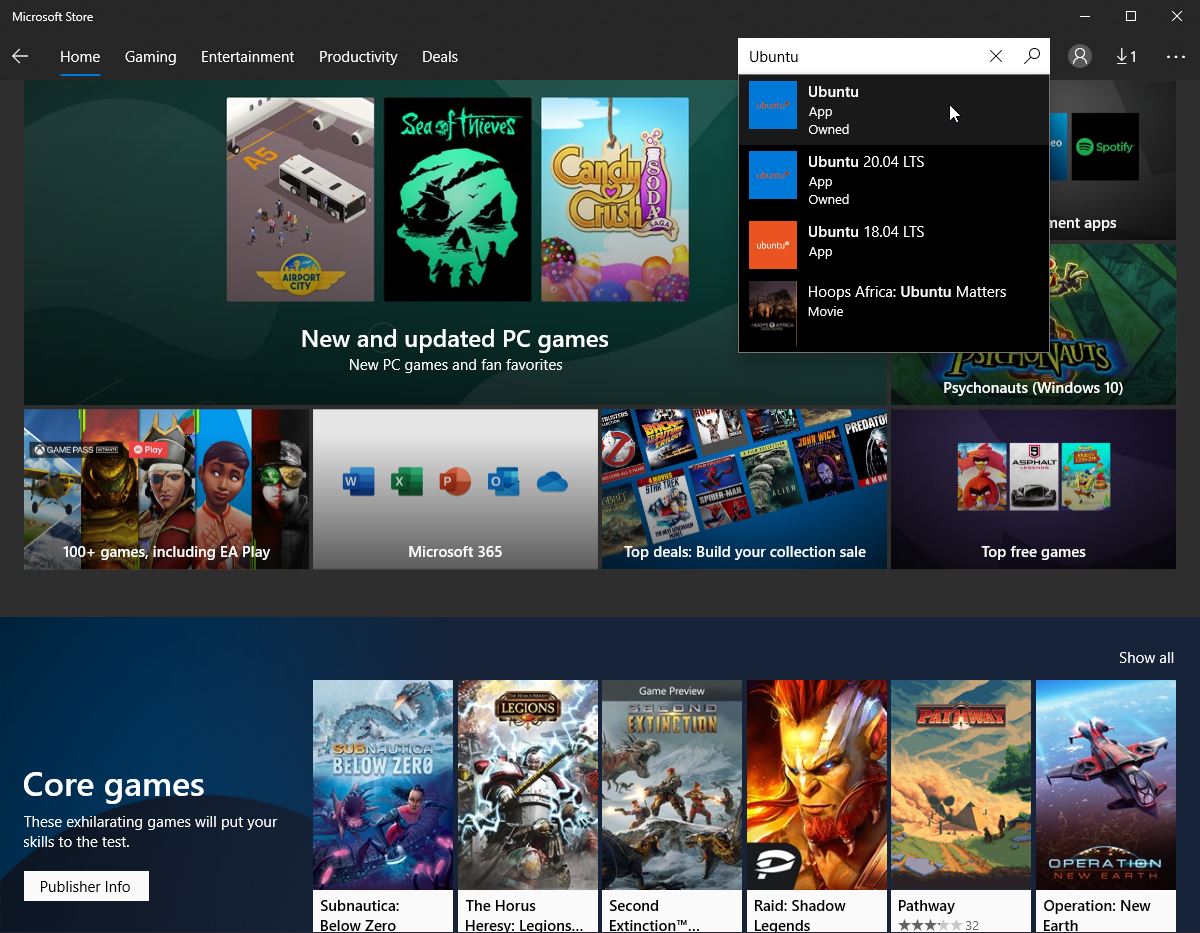
In the Windows Store, search for Ubuntu, and select the version-less one unless you have a reason to pick a specific version.
On the Ubuntu page, select Get to install.
1.2.3 Verifying your install
In the start menu, search for and run Ubuntu.
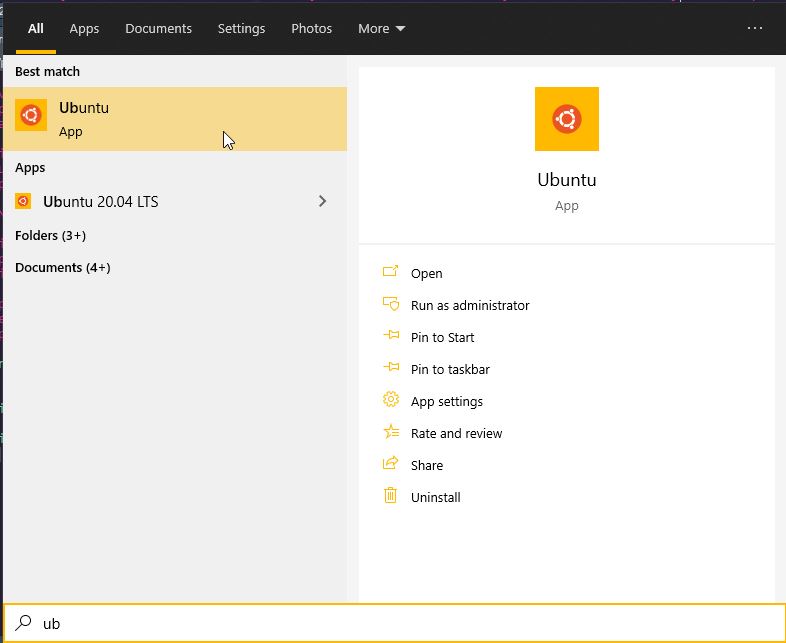
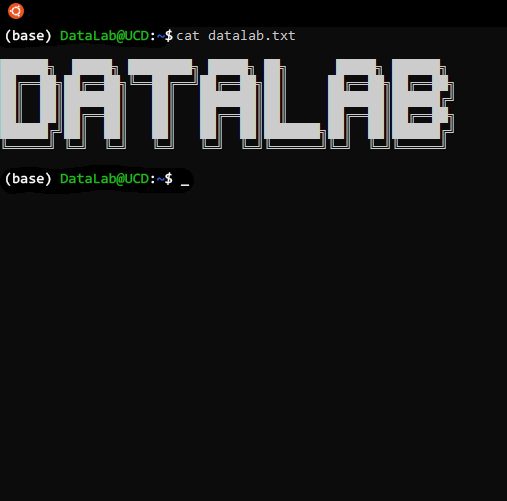
If a terminal window opens, you should be good to go!
1.2.4 Installation troubleshooting
If you are not able to successfully install the Linux Subsystem for Windows on your own, please attend DataLab’s Virtual Office Hours. Click here for more information and to receive a Zoom link.