2 R and R Tools
2.1 R/RStudio
2.1.1 Introduction
“R” is both a free and open source programming language designed for statistical computing and graphics, and the software for interpreting the code written in the R language. RStudio is an integrative development environment (IDE) within which you can write and execute code, and interact with the R software. It’s an interface for working with the R software that allows you to see your code, plots, variables, etc. all on one screen. This functionality can help you work with R, connect it with other tools, and manage your workspace and projects. You cannot run RStudio without having R installed. While RStudio is a commercial product, the free version is sufficient for most researchers.
Why learn R? There are many advantages to working with R.
- Scientific integrity. Working with a scripting language like R facilitates reproducible research. Having the commands for an analysis captured in code promotes transparency and reproducibility. Someone using your code and data should be able to exactly reproduce your analyses. An increasing number of research journals not only encourage, but are beginning to require, submission of code along with a manuscript.
- Many data types and sizes. R was designed for statistical computing and thus incorporates many data structures and types to facilitate analyses. It can also connect to local and cloud databases.
- Graphics. R has built-in plotting functionalities that allow you to adjust any aspect of your graph to effectively tell the story of your data.
- Open and cross-platform. Because R is free, open-source software that works across many different operating systems, anyone can inspect the source code, and report and fix bugs. It is supported by a large community of users and developers.
- Interdisciplinary and extensible. Because anyone can write and share R packages, it provides a framework for integrating approaches across domains, encouraging innovation.
2.1.2 R/RStudio on Windows
Follow these step-by-step instructions to install R and RStudio on a Windows machine:
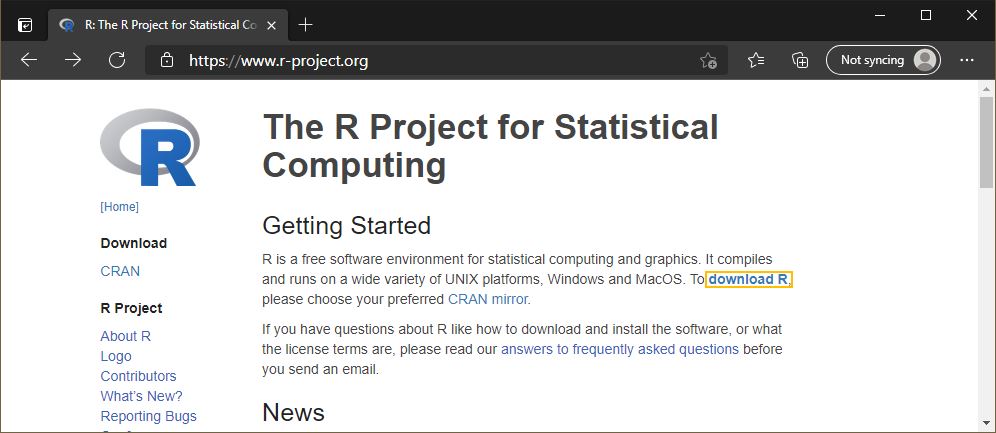
First open your internet browser of choice, and navigate to https://www.r-project.org/. Click on download R.
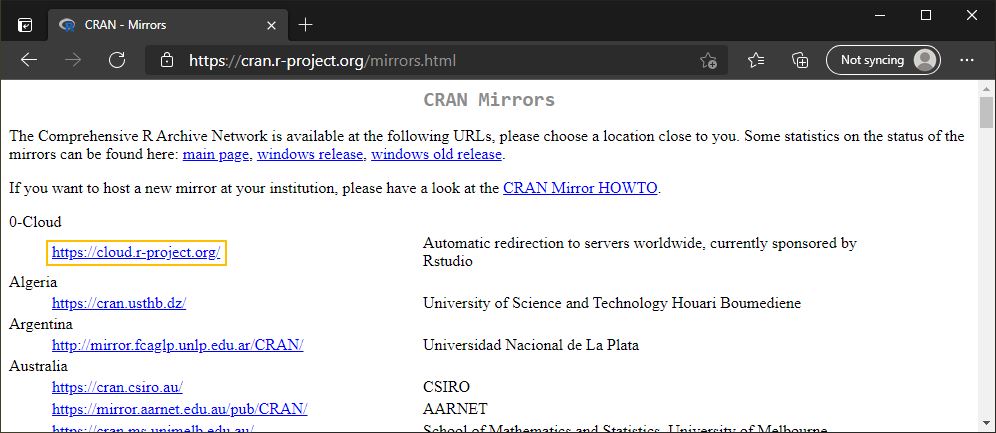
On the following page, select the link under whatever location is closest to you for the best download speed (though any will work).
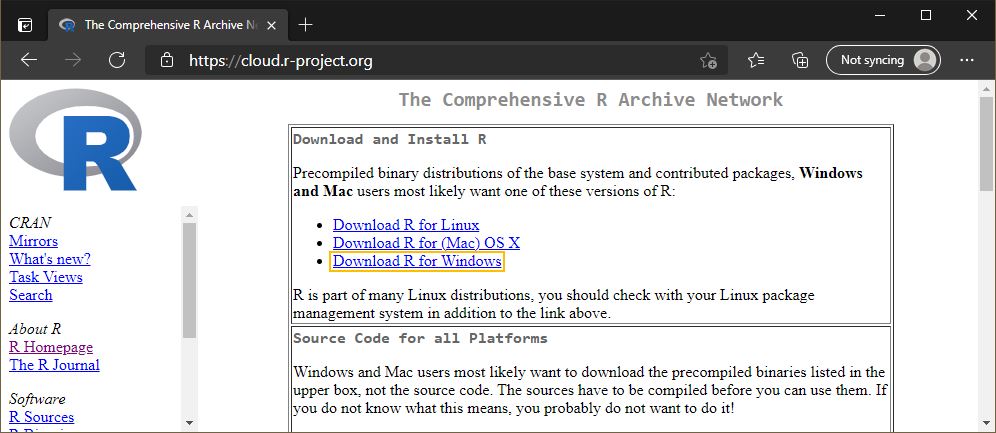
Next, click the Download R for Windows link.
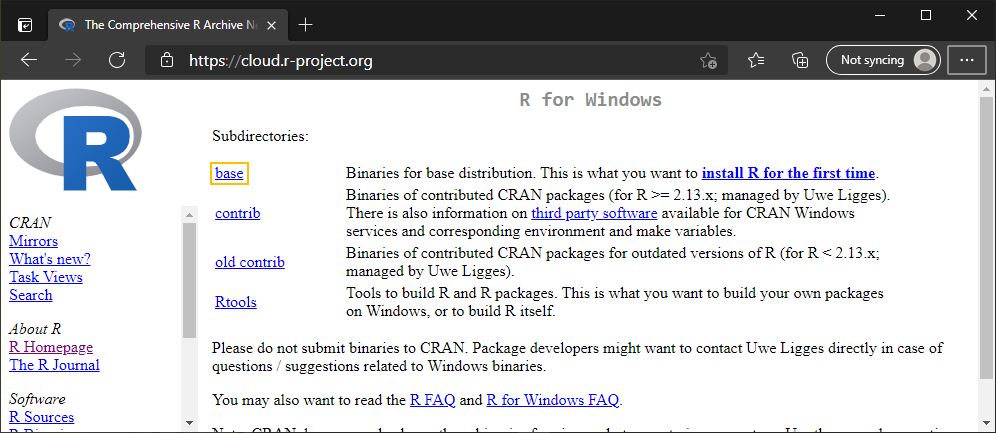
Click on the link base to go to the download page.
Finally, click Download R X.X.X for Windows to download the installer.
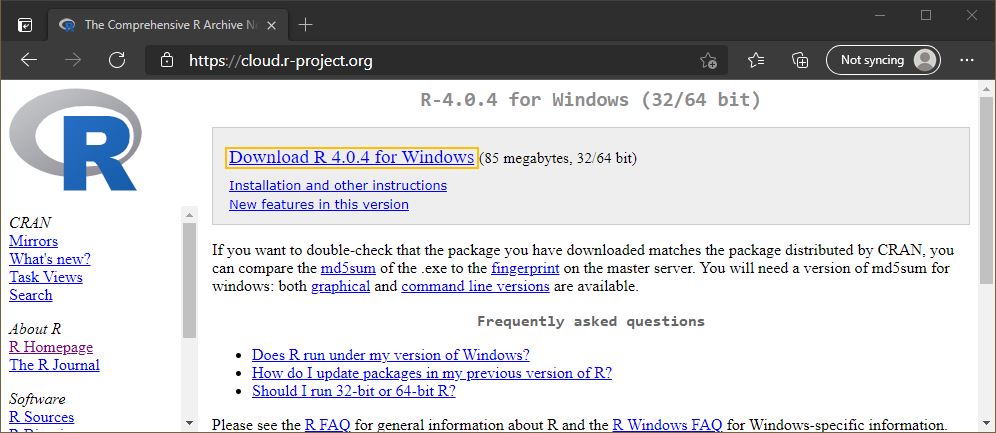
When the download is complete, run the R installer. This will look slightly different depending on your browser.
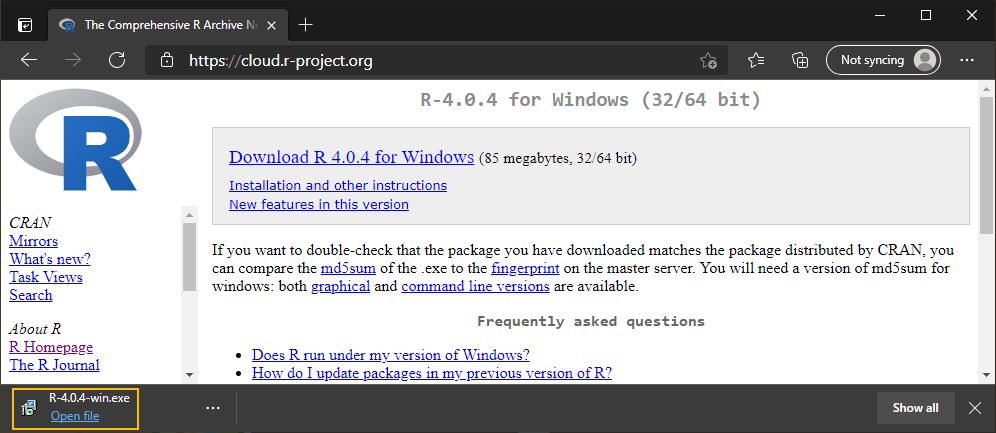
Select your language and then accept the license agreement by hitting Next >.
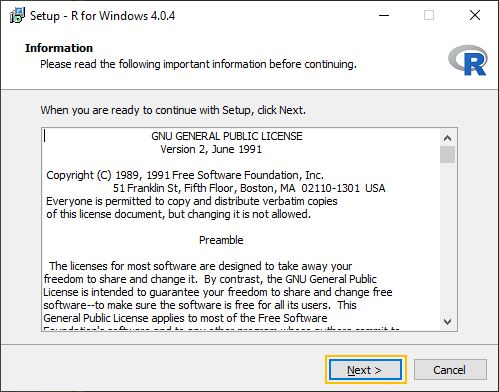
Leave the default install location and select Next >.
If you know what kind of machine you are on, you can specify if you want the 32 or 64 bit version of R. If you do not know, it is safe to install both.
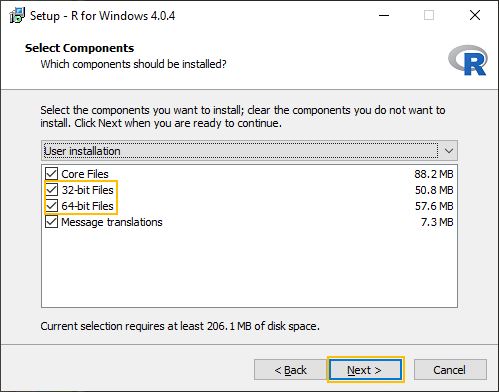
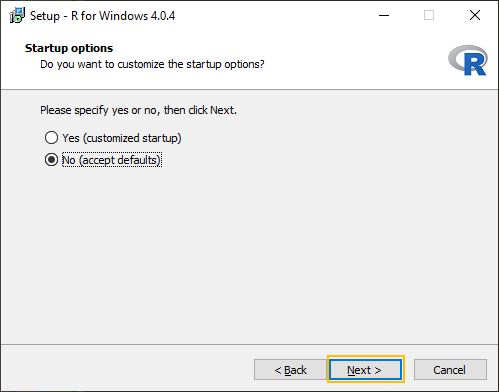
Keep the default startup options and hit Next >.
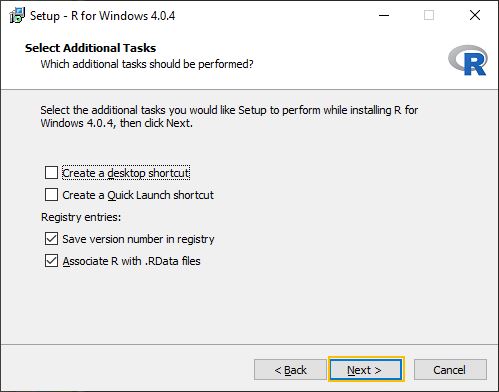
You most likely will not want an R shortcut on your desktop, as you will almost certainly use RStudio as an interface. You can still have one if you would like. Otherwise, accept the defaults and hit Next >.
Wait for the instillation to complete.
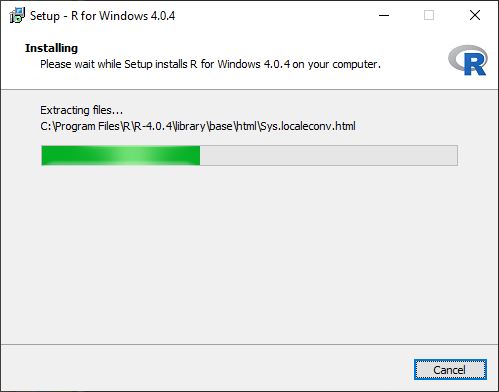
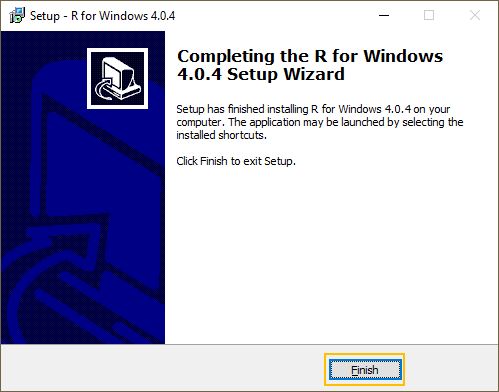
Once it is done, hit Finish. You’ve now installed R! However, we still need to install RStudio separately.
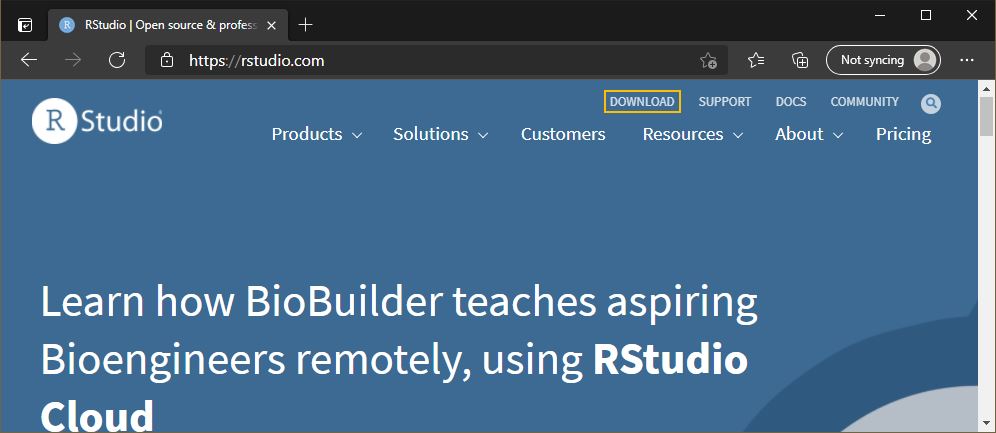
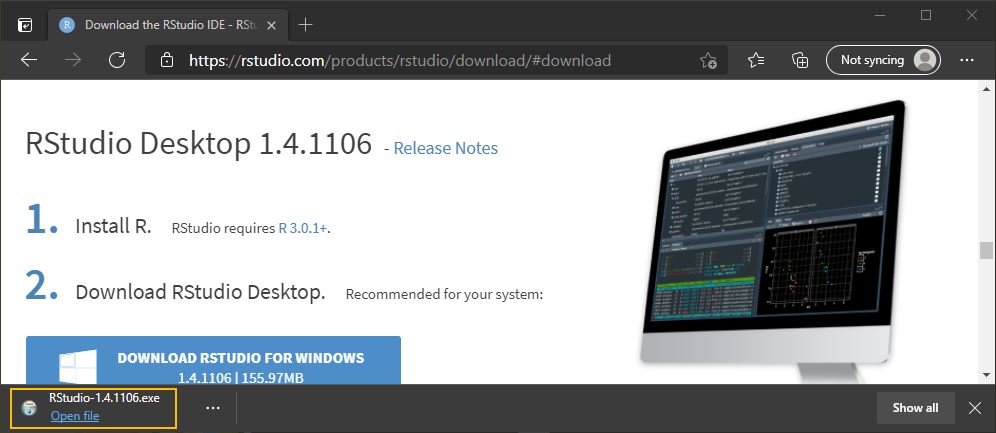
Navigate to the RStudio homepage at https://rstudio.com/ and click the download button.
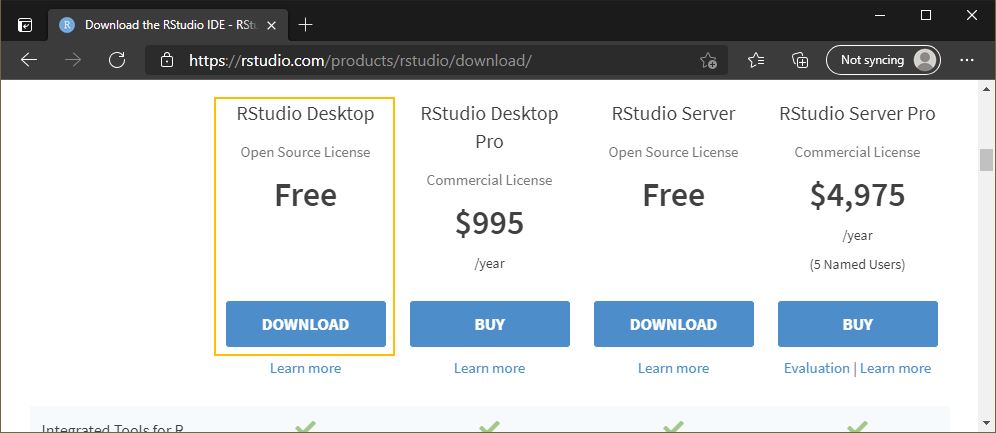
Scroll down and select the free version to download. If you are using RStudio for commercial purposes you will need to look into RStudio’s licensing terms to see if you need to pay for the pro version.
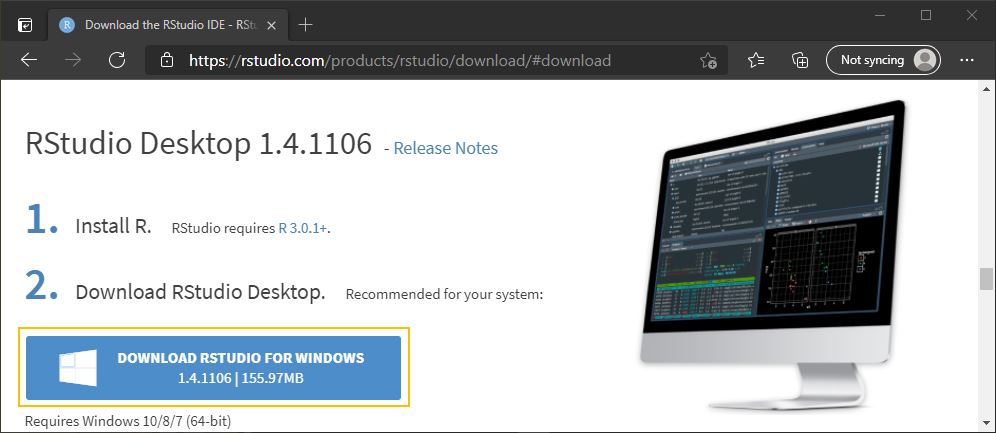
Download the RStudio installer for your machine.
Run the installer just as you did for the R download.
2.1.3 Updating R/RStudio on Windows
Over time updates to R and R Studio will necessitate and update. Packages you use may not update with R! If you rely heavily on a package for a project, it is highly recommended you save your current configuration of R and R Studio before updating. If there was a major version change, you will also need to re-install all of your packages. Upgrading R and R Studio follows the same process as installing it in the first place. You can simply install the new versions on your machine. As long as you do not remove the old instances of R as part of this process, you would be able to revert to a previous version.
2.1.4 R/RStudio on Mac
If you are installing R/RStudio on a Mac, there is no extra configuration. Simply go the download pages for R and RStudio and choose the latest version for mac. Run the installer package when it is finished downloading. If you receive an error regarding the app being from an unidentified developer, please follow the instructions here.
2.1.5 Verifying your install
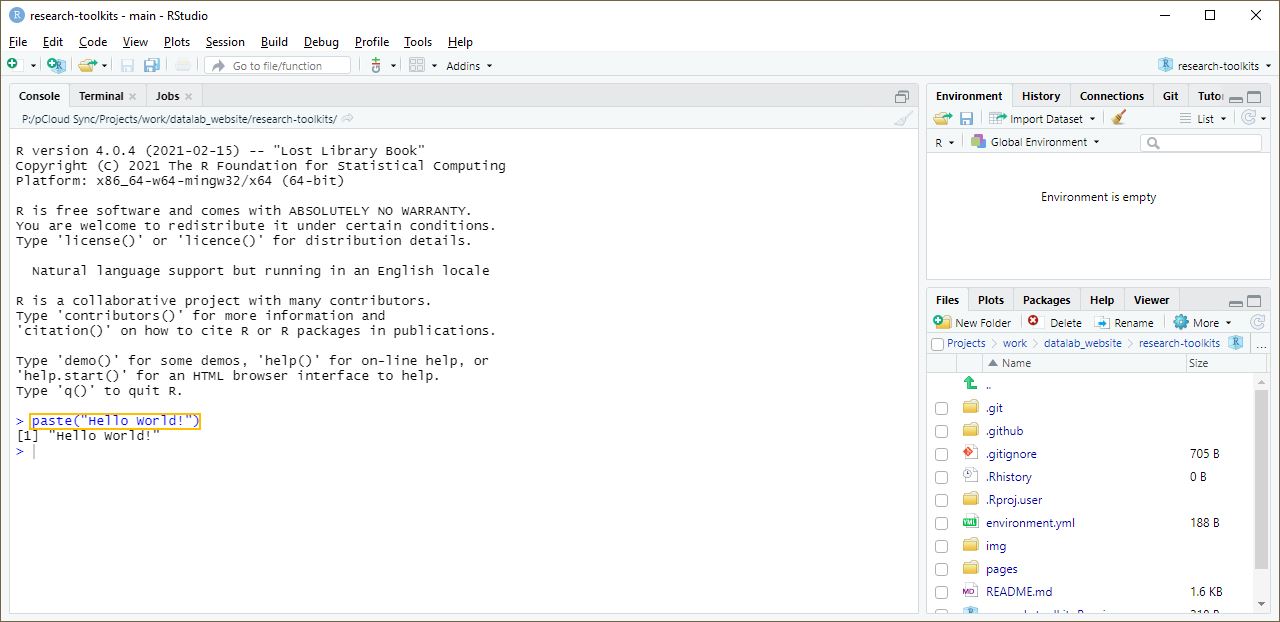
Once you have installed both R and RStudio, you should be able to run RStudio on your machine. You can verify your install is working by opening RStudio and typing paste("Hello World!") into the console as shown below. If the code runs you should see a response that says [1] Hello World!. If that works you are all set!
2.1.6 Installation troubleshooting
If you are not able to successfully install R/RStudio on your own, please attend DataLab’s Virtual Office Hours. Click here for more information and to receive a Zoom link.
2.2 R Packages
2.2.1 Introduction
R packages are community made functions that automate or expand the things you can do in the R language. The process for installing them is largely the same for both Windows and Mac. There are three main methods for installing R packages. You can install them from the Comprehensive R Archive Network (CRAN) from within R, from another online source like Github, or from files on your local machine. We will cover each of these methods here.
2.2.2 Packages from CRAN
The vast majority to packages in R can be installed from CRAN. You will need the name of the package you want to install. Once you have the name (case sensitive!), you can download it from within R using the install.packages() function in the R console.
For example, if you wanted to install the skimr package, you would enter install.packages("skimr"). Note that you do need to put the package name in quotes, and that it is case sensitive. You can install multiple packages at a time by passing a vector of package names to install.packages(), for example: install.packages(c("skimr", "corrplot")).
You can test if the packages installed correctly by calling it in R using the library() function.
2.2.3 Packages from Github
Not all packages are available on CRAN, especially very new or very old packages. For these you will most likely need to install them from an online repository, the most common of which is Github. There are some R packages that make this process easy. We will use the remotes package.
First install the remotes package by running install.packages("remotes") in the R console. If it installed correctly, you will see package ‘remotes’ successfully unpacked and MD5 sums checked.
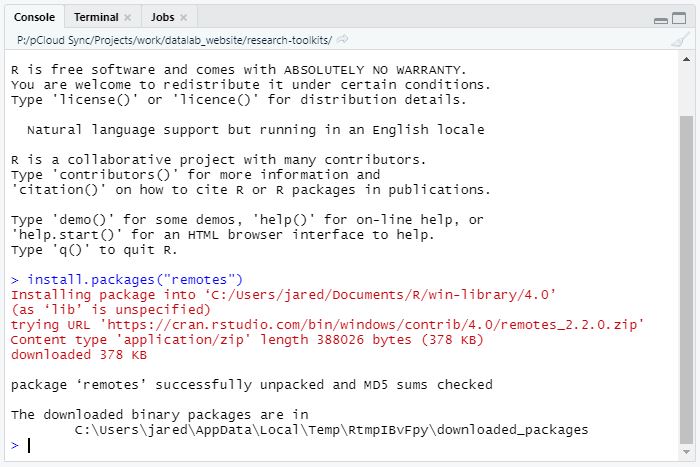
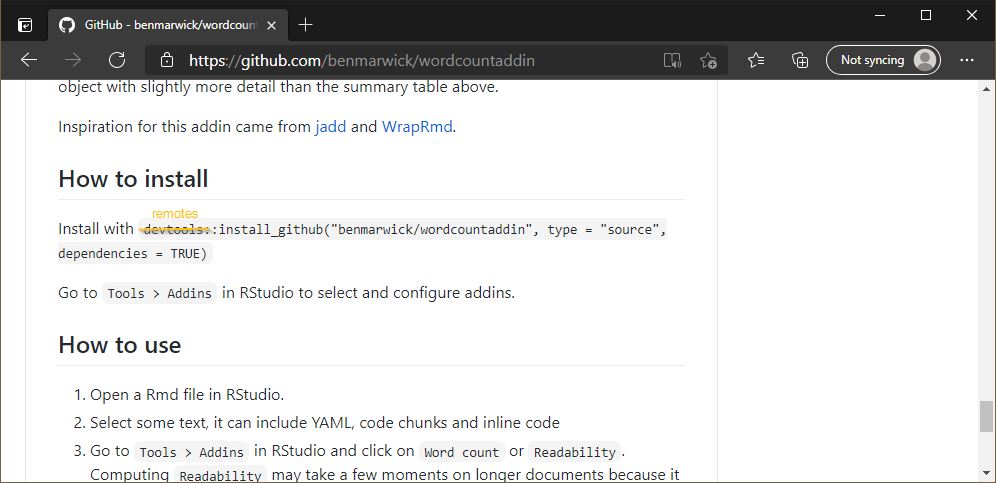
Once remotes is installed, you can install packages directly from an online repository. We will use remotes’s install_github() function to demonstrate. Let’s try installing the handy wordcountaddin for RStudio. First navigate to the package page on Github: https://github.com/benmarwick/wordcountaddin.
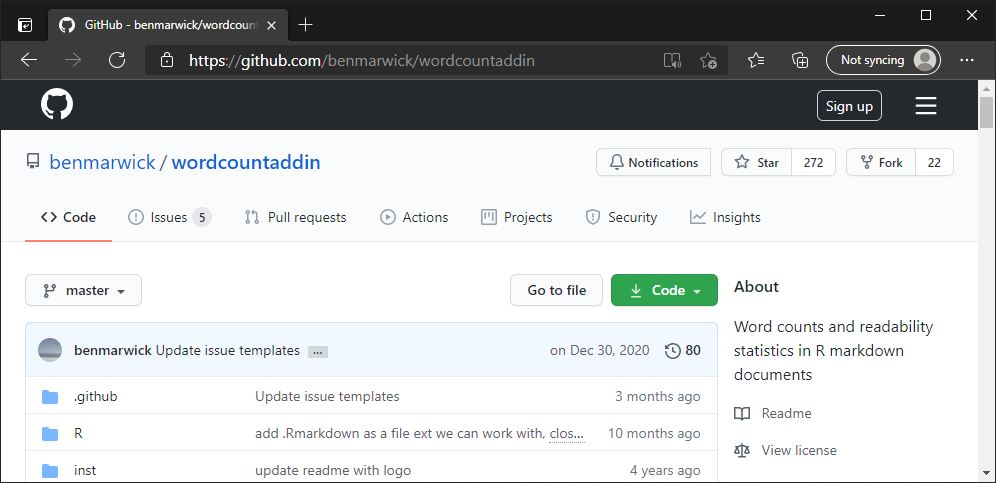
Most packages that need to be installed from an online source will give you the code to do so in the readme of their repository. Another common package for installing from online repositories is called devtools, but this package contains many other functions we don’t need for this task. You can replace devtools with remotes almost all of the time.
For our case, type remotes::install_github("benmarwick/wordcountaddin", type = "source", dependencies = TRUE) into the console and hit enter. You may be asked if you would like to update other packages. Enter 1 to try and update all. If this doesn’t work, you can enter the command again and try 3 to ignore these updates.
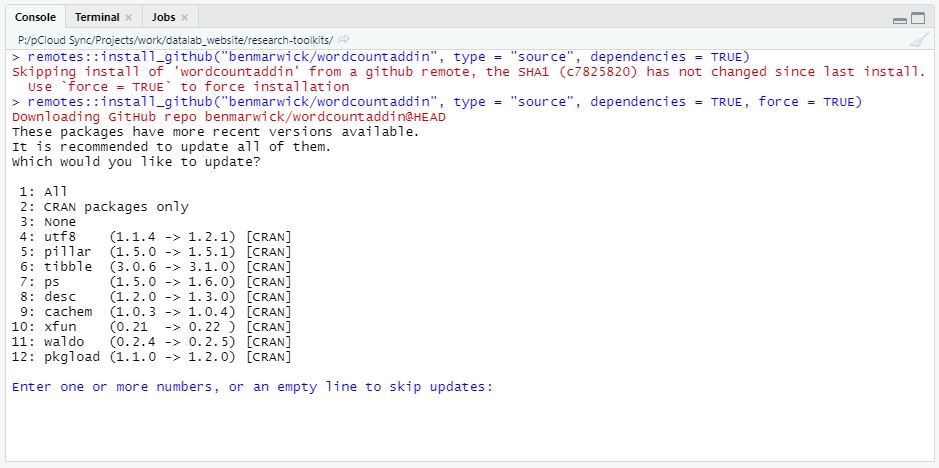
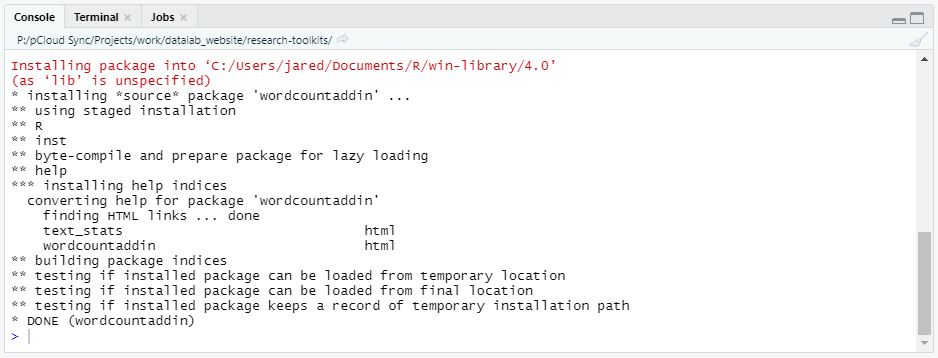
Read the resulting install output. As long as it does not indicate anything failed to install, you’re done!
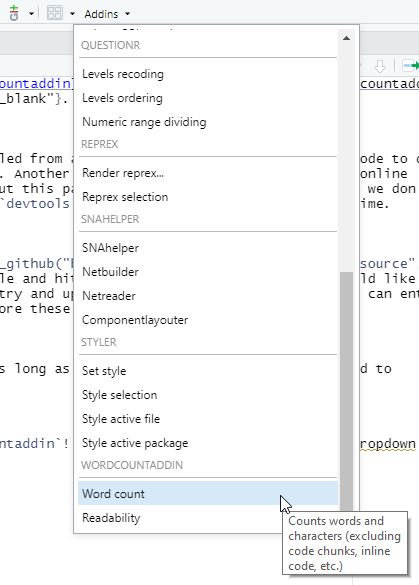
You can now use the helpful wordcountaddin! You can find it in the Addins dropdown above the editor pane.
2.2.4 Packages from Local Source
On occasion it will be necessary to install an R package from a local source .tar.gz file. You would need to download this file yourself, then install it. For example, let’s download then install the mgcv package from https://cran.r-project.org/web/packages/mgcv/index.html. First navigate to that page, and click on the download link next to package source.
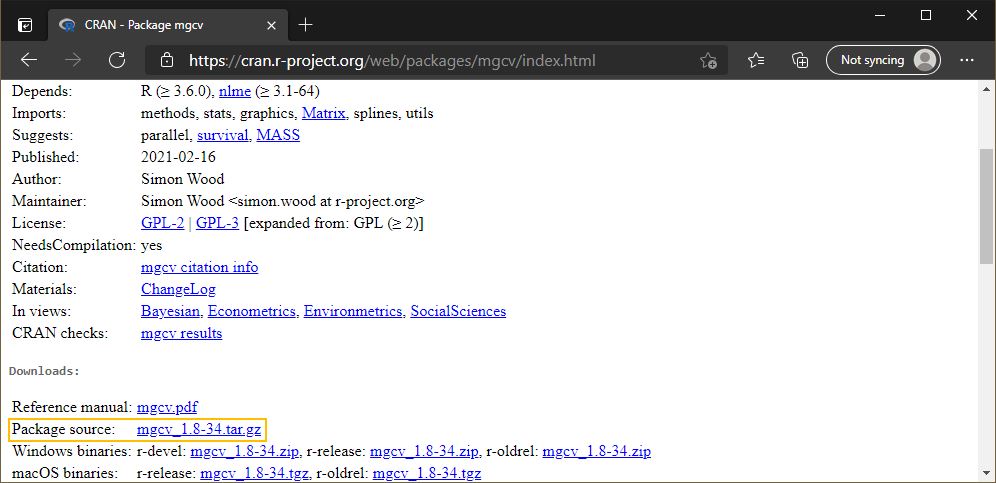
Once the .tar.gz file is downloaded, leave it as it is, do not decompress it. Instead, find the file on your system and take note of it’s location. On Windows you can shift-right click on it, then select Copy as path.
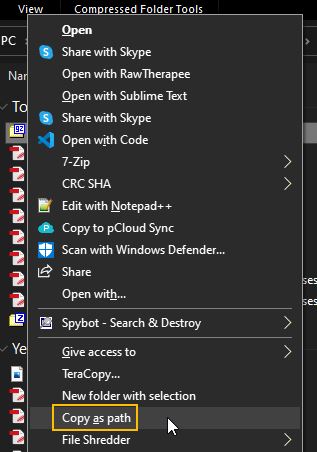
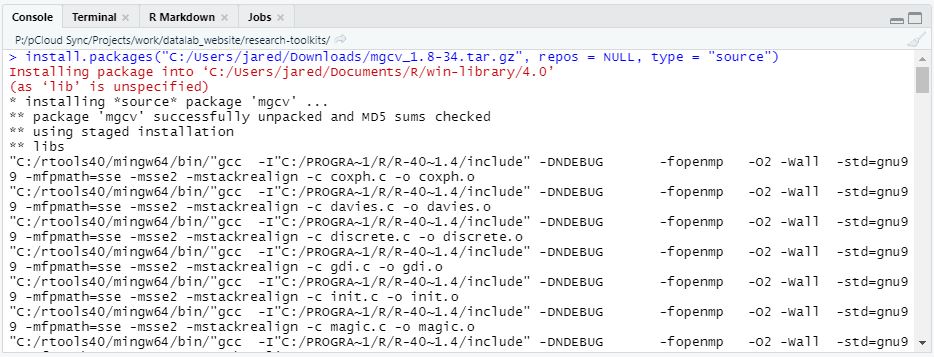
In your R console, type in install.packages("path/to/your/source_file.tar.gz", repos = NULL, type = "source"). R will start installing the package from the local copy.
Two things to note for Windows users:
You will need to have installed R tools on your machine. There is a guide for that lower in this document.
If you are on windows, you will need to make sure your file path uses forward slashes (
/) rather than back slashes (\).
2.3 R Tools
2.3.1 Introduction
R Tools is a bundle of programs on Windows that allows R to build packages from local source files, rather than installing through CRAN. The vast majority of the time this is unnecessary, but some circumstances require it. Mac users do not need to install R Tools.
2.3.2 RTools on Windows
First, navigate to the R tools website at https://cran.r-project.org/bin/windows/Rtools/.
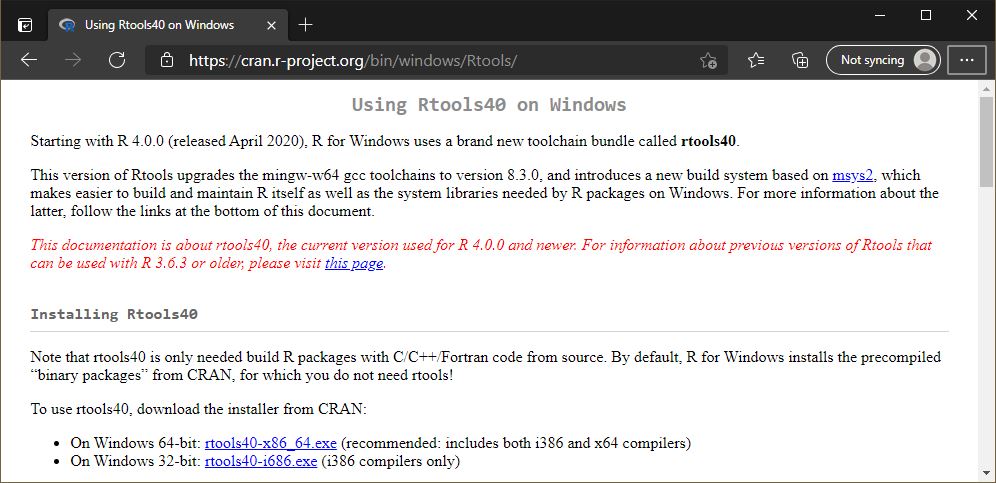
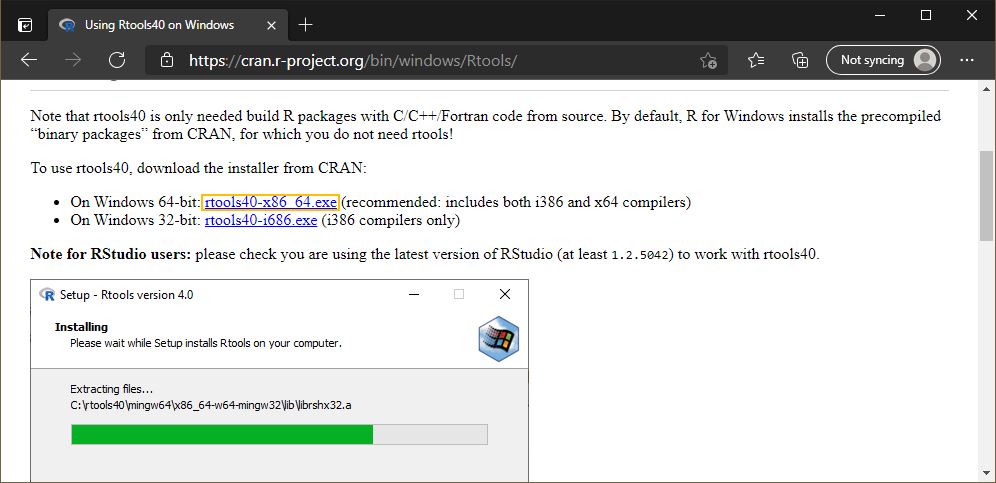
Scroll down to the download links and select the rtoolsXX-x86_64.exe link.
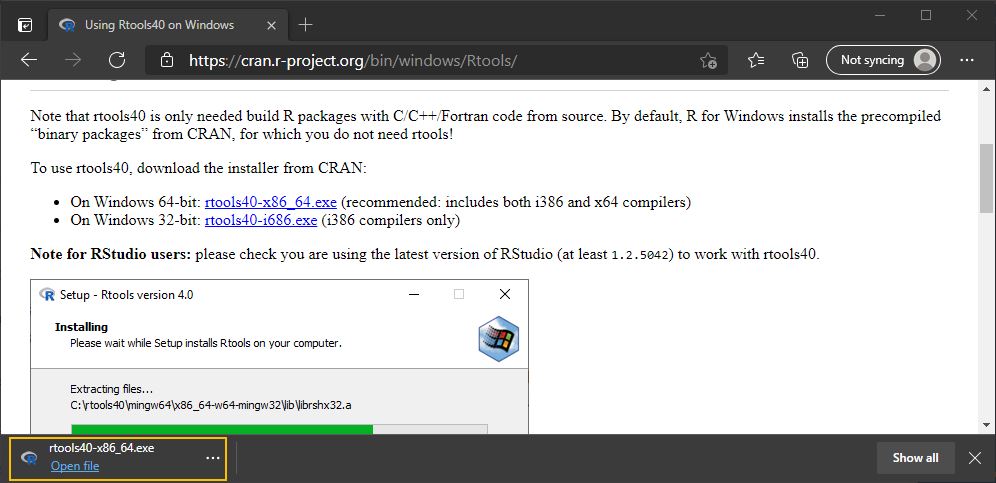
Once the download has finished, run the R tools installer.
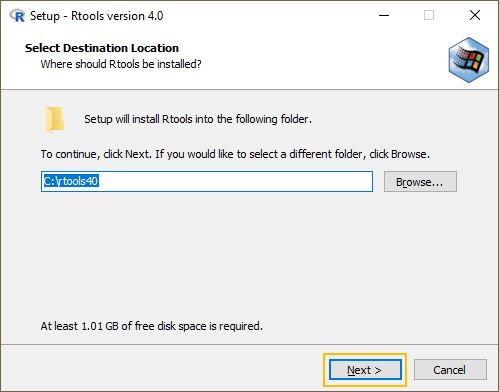
On the first page of the installer, select a custom location if you would like, but otherwise press Next >.
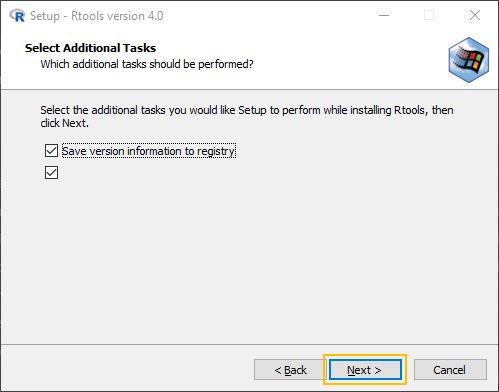
Leave the defaults for the additional tasks and hit Next >.
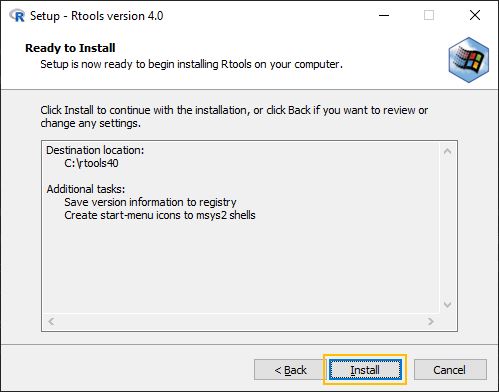
On the next page, hit the install button and wait for it to complete.
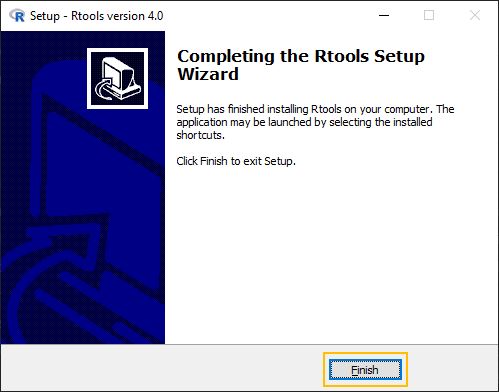
One the install is done, press Finish. You’re not done yet though!
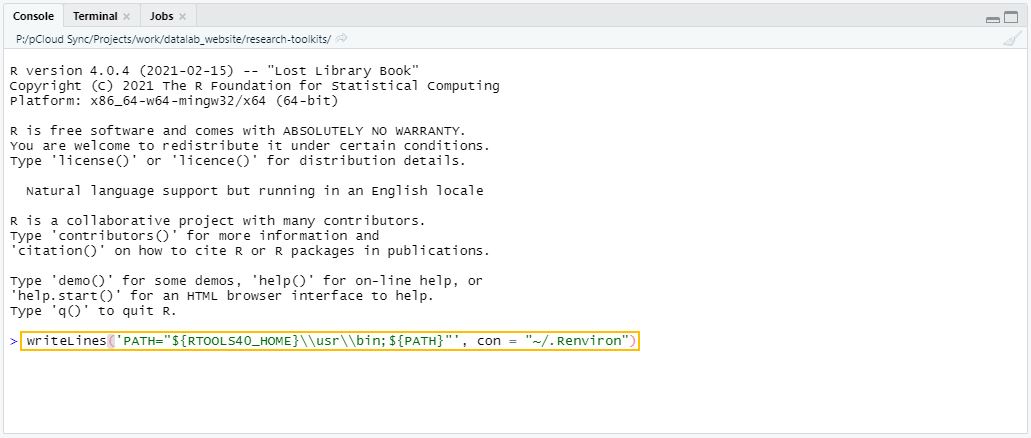
In order for R to make use of R tools, you need to add it to the PATH that R looks for tools on. To do this, open R or R Studio and type writeLines('PATH="${RTOOLS40_HOME}\\usr\\bin;${PATH}"', con = "~/.Renviron") in the console and press enter.
2.3.3 Verifying your install
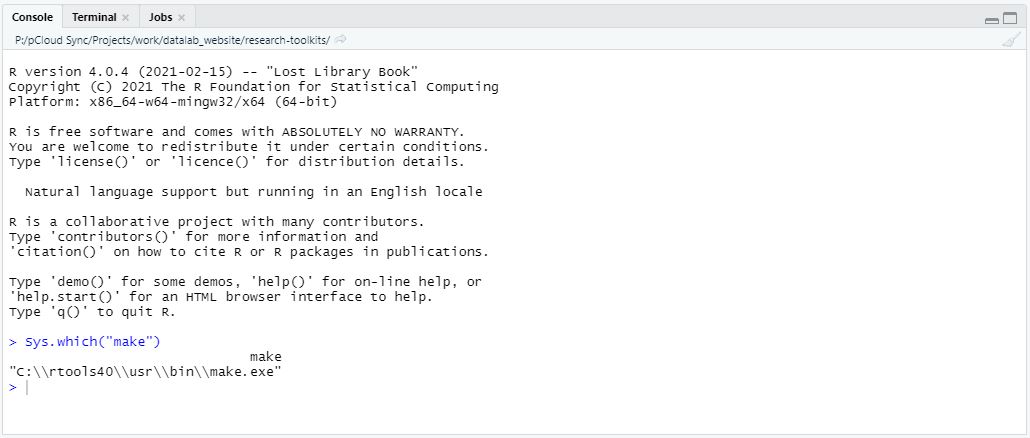
To verify R tools was installed successfully, first restart R to assure you are in a clean environment. You can do this by closing and re-opening your R or RStudio window. Afterwards, type Sys.which("make") (case sensitive!) into the console. If you see "C:\\rtools40\\usr\\bin\\make.exe" as a result you are all good!
2.3.4 Installation troubleshooting
If you are not able to successfully install R Tools on your own, please attend DataLab’s Virtual Office Hours. Click here for more information and to receive a Zoom link.