2. Core Practices#
This chapter covers core practices for reproducibility. At DataLab, we adopt these practices for every project, and we recommend that you do too. They’ll ensure that you can work on projects efficiently, without being slowed down by trying to remember what you did last week, find that one file with the code that actually works, or reorganizing your project so that it isn’t embarrassing to share with a collaborator.
Of the five reproducibility principles introduced in Chapter 1, only four appear here: documentation, artifact preservation, project organization, and workflow automation. The first three of these are the most critical principles. Neglecting them can make your projects impenetrable to other people—and in some cases, even to future you. The subsequent chapters will address the remaining principle: environment management.
For all of the practices listed in this chapter, the benefits far outweigh the costs. Most of them are practices you can adopt immediately, with minimal training. Eventually, they become good habits that you don’t even have to think about. There are two practices listed here—version control (Section 2.2.2) and computing with code (Section 2.4.1)—that do require substantial effort to learn and use. However, they provide benefits for reproducibility, collaboration, and distribution that we consider well worth the cost.
2.1. Documentation#
Writing is a primary mechanism for doing research, not just for reporting it.
– paraphrased from Simon Peyton Jones, computer scientist
2.1.1. Start with the Scope#
At the beginning of a project, write a scope document or research proposal to lay out the research question and goals. The funding mechanisms in your discipline may require this, but even if they don’t, it’s a excellent way to clarify what you’re trying to achieve and can help you identify potential problems or gaps in reasoning early. The scope document will help you stay focused and organized as you work. Later on, it can help you and your collaborators understand the history of the project.
This is also a good time to establish a timeline with milestones you’d like to reach. The milestones should be specific, measurable, and concrete, so that you can easily tell when you’ve completed one. Be generous with yourself and your collaborators: it can be hard to predict the directions research will take you, and tasks that seem short (especially programming tasks) can end up taking longer than expected. It’s almost always better to finish things earlier than planned rather than later.
For projects which involve data analysis, investigate potential data sources. Sometimes a data set can sound promising, but lack the features you need, have too few observations, or have too much missing data. If you’ll collect the data yourself, make a plan for data collection. You should have a clear picture of which data sets will be available at the analysis stage and how they will be structured. Pay particular attention to whether there are any biases, ethical concerns, privacy concerns, licensing fees, or other issues.
Tip
If you use spreadsheet software like Microsoft Excel or Google Sheets to collect or analyze data, check out DataLab’s Excelling with Excel workshop reader to learn how to keep your data neat and tidy.
To level-up your reproducibility, consider using a programming language like R or Python to analyze data instead. Analyses you carry out in a spreadsheet can be difficult for others to reproduce unless you meticulously document every step. When you write code, anyone you share that code with can repeat your steps.
If you need to store a lot of data, especially many different closely related tables, consider using a database to store the data.
2.1.2. Keep Running Notes#
Set up one or more running notes documents when you set up your project. Use the notes to keep track of things you’ve tried, things you want to try, relevant references, and more. If you’re working alone, these notes are just for you—think of them as an external hard drive for your brain. Organize the notes in whatever way works best for you. One thing that can be helpful is to include the date whenever you add to the notes.
Tip
Reference management software like Zotero are helpful for organizing and searching references.
Whether you take notes on paper or digitally, the important thing is that you take notes. Paper notes are convenient for diagramming and doodling, and can be digitized after the fact to share with the team. Digital notes are convenient for collaborating with team members who aren’t physically present, and can be shared as they are being written. When you start a notes document, make sure to consider whether you’ll need to include figures, code, or other media, and choose an appropriate format. At DataLab, we frequently use paper notes, Google Docs, and Markdown.
2.1.2.1. For Collaborations#
If you have collaborators, take notes about your meetings. Record anything there’s a chance you’ll want to remember later: results (positive or negative), new ideas, new leads, decisions, changes of plan, action items, and scheduling details.
Consider what note-taking method works best for everyone. Some people like to take notes during meetings, while others prefer to take summary notes immediately after, so that they can be fully engaged. Collaborating on notes or rotating who takes notes in each meeting can help lessen the burden, but having a designated note-taker can help ensure consistency.
It’s usually a good idea to share the notes with everyone who attended the meeting, so that misunderstandings can be corrected quickly. You can do this by having a shared notes document or by sending out the notes after each meeting. If you use a shared notes document, make sure it’s in a format everyone can access and edit; some collaborators may not be comfortable working with Markdown or other plain-text formats.
2.1.3. Write READMEs#
A README is a document that introduces and explains a project or directory
within a project. READMEs should generally be plain-text (.txt) or Markdown
(.md) files, because these are non-proprietary formats accessible to anyone
with a text editor. READMEs help people—including future you—find and use
your project.
Tip
Each time you start a new project, create a new directory for the project. Use this project directory to store all files related to the project. This directory is sometimes also called the top-level directory for the project, since all files for the project exist beneath it.
Section 2.3.2 elaborates on this idea.
A project should always have a README in the top-level directory to serve as an introduction. The top-level README will often be the first thing someone new to the project sees. At a minimum, the top-level README should contain:
The project title
A brief description of the project
A list of the contributors and their affiliations
A primary contact (typically a name and email address)
A list of links to other project resources, including data sets and papers, which are stored separately
For projects with data or code, the top-level README should also contain instructions for installation and use (more about this in Section 2.1.3.2).
A top-level README is usually sufficient documentation for projects with a shallow directory structure and where methodology is published elsewhere (such as journal articles or technical reports). For projects with a deep directory structure, additional READMEs in important directories can be helpful for understanding where files are. For projects with technical details that are not explained elsewhere, it’s a good idea to provide additional documentation in the form of READMEs or other files.
See also
See DataLab’s README, Write Me! workshop reader for more about how to write READMEs.
2.1.3.1. File Manifests#
A file manifest is a description of the files and directories in a project. For intuition, think of a shipping manifest on a box sent to you in the mail. A file manifest serves two important purposes:
It describes which files and directories are supposed to be included with the project. If you, a collaborator, or an outside researcher thinks they might be missing a file, consulting the file manifest is one way they can check.
It documents the purpose of each directory (and often, each file).
A good file manifest lists files and directories in alphabetical order, with the exception that sometimes listing all of the directories first is clearer. A manifest should also show the directory hierarchy through indentation, symbols, or both. Here’s an example of a manifest from a DataLab project:
data/           Models and images
docs/           Notes on the project as well as environment setup
log/            Slurm log files
src/            Image preprocessing, model training, and analysis
STEGO/          Code for creating STEGO models
tests/          Scripts for testing workflows, examining outputs, etc.
toy_data/       Very (very!) small pieces of data for dev testing
If a directory contains many files or subdirectories, consider whether it’s clearer to write a separate manifest specifically for that directory.
2.1.3.2. Workflows#
A workflow is a way of using your project. Often this will be a series of commands you can run to produce a specific output. For example, if your project is a study of passenger rail systems in the U.S., you might have three scripts that you run in a specific order and with specific parameters in order to produce a plot that summarizes how often trains are late and how late they are for lines in Chicago. Remembering the order in which to run commands and the settings for each one might seem easy while your project only has a few workflows and you use them frequently. If your project grows or you spend time away from it, you may find it much harder to remember what to do. Moreover, your collaborators may have a hard time remembering how to run a workflow you set up, and vice-versa. Thus it’s important to document your project’s workflows.
There’s one workflow that’s essential to almost every project: downloading the files and installing the necessary software. It’s a good idea to provide step-by-step installation instructions in your project’s top-level README, even if you’re the only one working on the project. Installation instructions are invaluable if you ever have to switch to a different computer or reactivate a project you haven’t worked on for a few months.
Note
As an example, see the installation instructions for fd, a popular command-line tool for finding files.
Besides installation, you should also document workflows for using your project. Explain the different ways to use your project, the settings available, and common patterns of use. If your project contains mostly data rather than code, explain how the data were collected, how they can be used, built-in assumptions, and limitations.
Note
As an example, see the user guide for ripgrep, a popular command-line tool for searching within files.
Although documenting workflows is listed here under the documentation principle, it’s also closely related to the workflow automation principle. Documenting workflows is important because it enables you and other people to repeat commands you used to get a particular output. Workflow automation practices take this a step further by bundling all of the commands in a workflow into a single command.
2.2. Artifact Preservation#
2.2.1. Make Backups#
Hard drives can and do fail. Store at least one backup copy of each project on a different computer, on an external hard drive, or in the cloud. This way, if your hard drive stops working, you won’t lose everything. Make a schedule for when you’ll update the backups, either daily or weekly, and stick to it.
Important
For projects which involve data, it’s especially important to keep backup copies of the original or source data sets. This way you can experiment with multiple approaches to data processing and can recover if you accidentally corrupt or delete a data set.
Cloud services such as Google Drive, Dropbox, Box, and OneDrive are convenient for backups because you can also easily share the files with collaborators. If you Use Version Control, then GitHub, BitBucket, or GitLab are similarly convenient. If your project has specific privacy requirements, be careful to make sure they’re satisfied when choosing a cloud service.
2.2.2. Use Version Control#
A version control system is a system for tracking changes to documents,
code, or other data. You may already use copies of files with different names
as a kind of ad-hoc version control: essay.doc, essay_edited.doc,
essay_final.doc, essay_final_for_real.doc, and so on. A more consistent and
less error-prone approach is to use software specifically designed for version
control. In computing contexts, when people say “version control,” it’s often
implied that they mean version control software. In addition to helping you
keep track of different versions of files, most modern version control software
can also help you share and collaborate on files with others.
2.2.2.1. For Documents#
Cloud-based office suites such as Microsoft 365 and Google Office have version control built-in. Consult the documentation for your preferred office suite to learn more. A disadvantage of these services is that they typically save documents in proprietary formats that may not be accessible to some people, and they do not necessarily preserve version information when you download a document from the cloud. For an open-source, desktop-based alternative, consider using LibreOffice, which also has version control built-in.
Markdown provides basic formatting options, is supported by a wide variety of editors and platforms, and can be used to produce publication-quality documents with open-source tools like Pandoc. Because Markdown is a plain-text format, anyone with a text editor can read a Markdown document, and you can manage versions with the same version control systems available for code. For a more richer markup language that produces publication-quality documents out-of-the-box, but has many of the same advantages as Markdown, consider LaTeX.
2.2.2.2. For Code#
Version control systems for code first appeared in the 1960s and are now widely considered an essential part of every programmer’s toolkit. One reason for this is that code is usually developed incrementally: you write code for a new feature, run tests to make sure it works, make corrections, and repeat, until you can move on to the next feature. Occasionally, you might start to develop a feature and then realize that it just won’t work or that it isn’t worth the effort. In that situation, it’s important to be able to go back to the most recent version of the code before you started working on the feature—which is exactly what version control allows you to do. If you suspect that some changes to your code introduced a bug, you can also use version control to isolate the changes that caused the bug by testing earlier versions. These capabilities also make version control well-suited to research, because you never know when you’ll need to re-run an old experiment or hit a dead end on a particular line of investigation.
Many different version control systems exist, but a recent StackOverflow survey found that about 93% of developers use git, an open-source distributed version control system. “Distributed” means that git is flexible about where you store your code: there can be copies of the code on your laptop, on a private server, on a hosting service like GitHub, and on your collaborators’ laptops, and git will help you keep all of them in sync—if that’s what you want. DataLab uses git for all of our projects, and recommends that you do too.
See also
See DataLab’s Introduction to Version Control workshop reader for a technical introduction to version control with git.
2.3. Project Organization#
2.3.1. Use Naming Conventions#
There are only two hard things in Computer Science: cache invalidation and naming things.
– Phil Karlton, software engineer at Netscape
Names are the first thing you see when you skim through the files in a directory or the expressions in a snippet of code. Well-chosen names serve as a form of documentation, making it easier to guess the purpose of each file or expression. With that in mind, naming things amounts to summarizing (often complex) concepts in one or two words—so it’s no surprise that it can be challenging and easy to neglect.
Adopting a naming convention and following it consistently can ease some of the burden of naming things by reducing the number of decisions you have to make. Different contexts often benefit from different naming conventions. For instance, it’s usually a helpful to have separate naming conventions for files and for code.
2.3.1.1. File and Directory Names#
Choose filenames that are human-readable, machine-readable, and have a meaningful order when sorted alphabetically. Many data scientists recommend the following rules for naming files:
Make the name descriptive (can someone guess the contents from the name?)
Avoid spaces, punctuation, accented characters, and other special characters
Use lowercase unless there is a compelling reason for uppercase
Use underscores
_to separate fields (distinct pieces of information, such as dates and descriptions)Use dashes
-to separate words within fieldsWrite dates and times in ISO 8601 format, which orders units from largest to smallest (for example, year-month-day as in
2023-09-20; also see Figure 2.1)Pad numbers with leading zeros to the width of the largest number you anticipate
At DataLab, we follow these rules for almost all of our projects, with some simplifying exceptions around how we use underscores and dashes.
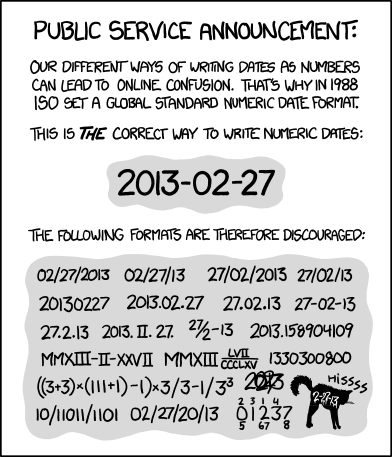
Fig. 2.1 “ISO 8601” from “xkcd” by Randall Munroe (license).#
See also
The rules in this section are based on Jenny Bryan’s How to Name Files presentation.
Prefer an essay over a presentation? See Douglas MacDonald’s On Naming Things.
2.3.1.2. Names in Code#
Most programming languages have a style guide with standards for how to format code, either officially or by community consensus. Following a style guide helps make your code intelligible to other programmers. Style guides usually include naming conventions, which tend to focus on how to capitalize and delimit words in multi-word names. Three common formats for names are:
camelCasedelimits words by capitalizing the first letter of each wordsnake_casedelimits words with underscoreskebab-casedelimits words with dashes
Some style guides use several different formats to distinguish between different kinds of objects.
Among the languages widely used for data science:
R doesn’t have an official style guide, but the Tidyverse style guide is popular. It recommends
snake_casefor all names. In the past,camelCaseand R’s uniquedot.casewere also popular.Python has an official style guide called PEP 8. It recommends
UpperCamelCasefor class names,UPPER_SNAKE_CASEfor constants, andsnake_casefor all other names.Julia has an official style guide. It recommends
UpperCamelCasefor module and type names, andsnake_casefor all other names.
See also
Wikipedia’s naming conventions page describes the styles and naming conventions for a wide variety of programming languages.
Besides how to format names in code, another detail to consider is how long names should be. Longer names allow for richer descriptions, but can also make code harder to read. Here’s one code organization expert’s recommendation:
The length of variable names should be proportional to their scope. Big scopes imply long names.
The length of function and class names should be inversely proportional to their scope. Small scopes imply long names.
– Robert “Uncle Bob” Martin, software engineer and author
In other words, the longer a variable is in use, the longer its name should be.
The rationale is that if a variable is in use for a long time, expressions that
use the variable may be far away from its definition, making it harder to infer
the meaning from context. So don’t hesitate to name a variable x if it will
only be used in a couple of expressions and there’s not an obviously better
name, but avoid naming a variable x if it’s going to be used repeatedly
throughout all of your code; choose a longer, more descriptive name.
Tip
Some other naming conventions include:
Use
i,j, andkfor indexes in loops.Use verbs (action words) in function names, because functions do things. For example:
read_data,add_offset,run_simulation.Use
get_andset_as prefixes for functions that get and set components of a data structure.Use
is_orhas_as prefixes for functions that return a Boolean value.
See also
See How Patterns in Variable Names Can Make Code Easier to Read for Felienne Hermans’ perspective as a computer science education researcher.
2.3.2. Establish a Directory Structure#
Create a separate, dedicated directory, often called a repository, for each of your projects. Store everything related to the project there. This will make it easier to find files and also to share specific projects with others. Use directories within each repository to further organize your files. At a minimum, we recommend these directories:
data/for data setsdocs/for documentssrc/for code in scripts (such as.Ror.pyfiles). The abbreviationsrcis short for “source code”. R scripts conventionally belong inR/instead, because of how R’s packaging mechanisms worknotebooks/for code in notebooks (such as RMarkdown or Jupyter notebooks)outputs/for results (data, models, figures, etc.)
Of course, if your project doesn’t include any code then the src/ and
notebooks/ directories aren’t necessary. If your project has lots of
outputs, it can also be helpful to replace or supplement the outputs/
directory with more specific directories such as figures/ and models/.
These recommendations are not necessarily appropriate for every project. When choosing a directory structure, consider the specific needs of your project, your collaborators, and your audience. Make sure to document whatever directory structure you decide to use in your project’s README (see Section 2.1.3.1).
See also
For more examples of directory structures, see:
DataLab’s Project Template
The Turing Way’s Creating Project Repositories guide
2.3.3. Organize the Code#

Whenever you’re about to write code, take time to think about what its purpose is and how it will be used in the future. Clarity on these points can make it easier to decide where to put the code, break down the programming problem, and choose appropriate programming abstractions.
Is your code for a one-shot exploration, a prototype, or something highly visual? Then it’s probably a good idea to write and save your code in a notebook format, such as RMarkdown, Jupyter, or Quarto. Notebooks display writing and results inline with code, so that you can try snippets of code out, get immediate feedback, and take notes. Notebooks can also display images, so you can inspect plots and other figures without opening another window or file.
On the other hand, if your code is likely to be reused many times over the
course of the project—and possibly in other projects or by other
people—then it’s usually preferable to write and save your code in a script
format. Script formats are usually plain-text files with an extension like
.R, .py, or .jl to indicate the kind of code.
A mix of notebooks and scripts can be an effective way to solve programming problems and develop code. Don’t feel locked in to one or the other, and remember that generally notebooks can load functions and other code from scripts.
2.3.3.1. Write Functions#
To solve problems efficiently and better organize your code, try to break programming tasks into small, manageable steps. Use writing (for instance, in comments) to clarify and plan the steps. For each step, write the code to solve a few small, simple cases. Once the code for a step seems to work correctly, turn it into a function. Start by identifying the inputs and outputs. These become the parameters and return value, respectively. Test the function still works on the small, simple cases. Then scale up to larger, more complex cases. Edit the function and add parameters as necessary to make it work correctly for the new test cases, making sure that it also continues to work correctly for the old ones. When you have functions for all of the small steps, combine them (usually in sequence) to handle the larger task.
Important
How small is a “small step”? Small steps and functions should generally be longer than a single expression—because in that case you might as well just write the expression—and generally be shorter than one screen in your editor—so that you can reason about what they do easily. Be flexible and judicious with these guidelines; there are exceptions.
When you write small steps, you can try to break them down into smaller sub-steps as well. The sub-steps are usually individual expressions.
Tip
It may be helpful to think of writing code or functions like writing an essay. Start with an outline (describe the steps in comments). Sometimes the outline will have multiple levels (sub-steps). Once you’ve written the outline, start filling in the details (the code). As you write, you may occasionally need to stop and adjust the outline as you uncover gaps in your reasoning.
2.3.3.2. Make It Modular#
Create separate scripts for separate parts of your project. For example, you might have a script to clean the data, a script to train a model, a script to generate predictions from the trained model, and a script to generate figures summarizing the results. Dividing up responsibilities across multiple scripts is helpful for isolating bugs and staying focused while you’re working. Using multiple scripts will also make it easier for you and your collaborators to find things, provided the scripts have descriptive, unambiguous names.
Structure your scripts so that they’re modules: collections of functions that can be imported and used by other code. Avoid writing code outside of functions, with one exception: to define a constants (named values that do not change, such as pi). Doing this ensures that importing a script won’t cause hard-to-predict side effects.
If you want to be able to run a script from the command line, include a
function that serves as the entry point—the code that runs first. For many
programming languages, it’s required or recommended to call this function
main. Regardless of what name you choose, use it consistently for the entry
point functions across all of your scripts.
2.4. Workflow Automation#
2.4.1. Compute with Code#
Note
This practice is recommended for projects that involve computations. If your project doesn’t, or if all computations are handled by specialized software, then you might not need a programming language.
Nevertheless, we’ve included writing code as a core practice to emphasize that it’s uniquely important for reproducibility if your project does involve computations.
Code is an explicit, unambiguous record of every step in a computation. This is a major benefit for reproducible research. You can share your code with someone else, and if they run it with all of the same inputs, they’ll get the same outputs. The same is difficult or impossible to achieve using software that has a graphical user interface.
Another benefit of programming is that code is reusable and often scalable. If you write code to solve a general problem, you can then apply it to any number of specific instances of that problem. The only constraints are time and the computing resources available to you. Most popular programming languages have supportive, active communities that create and distribute thousands of user-contributed packages, so often it’s not even necessary to solve a problem yourself—you can reuse someone else’s code.
Choosing a programming language doesn’t just mean choosing a particular syntax, it also means choosing a community and ecosystem. Different languages have different strengths, weaknesses, community cultures, and packages. We recommend choosing an open-source, high-level language designed for research computing and data analysis, such as:
R: a “software environment for statistical computing and graphics,” R is especially well-suited to cleaning and analyzing tabular data, training statistical models, and creating data visualizations. R has support for missing values built-in, a friendly and active community, and tens of thousands of user-contributed packages, mostly related to statistics and data science.
Python: a general-purpose programming language that “lets you work quickly and integrate systems more effectively.” The Python community supports research computing through its user-contributed NumPy, SciPy, and Pandas packages, as well as others. Python’s syntax encourages well-organized code, and its community is enormous and spans many different disciplines. It’s also one of the primary languages for deep learning. Python’s facilities for data analysis are not as mature as R’s, with equivalent features and stability but some rough edges.
Julia: a relatively new programming language “appropriate for scientific and numerical computing, with performance comparable to [languages like C].” Julia is designed from the ground up for research computing and uses modern optimizations to run substantially faster than R or Python for many tasks. Julia’s community is small but growing. Julia’s facilities for data analysis are not as mature as R’s or Python’s, with many still in early development. Expect to occasionally have to develop things yourself when you wouldn’t in more mature languages.
When choosing a language, always make sure to consider the specific needs of your project. Projects with specific requirements for performance or other features (for example, developing web applications) may benefit from using other languages or a mix of languages.
See also
If you want to learn R, see DataLab’s R Basics workshop reader and consider joining the Davis R Users Group.
If you want to learn Python, see DataLab’s Python Basics workshop reader and consider joining the Davis Python Users Group.
If you want to learn Julia, see the official Julia documentation and consider joining the UC Julia Users Group.