22. Working with GitHub#
Learning Goals
After this lesson, you should be able to:
Explain what an issue is
Create an issue
Explain what a fork is
List a repository’s remotes
Add a remote to a repository
Remove a remote from a repository
Explain what a pull request is
Create a pull request
Merge a pull request
Use GitHub Flow to contribute to projects
What makes GitHub special is the fact that, more than being simply a place to store files, it is above all a communication channel. Where GitHub extends the functionality of version control is not just where it offers various forms of cloud hosting; it is also where GitHub provides tools that let people talk about the code they’re working on. It’s a place where team members can propose and explain the changes they make, look at changes others have made, track and discuss any bugs that might come up, get feedback from others, and plan for any future changes the team intends to make.
Learning how to use GitHub, then, is as much about learning how to communicate effectively through the different facets of the service as it is about acquainting yourself with new technical skills (i.e., using your computer to track code remotely). In this chapter, we’ll discuss both parts of using the service and do so with an eye toward how GitHub can facilitate collaborative and reproducible research. Although we focus on GitHub, many of the concepts and workflows presented also apply to other Git hosting services, such as GitLab and Bitbucket.
A short summary of the different facets of communication GitHub provides includes:
Documentation, often through README files
Issue tracking for bug reporting and assigning tasks
Pull requests for proposing and discussing changes
Wikis, which may feature additional documentation, tutorials, etc.
Project boards for long-term planning
Various graph visualizations for project overview
Additionally, GitHub users can monitor and modify other projects’ code using “Watch”, “Star”, and “Fork” functionalities. The service also provides teams with the ability to specify licensing information for their projects.
22.1. What’s an Issue?#
When you’re working collaboratively, you and your collaborators can use Git to send changes back and forth. If you’re using GitHub with Git, it provides a variety of tools to organize and coordinate your work. This chapter describes some of those tools.
An issue or ticket is a description of a specific task to be completed in a project. The name “issue” originated in software development, where posting an issue is the primary way to report a bug (a literal issue with how the software works). Nowadays, most projects use issues to keep track of all development tasks, not just those related to bugs. An issue tracker is a website where people can create, view, and comment on issues for a project.
We recommend that researchers use issues in two ways. First, issues are a great way to plan, discuss, and coordinate a project, even if computing is only a small part of it. Think of the issue tracker as a to-do list. GitHub provides a variety of features for organizing issues, such as tags, deadlines, assigned owners, checklists, sub-issues, and more.
Second, for any project that depends on open-source software, the issue trackers for those software can be a good source of information when trying to diagnose problems. You can search the issue tracker for related issues, which might include workarounds to use until the problem is fixed. If there isn’t an issue for the problem, and you’re confident it’s a bug, you can create an issue to (hopefully) get help from the developers. In the event that you fix a bug or add a feature to the software yourself, the issue tracker is also the first place to go to get your contributions officially added.
Let’s practice using issues on GitHub. Make sure you’re logged in to GitHub, then go to the page for DataLab’s Git sandbox repository. Click on the “Issues” tab near the top of the page. You should see a page like the one in Fig. 22.1. This is the issue tracker for the repository. In the screenshot, there are no issues shown, but you might see issues in the tracker on your screen.
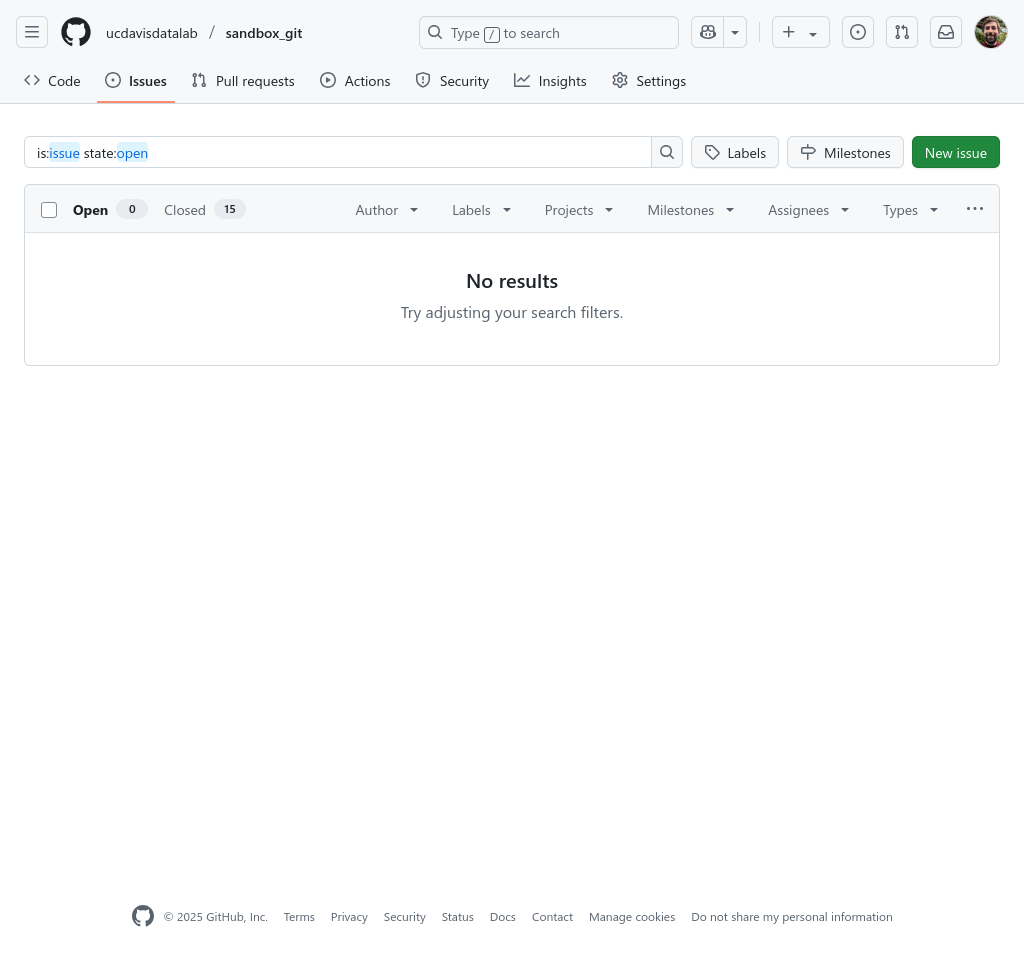
Fig. 22.1 The issue tracker for DataLab’s Git sandbox repository.#
An issue can be open or closed; an open issue is one that is still in progress, while a closed issue is one that’s not, typically because it’s either complete or canceled. By default, GitHub issue trackers only show open issues. You can see closed issues instead by clicking on the “Closed” tab.
Click on the green “New Issue” button to create a new issue on the repository. You’ll be taken to a page like the one in Fig. 22.2.
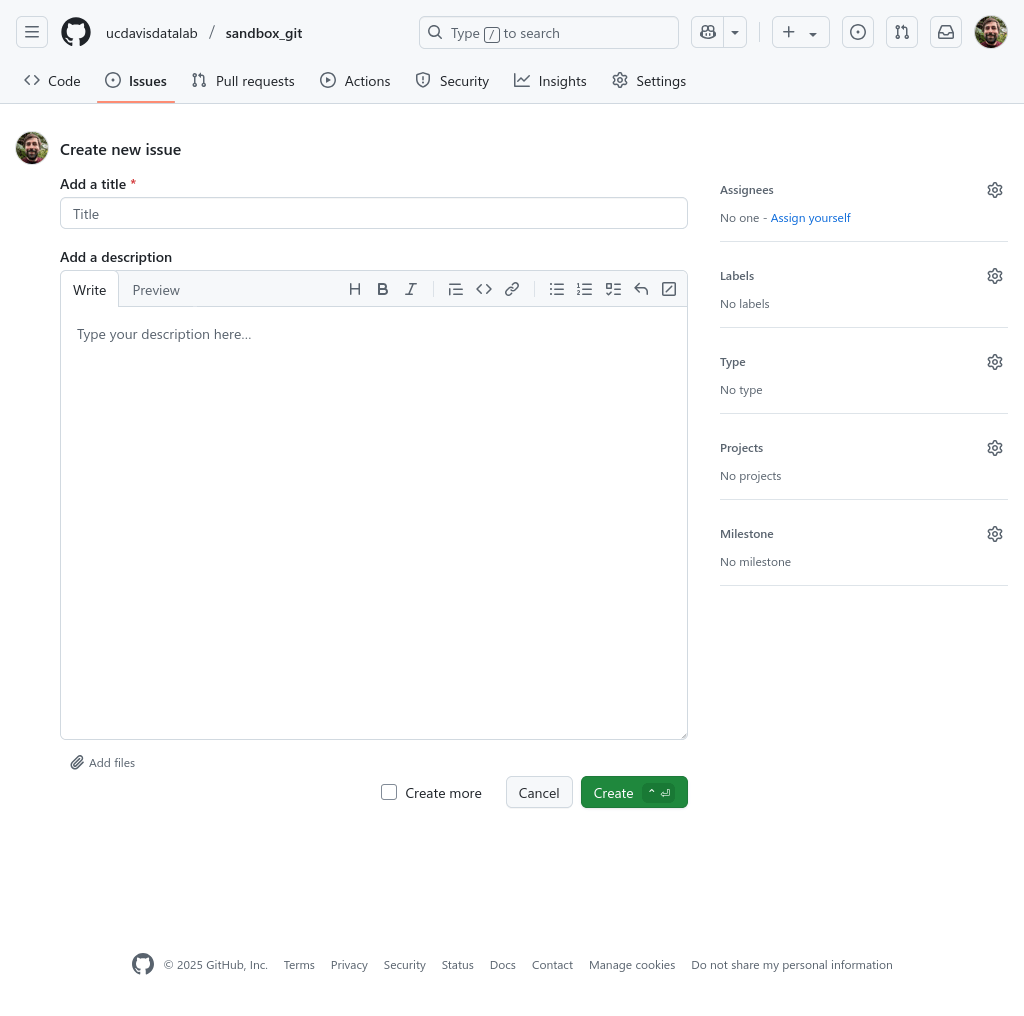
Fig. 22.2 GitHub’s new issue page.#
Let’s fill in the issue with a title and a description. In the title, put a non-invasive question for your fellow learners. For example, you could put a question like, “What’s your favorite tree on campus?”. Try to think of a unique question. In the description, state the question again, and write 1-2 sentences explaining why you think it’s an interesting question. You can use Markdown to format the description of an issue.
When you’re done writing, click on the green “Create” button. GitHub will create the new issue and take you to its page, as in Fig. 22.3. Notice that GitHub assigns a unique number to each issue in a repository, so that you can easily cross-reference issues. The issue in the screenshot is number 19. GitHub also allows you to comment on your issue, which is a great way to post follow-up information (for corrections to the issue description, it’s usually better to use the “Edit” option in the issue’s “…” menu).
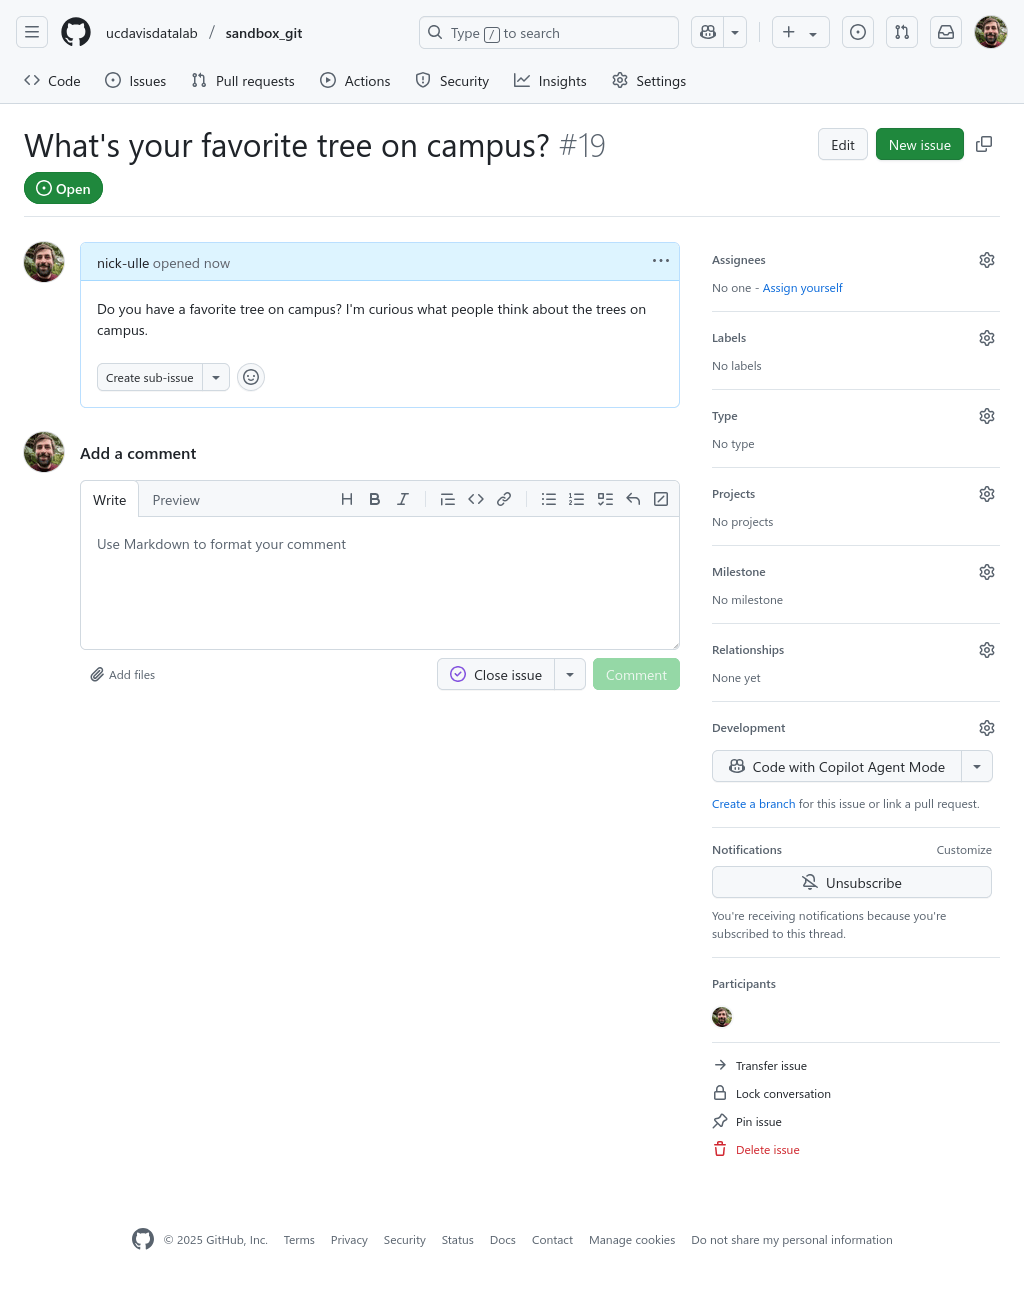
Fig. 22.3 An issue just after being created.#
Now that you’ve created an issue on the sandbox repository, find a partner and
exchange issue numbers. Then find your partner’s issue on the tracker. When
writing an issue description or comment, you can reference another issue by
typing a number sign (#) and the issue number. GitHub will automatically
create a link with the issue’s title. Try this out by replying to your
partner’s issue. Answer their question and mention your issue, as in
Fig. 22.4.

Fig. 22.4 A comment on an issue.#
Finally, go back to the issue your created and read your partner’s comment. Then close the issue by pressing the “Close issue” button. You can close any issue you create, as well as any issue anyone creates on your repositories. Generally, you shouldn’t close an issue unless you feel it’s been completed or resolved.
On public-facing open-source projects, issues are the primary way to report bugs and request features. On research projects, issues are a good way to plan next steps, document your work as you go, and coordinate with collaborators. Issues are only public on public repositories, so if you choose to work in a private repository, your issues will be private as well.
Important
When you create an issue on someone else’s repository, especially if it’s an open-source project and you want to report a bug, craft the description carefully. Make sure to include information about the context in which you encountered the problem and details about how to reproduce it, such as your operating system, version of the software, and the steps you took that led to the problem. Be polite and remember that developers of open-source projects are usually unpaid volunteers, so they might not be able to address your issue right away. If it’s urgent, consider trying to fix it yourself and if you succeed, contribute the fix to the project.
See this guide for more advice about how to write a good issue.
22.2. Forks & Remotes#
A fork is a copy on GitHub of some other repository on GitHub. Forking a repository has two purposes:
The fork is your copy, so you can make whatever changes you want (as long as you satisfy the project’s license agreement). If you develop a bug fix or a cool new feature on the fork, you can contribute it back to the original repository. If the original developers are not interested or don’t respond to communications, you can still work on your fork.
The fork serves as a backup in case the original repository is deleted.
As an example, suppose you want to contribute a change to DataLab’s Git sandbox repository. Since you don’t own the repository, you can’t push changes to it directly. If you know the owner and they trust you, you can ask them to give you access as a collaborator (as in Collaborating). But that won’t be the case for most projects.
Instead, you can get your changes on GitHub by forking the repository. Once they’re on GitHub, you can, if you want, make a request to the owner of the original repository to incorporate your changes (more about this in Making a Pull Request). Let’s do this with the Git sandbox repository.
Make sure you’re logged in to GtiHub and open the repository’s GitHub page in your web browser. In the row of buttons in the top right part of the page, click on “Fork”. GitHub will take you to a page like the one shown in Fig. 22.5, where you can edit the name and description for the fork. Leave the name and description as-is, and click on the “Create fork” button.
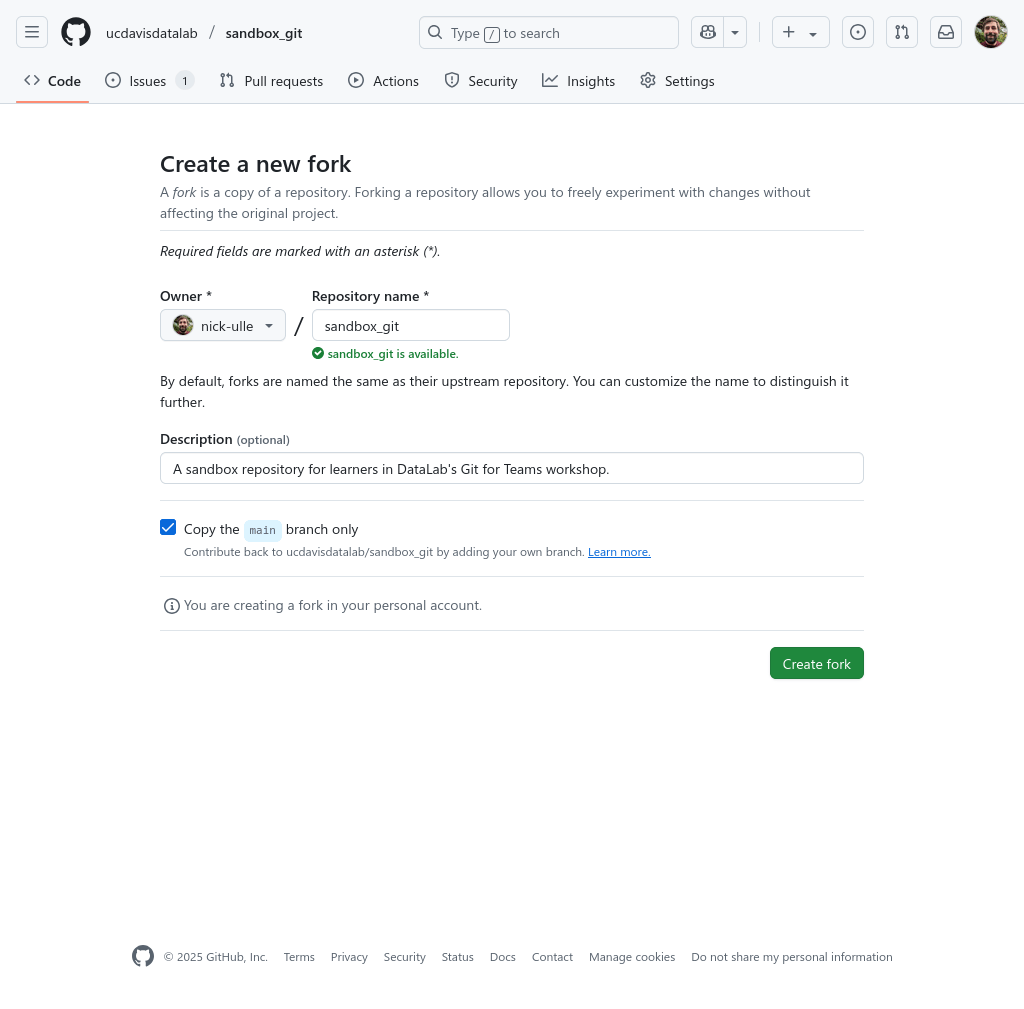
Fig. 22.5 GitHub’s “Create a new fork” page.#
After clicking the button, GitHub will take you to the page for the new fork,
as in Fig. 22.6. Notice that the owner of the repository is you
rather than ucdavisdatalab. There are also two special buttons on the page:
“Contribute” and “Sync fork”. We’ll explain more about the “Contribute” button
soon. The “Sync fork” button merges the latest commits from the original
repository into your fork—you can use it to update your fork if the original
repository changes.
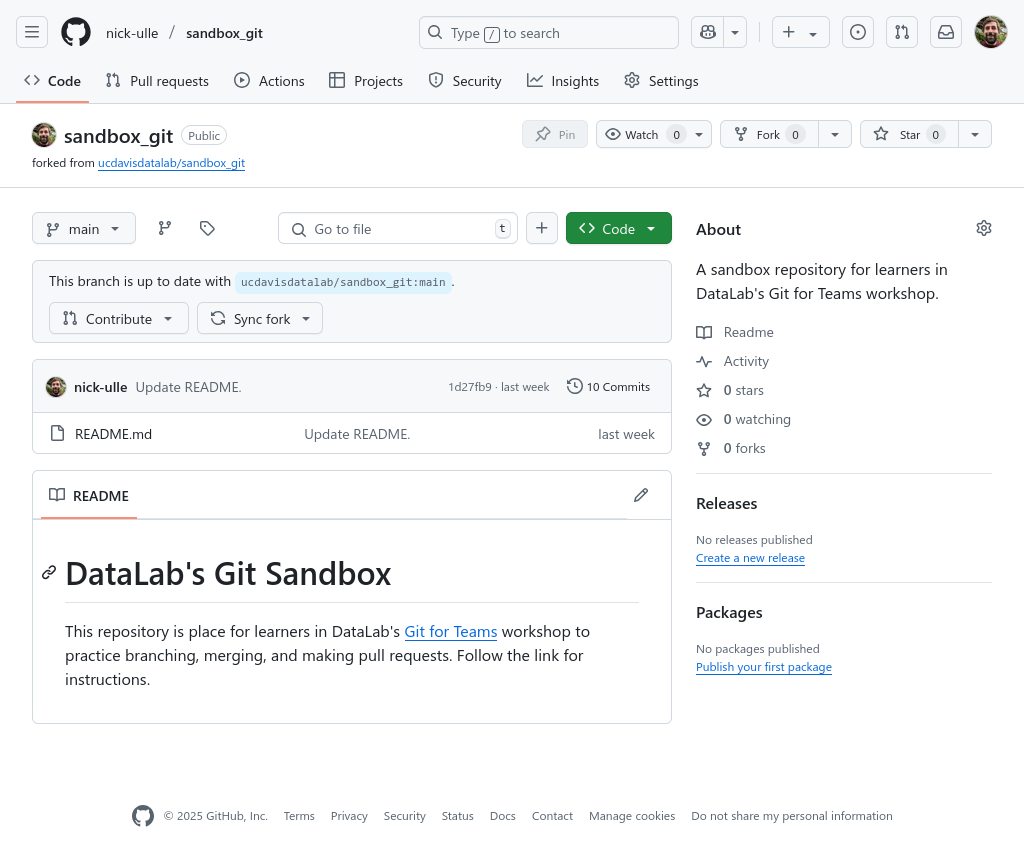
Fig. 22.6 The fork’s GitHub page.#
If you’ve been following along with the examples, at this point you’ve worked with three different copies of the Git sandbox repository:
DataLab’s original repository on GitHub
The local copy you cloned in Branches & Merges
The fork you just created
Most of the time, if you want to make changes to a repository, it’s easiest to
do so with a local copy. So go back to your terminal and the local copy. Switch
to the main branch:
git switch main
Change to the directory with the current date in YYYY-MM-DD format, or use
2025-05-01 if you don’t see a directory for the current date. Inside the
directory there’s a README.md file. Open the file in a text editor. It should
look something like this, but might have a different date and question:
# 2025-05-01

What are your 3 favorite places to eat in Davis, CA?
Close README.md without saving. In the same directory, use a text editor to
make a new file called USERNAME.md, where USERNAME is your GitHub username.
In the file, answer the question (one answer per line). Save the file, then
git add and git commit the changes.
Now that we’ve changed the local repository, we need to get the changes to
GitHub. The local repository already knows about DataLab’s repository on
GitHub, since it was cloned from there. More precisely, Git knows that
DataLab’s repository is a remote for the local repository. You can see all of
the remotes for a repository with the git remote command:
git remote
origin
When you clone a repository, Git names the remote origin by default.
Most of the time, it’s best to run git remote with the -v flag (short for
--verbose), so that you can also see the URLs for each remote:
git remote -v
origin  git@github.com:ucdavisdatalab/sandbox_git.git (fetch)
origin  git@github.com:ucdavisdatalab/sandbox_git.git (push)
In the verbose output, Git prints each remote twice, since remotes can have
different URLs for fetching and pushing commits (although this is uncommon).
More importantly, we can see that origin does indeed refer to DataLab’s
repository.
In order to push changes from the local repository to the fork, you first need
to let Git know that the fork exists by adding it as a remote. On the fork’s
GitHub page, click on the green “Code” button, and copy the URL under the SSH
tab. Then go back to the terminal, type git remote add fork, and paste the
URL after the command. The full command should look like this:
git remote add fork git@github.com:nick-ulle/sandbox_git.git
This command tells Git to add a new remote named fork to the repository, with
the provided URL. Check the repository’s remotes one more time:
git remote -v
fork    git@github.com:nick-ulle/sandbox_git.git (fetch)
fork    git@github.com:nick-ulle/sandbox_git.git (push)
origin  git@github.com:ucdavisdatalab/sandbox_git.git (fetch)
origin  git@github.com:ucdavisdatalab/sandbox_git.git (push)
We didn’t have to call the new remote fork, but it’s a good name here because
it makes it clear which remote is which. When dealing with multiple remotes,
try to choose descriptive, unambiguous names.
With the remote added, you can push your changes there. Push the main branch
to the remote fork:
git push fork main
Enumerating objects: 6, done.
Counting objects: 100% (6/6), done.
Delta compression using up to 4 threads
Compressing objects: 100% (3/3), done.
Writing objects: 100% (4/4), 1.58 KiB | 1.58 MiB/s, done.
Total 4 (delta 0), reused 0 (delta 0), pack-reused 0 (from 0)
To github.com:nick-ulle/sandbox_git.git
   f1976a1..6bebf75  main -> main
Refresh the GitHub page for your fork to make sure you can see the changes there. The page should look something like The fork after pushing a commit..
Note
You can remove remotes you’re no longer using from a repository with the git remote remove command. For instance, if you no longer want to use the fork
remote:
git remote remove fork
22.3. Making a Pull Request#
A pull request is a request in GitHub to merge one branch into another. Pull requests provide a way to contribute changes back to a repository you don’t control. You can also use pull requests in your own repositories to discuss and refine work, manage contributions from collaborators, and document major changes.
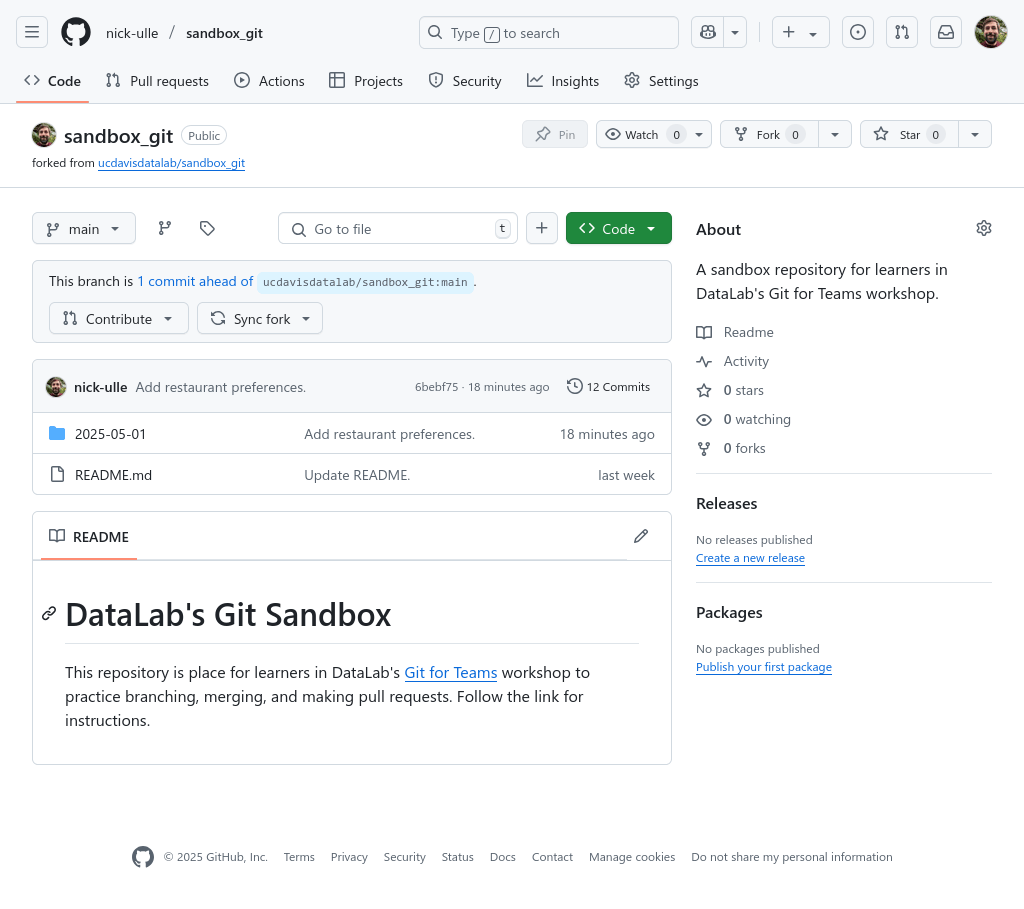
Fig. 22.7 The fork after pushing a commit.#
The changes you made to the Git sandbox repository are now online on your fork, but they’re still not in DataLab’s original repository. You can contribute your changes by making a pull request. GitHub provides several different ways to create a pull request; one is to click the “Contribute” button on a fork’s GitHub page (as in Fig. 22.7).
On your fork of the sandbox, go ahead and click the “Contribute” button, and click the green “Open pull request” button in the pop-up box. GitHub will take you to a “Comparing changes” page like the one in Fig. 22.8. The page has spaces for a title and description, similar to when we created an issue in What’s an Issue?. In fact, pull requests are just a special kind of issue.
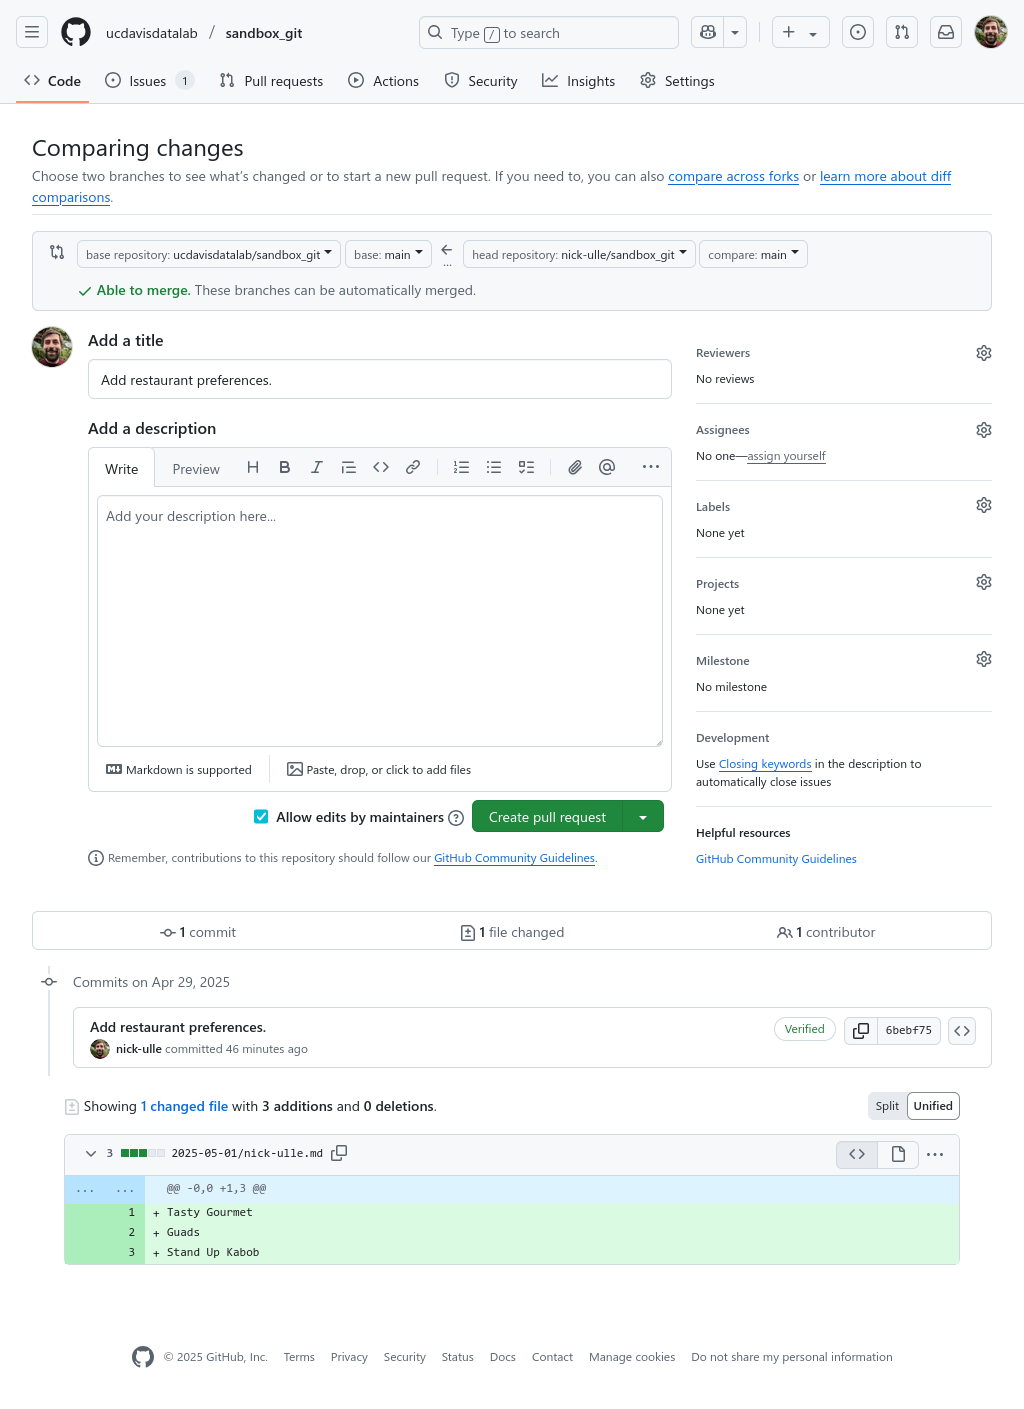
Fig. 22.8 GitHub’s “Comparing changes” page, to create a new pull request.#
When you create a pull request, GitHub automatically fills in the title with the commit message from the source branch’s most recent commit. If the branch has multiple new commits, it’s a good practice to change the title to something that summarizes the overall effect of the pull request. You should also fill in the description with a longer explanation of what your pull request does—don’t leave it blank!
Once you’ve filled in the title and description, click the green “Create pull request” button. GitHub will take you to the page for the new pull request, as in Fig. 22.9.
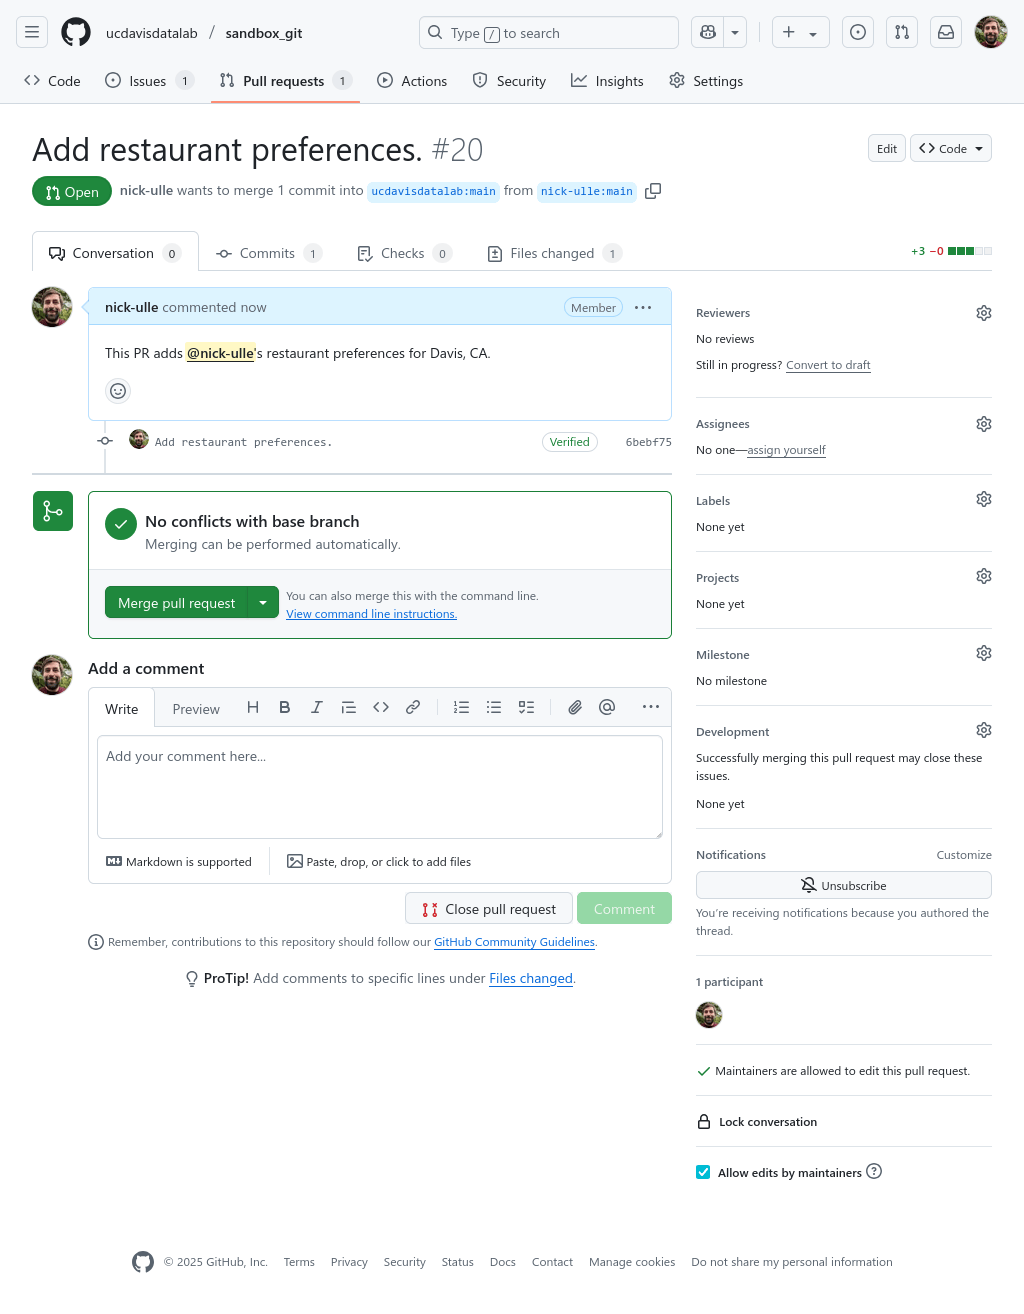
Fig. 22.9 The new pull request.#
A pull request stays open until it is merged or closed without merging. While a pull request is open, anyone with access to the source branch can push changes, and GitHub will automatically update the request. This way the author of the request can address feedback, or collaborators can even jump in and make corrections themselves.
The tabs along the top of the pull request page show information about the changes to be merged. On the “Conversation” tab, you and your collaborators can comment on the request just like you would on an issue.
Under the “Files changed” tab, you can see diffs for all of the files changed by the pull request, as in Fig. 22.10. You can also add comments on specific lines. Examining the files changed is a great way to make sense of what a pull request will actually do, and commenting on lines is a convenient way to provide feedback to collaborators.
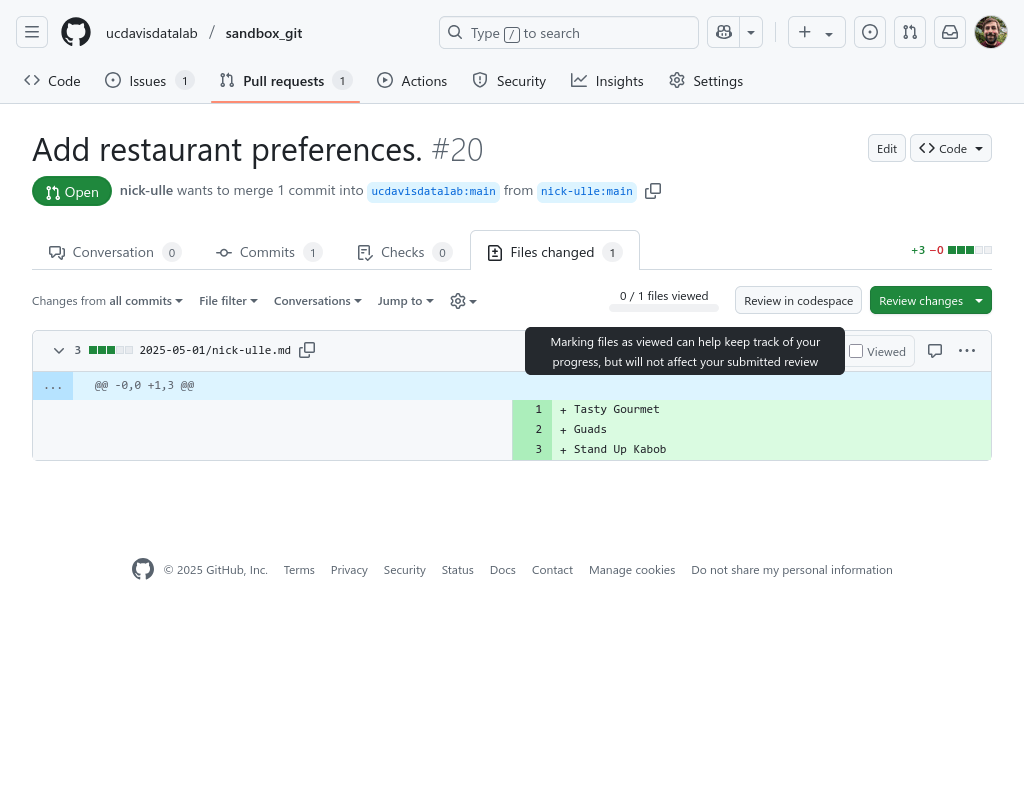
Fig. 22.10 The “Files changed” tab on a pull request.#
The “Files changed” tab is also the main interface for reviewing a pull request. Reviewing pull requests is generally the responsibility of the owner of the destination branch. The can choose to either accept the pull request, marking it as ready to merge, or flag it as in need of more work. In the latter case, the author can push new commits to their branch and then request another review.
With a pull request open, now you have to wait until your request is approved. Congratulations on making your first pull request!
22.4. GitHub Flow#
Pull requests are the foundation of GitHub flow, a workflow for collaborating on repositories and projects on GitHub. To follow GitHub flow for a repository, first you need to do some setup:
If you don’t have write access to the repository, create a fork.
Clone a copy of the repository (if you have write access) or your fork (if you don’t).
Once you’re set up, each time you want to make a new contribution, the steps in GitHub flow are:
Create a new, local branch with a short, descriptive name.
Commit changes on the branch.
Push your changes to GitHub.
Create a pull request when you’re ready to contribute the changes back to the original repository.
Address feedback from reviewers through discussion on the pull request and/or by pushing additional changes.
Merge the pull request.
Delete the branch.
You can read more about GitHub flow in the official documentation.
See also
GitHub flow is simplification of Git flow, a workflow designed for collaboratively developing software for a large audience, where maintaining stability and rolling out changes gradually is paramount.