5 Cloning a Repository
While tracking your own files remotely with GitHub is great for managing and storing your files, this doesn’t quite tap into the full use of the service. Remember, GitHub is above all a communication channel, in which people can share and discuss the code/files they’re working on. We haven’t yet taken advantage of much of what makes GitHub useful: getting files for a project, modifying them, discussing the changes with team members, and implementing those changes.
5.1 Cloning
To start using GitHub collaboratively, we need to retrieve, or clone, a repository. This will create a local copy of project files.
First, go back to your Home directory. You’ll be putting a repository here (in command line speak, the repository will be a “child” of Home).
$ cd ~Now go to the following link: https://github.com/ucdavis-datalab-training/workshop_git_for_teams_sandbox
Once there, click on the green “Code” button, which should show the following:
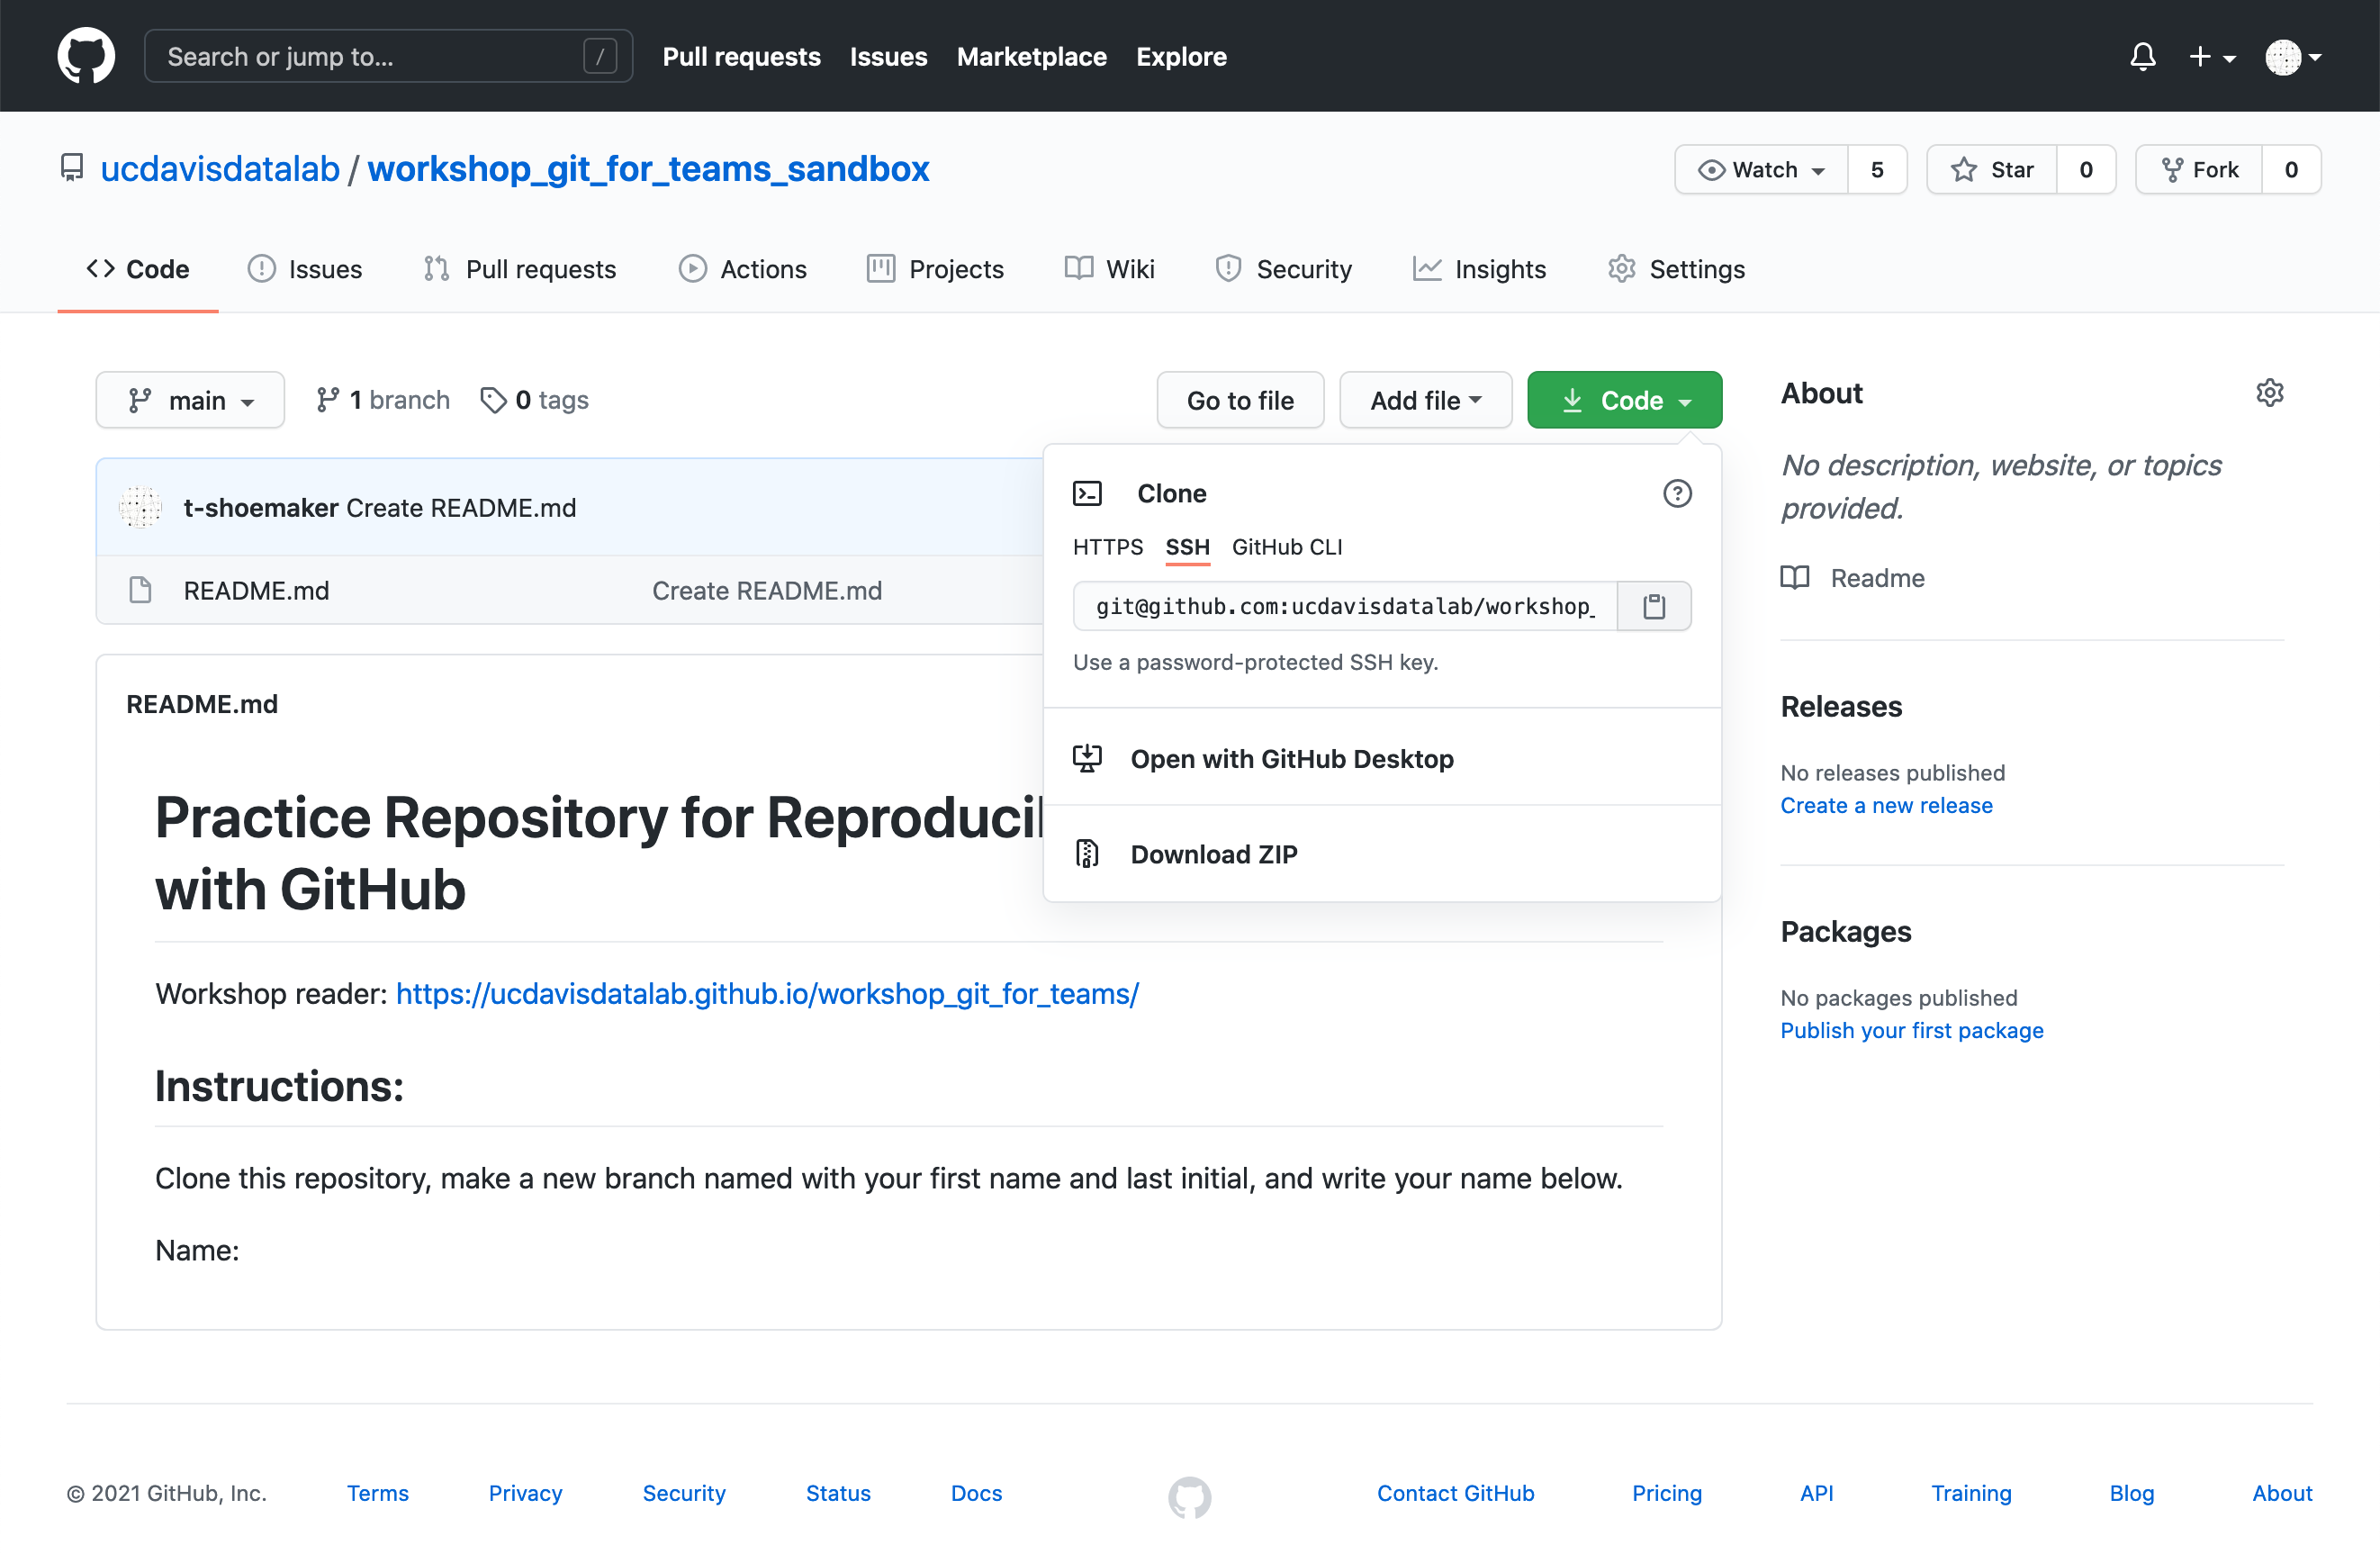
Since you have SSH keys, select the “SSH” option. Copy the text GitHub provides
to your clipboard. Then, in the command line, type git clone, add a space,
and paste in the line of text GitHub generated for you. Press Enter when you’ve
entered this information. The full command should look like this:
$ git clone git@github.com:ucdavis-datalab-training/workshop_git_for_teams_sandbox.git
Cloning into 'workshop_git_for_teams_sandbox'...
remote: Enumerating objects: 63, done.
remote: Counting objects: 100% (6/6), done.
remote: Compressing objects: 100% (3/3), done.
remote: Total 63 (delta 5), reused 3 (delta 3), pack-reused 57
Receiving objects: 100% (63/63), 8.00 KiB | 4.00 MiB/s, done.
Resolving deltas: 100% (18/18), done.
If you’d like, you can use ls to see the newly made directory. You should see
something like the following:
$ ls
Desktop                     Music
Documents                   Pictures
Downloads                   Public
Library                     workshop_git_for_teams_sandbox
Movies
If you cd into the directory and then type ls -a, you’ll see a README.md
file and a .git file, which contains all the logging info for the repository.
$ cd workshop_git_for_teams_sandbox
$ ls -a
.          ..         .git       .gitignore README.md
5.2 Branching
From here, you can start making and tracking changes. But if you’re working with a team, you need to be sure that the changes you make don’t conflict with changes your team members may be making. This is where branching steps in. Version control systems like Git help you avoid major change conflicts (and thus lost or redundant work) by letting you “branch” a repository to complete tasks in parallel with others working on the project. Usually, teams will have a stable, “Main” branch, which serves as an enduring reference point for subsequent modifications. When people want to make changes to that stable code, they’ll make a new copy of the main branch, implement their changes, and then commit their changes back the main one.
In a moment, we’ll see how GitHub helps us manage the above process. First, however, we’ll need to branch the repository we’ve just cloned. We’ll do so locally and then we’ll push that branch to the remote repository.
First, check whether the cloned repository has any branches with git branch:
$ git branch
* main
Just main so far. Let’s make a new one. Recall that you can make and switch
to a new branch with one command:
git checkout -b <branch-name>Use this command to branch from the main one. Name your branch with your first name and the first initial of your last name.
$ git checkout -b <first-name_last-initial>
Switched to a new branch '<first-name_last-initial>'